
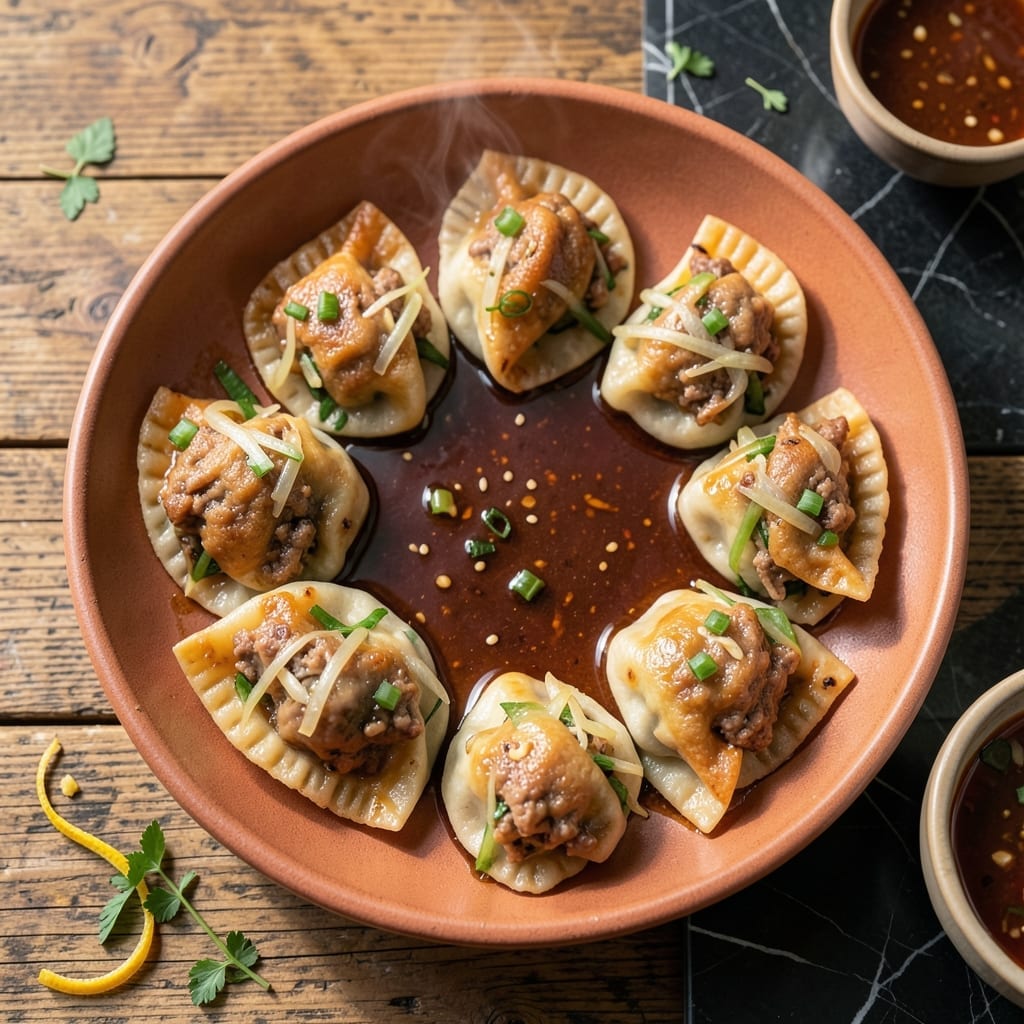
There’s a reason pot stickers remain a universal favorite—they deliver crispy golden bottoms with a juicy, savory filling in every bite. This recipe captures that perfect balance of textures and flavors that makes them irresistible.
I’ve refined this method to ensure consistent results, with a filling that stays moist and a bottom that achieves that signature crust. The pork and cabbage combination creates a satisfying, flavorful center that pairs beautifully with the pan-fried exterior.
What you’ll get is a dish that’s as enjoyable to make as it is to eat. The process involves simple techniques that yield professional-quality results, with each dumpling offering that coveted contrast of crisp and tender.
Serve these immediately for the best texture. Here’s how to create them at home.
Ingredients for Pot Stickers Recipe Pork Cabbage
Quality ingredients create that signature crisp-tender contrast in every bite you crave.
| Ingredient | Amount | Notes |
|---|---|---|
| Ground Pork 🐖 | 1 lb | 80-20 fat ratio preferred |
| Napa Cabbage 🥬 | 3 cups | Finely shredded, salted and drained |
| Green Onions 🧅 | 4 whole | Thinly sliced, white and green parts |
| Garlic Cloves 🧄 | 3 cloves | Minced finely |
| Fresh Ginger 🌿 | 1 tbsp | Grated or minced |
| Soy Sauce 🫒 | 2 tbsp | Low-sodium preferred |
| Sesame Oil 🫒 | 1 tbsp | Toasted for best flavor |
| Rice Vinegar 💧 | 1 tbsp | Unseasoned variety |
| Pot Sticker Wrappers 🥟 | 48 pieces | Round dumpling wrappers |
| Neutral Oil 🫒 | ½ cup | For pan-frying, high smoke point |
| Salt 🧂 | 1 tsp | Divided for filling and seasoning |
| Black Pepper 🌶️ | ½ tsp | Freshly ground |
| Sugar 🍚 | 1 tsp | Balances savory flavors |
| Water 💧 | ¼ cup | For steaming dumplings |
| Cornstarch 🌾 | 1 tbsp | For slurry, mixed with water |
The ground pork is critical—80-20 fat ratio ensures juicy fillings. Asian markets often carry the best quality, but most supermarkets work fine. For Napa cabbage, look for firm heads with vibrant green leaves. The wrappers matter too: Nasoya or Twin Marquis brands are reliable. Fresh ginger and garlic are non-negotiable for authentic flavor (pre-minced jarred versions lack punch).
No ground pork? Ground turkey or chicken work in a pinch (drain excess liquid). Substitute regular cabbage if Napa isn’t available, but salt and drain it well. Low-sodium soy sauce can be replaced with tamari for gluten-free. If you’re missing rice vinegar, apple cider vinegar at half the amount gets you close. The cornstarch slurry is essential—don’t skip it (worth the extra minute).
Fillings can be prepped 1 day ahead and refrigerated. Wrappers dry out fast—keep them covered with a damp towel until use. Cooked pot stickers keep 3-4 days in the fridge, but they’re best eaten fresh. For freezing, arrange uncooked dumplings on a tray, freeze solid, then transfer to a bag. They’ll keep 2-3 months (don’t thaw before cooking).
Why You’ll Love This Recipe
- One Pan Wonder: I can fold the entire batch while the first round browns—no extra bowls, just a cutting board and my trusty skillet.
- Ginger-Garlic Punch: That first bite where the crispy bottom gives way to the juicy pork and cabbage filling, with the ginger and garlic singing through? Ridiculously good.
- Freezer Bestie: I make a double batch on Sunday, freeze half, and pull them straight from the ice box to the pan on busy nights. (Yes, even on a Tuesday night)
- Budget Stretcher: Ground pork and napa cabbage feed my family of four for less than a takeout order, with leftovers for lunch the next day.
Step-by-Step Instructions for Pot Stickers Pork Cabbage
Master the technique for perfect crispy-bottom dumplings with this professional approach.
Step 1: Prepare the Filling Mixture
In a large bowl, combine the 1 lb ground pork, 3 cups napa cabbage, 4 whole green onions, 3 cloves garlic cloves, and 1 tbsp fresh ginger. The cabbage should already be finely shredded, salted, and drained to prevent excess moisture in your filling.
Add the 2 tbsp soy sauce, 1 tbsp sesame oil, 1 tbsp rice vinegar, ½ tsp black pepper, 1 tsp sugar, and ½ tsp salt from your divided amount. Mix thoroughly until the filling becomes sticky and uniform, ensuring all flavors are evenly distributed throughout the pork mixture.
Step 2: Assemble the Dumplings
Place a pot sticker wrapper on your work surface and add about 1 tbsp of the filling in the center. Be careful not to overfill, as this makes sealing difficult and can cause the dumplings to burst during cooking.
Moisten the edge of the wrapper with water and fold in half, creating a crescent shape. Pinch the center to seal, then make two pleats on each side, pressing firmly to create a secure closure that will hold during frying and steaming. Repeat with the remaining 48 pieces pot sticker wrappers.
Step 3: Pan-Fry to Develop Crispy Bottoms
Heat 2 tbsp of the ½ cup neutral oil in a large non-stick skillet with a lid over medium-high heat until shimmering. Arrange the dumplings in a single layer, not touching each other, with the pleated edge upright. Fry for 3-4 minutes until the bottoms turn golden brown and crisp.
Watch for the edges to become translucent as they cook. This visual cue indicates the filling is beginning to cook through. Be careful not to overcrowd the pan, as this will lower the temperature and prevent proper crisping.
Step 4: Steam to Cook Through
Create a slurry by mixing the 1 tbsp cornstarch with the ¼ cup water. Pour this mixture into the skillet, being careful to add it around the dumplings, not directly on top. Immediately cover with the lid to trap the steam.
Reduce heat to medium and steam for 8-10 minutes until the water has evaporated and the dumpling wrappers appear translucent. The filling should reach an internal temperature of 160°F when tested with an instant-read thermometer. Remove the lid and cook for an additional 1-2 minutes to re-crisp the bottoms.
Step 5: Serve with Crispy Side Down
Carefully transfer the dumplings to a serving plate, crispy side down. Use a thin spatula to prevent the crispy bottoms from breaking. The perfect pot sticker should have a golden, lacy crisp on the bottom with a tender, pleated top.
Serve immediately while hot. The contrast between the crispy bottom and tender wrapper with the savory filling is what makes these dumplings exceptional. Any remaining dumplings can be kept warm in a 200°F oven, but they’re best enjoyed fresh from the pan.
Pro Tips For Making Pot Stickers Recipe Pork Cabbage
- Salt the Cabbage First: Toss the shredded napa cabbage with 1 teaspoon of salt and let it sit for 10 minutes in a colander—this draws out excess water so your dumplings don’t turn into soggy messes. I learned this the hard way after my first batch fell apart in the pan.
- Chill the Filling: After mixing the pork, cabbage, green onions, garlic, and ginger, refrigerate the filling for 20 minutes before wrapping. It firms up the mixture, making it way easier to fold without tearing the wrappers.
- Skip the Overcrowding: Leave at least 1 inch between each pot sticker in the pan—any closer and they’ll steam instead of crisp. After burning three batches, I finally figured out that patience here is non-negotiable.
- Use a Lid: Cover the pan with a lid for the first 5 minutes of cooking to trap steam and guarantee the pork cooks through before the bottoms burn. Sounds weird, but it works every time.
Common Mistakes When Making This Recipe
Overfilling Dumplings
Using too much filling makes sealing difficult and often causes bursting during cooking. Stick to 1 tbsp of filling per wrapper. I learned this the hard way after several exploded dumplings ruined my first batch.
Skipping the Drain
Napa cabbage releases significant moisture that can make your filling watery. Always salt and drain the 3 cups cabbage thoroughly before mixing. Press it in a clean towel to extract every last drop. 💡
Overcrowding the Pan
Crowding lowers the oil temperature, preventing proper crisping. Cook in batches with ½ inch space between dumplings. This ensures even browning and that signature golden crust.
Insufficient Sealing
Poorly sealed edges allow filling to leak out during steaming. Press firmly when pleating, using a bit of water to help the wrapper stick. Test one dumpling first to check your seal.
Peeking While Steaming
Every time you lift the lid, you release precious steam that’s cooking your dumplings. Resist the urge for the full 8-10 minutes. Trust the process—the translucent wrappers will tell you when they’re done.
Skipping the Re-Crisp
After steaming, the bottoms can soften. Uncover and cook for an additional 1-2 minutes to restore that perfect crispiness. This final step makes all the difference.
Nutrition Facts
Frequently Asked Questions
Can I use regular cabbage instead of Napa?
Yes, but salt and drain it well first. Regular cabbage has more moisture than Napa, which can make your filling watery. Press it in a clean towel to remove excess liquid before mixing.
How do I prevent the dumplings from sticking?
Use a non-stick pan and enough neutral oil. Arrange dumplings with ½ inch space between them. Let them cook undisturbed for 3-4 minutes to develop a proper crust before adding the slurry.
Can I freeze uncooked pot stickers?
Arrange them on a tray, freeze solid, then transfer to a bag. They’ll keep for 2-3 months. Cook from frozen—no need to thaw. Add 1-2 minutes extra steaming time.
What’s the best way to reheat leftovers?
Place them in a dry pan over medium heat with a lid for 2-3 minutes. Add a splash of water to steam and re-crisp the bottoms. Avoid microwaving, as it makes them soggy.

- Protein Pudding Recipe With Sugar Free Pudding: High-Protein Creamy Indulgence - November 3, 2026
- Progresso Recipe Starters Creamy Parmesan Basil Cooking Sauce: Rich Herb-Infused Base for Pasta and More - November 3, 2026
- Pudding Recipe With Egg Yolks: Silky Smooth Custard in Minutes - November 3, 2026