
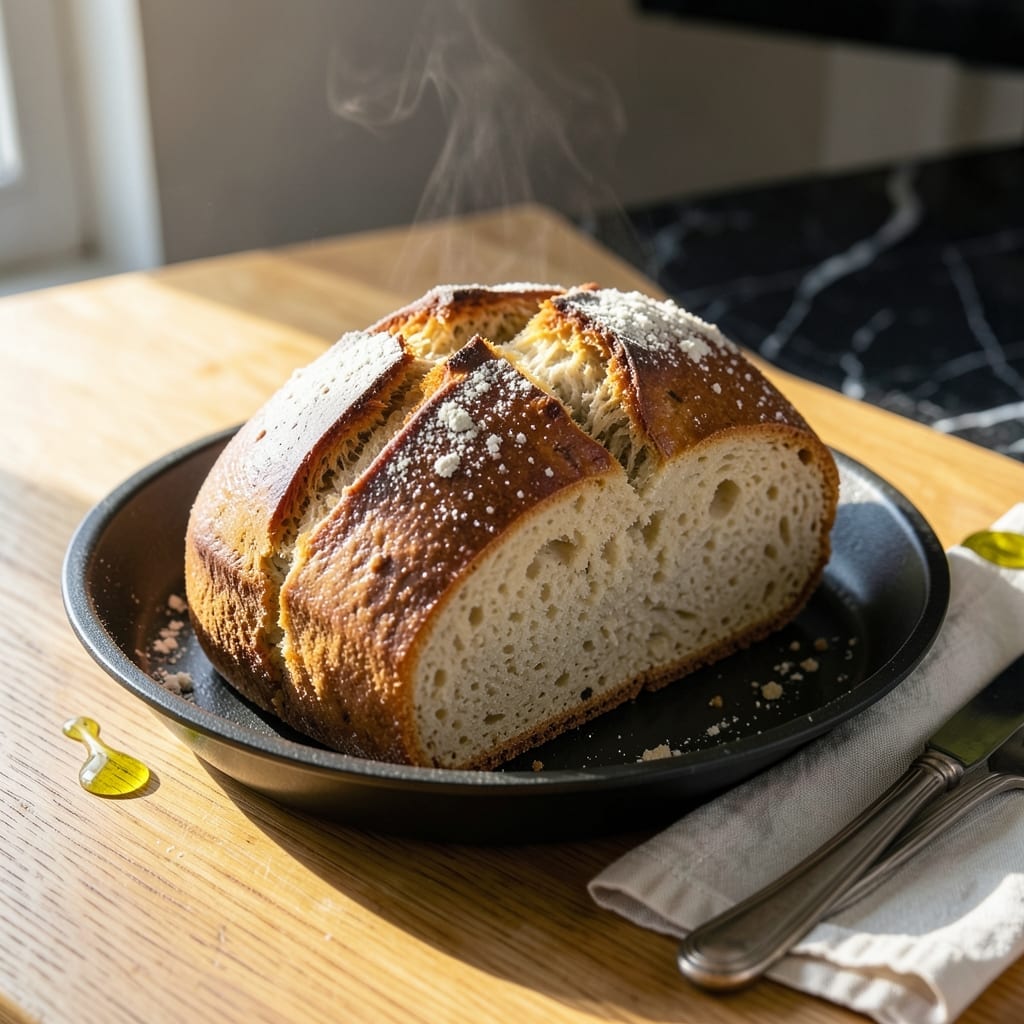
There’s something special about pulling a warm, light and airy loaf from your bread machine with almost no effort. This recipe proves that homemade bread doesn’t require hours of kneading or a degree in baking.
The addition of potato flour creates a tender crumb and slightly sweet flavor that sets this bread apart. I’ve tested this method repeatedly to ensure it works perfectly in standard bread machines with the basic or white bread setting.
What you’ll get is a golden-brown loaf with a soft, pillowy texture that slices beautifully. The potato flour adds moisture without making the bread dense, resulting in a perfect balance of chewiness and softness.
With just a few simple ingredients and your bread machine doing all the work, you’ll have fresh, homemade bread ready in about 3 hours. No special skills required.
Ingredients for Potato Flour Bread Recipe Bread Machine
Simple ingredients for a light, pillowy loaf with almost no effort on your part.
| Ingredient | Amount | Notes |
|---|---|---|
| Bread Flour 🌾 | 3 cups | All-purpose works in a pinch |
| Potato Flour 🥔 | ¼ cup | Not potato starch |
| Granulated Sugar 🍚 | 2 tbsp | Balances yeast activity |
| Active Dry Yeast 🍞 | 2 ¼ tsp | Or one packet |
| Salt 🧂 | 1 ½ tsp | Fine sea salt preferred |
| Water 💧 | 1 ¼ cups | Warm, about 110°F |
| Unsalted Butter 🧈 | 2 tbsp | Melted and cooled |
| Milk 🥛 | ¼ cup | Whole milk for richness |
| Large Egg 🥚 | 1 whole | Room temperature |
| Honey 🍯 | 1 tbsp | Optional for extra softness |
The potato flour is key here—Bob’s Red Mill is widely available and consistent. Bread flour gives the best structure, but King Arthur all-purpose works if that’s what you have (the loaf will be slightly less chewy). Most grocery stores carry these in the baking aisle. I grab mine from Whole Foods when I’m restocking, but any supermarket will do. Look for potato flour, not starch—they’re totally different.
No bread flour? All-purpose is fine, just expect a slightly denser crumb. Out of potato flour? Instant mashed potato flakes at one-third the amount can work in a pinch (grind them first). The honey is optional, but it adds a subtle sweetness and keeps the bread soft—maple syrup works too. Milk can be swapped for water if needed, though the loaf won’t be as rich.
Store flour and yeast in airtight containers in a cool, dark place—they’ll keep for 6-12 months. The bread stays fresh for 3-4 days in a bread box or loosely wrapped in foil. Slice and freeze extras for up to 3 months (toast straight from frozen).
Why You’ll Love This Recipe
- Set and Forget: The bread machine does all the work—I just measure the flours, sugar, yeast, and salt, then walk away.
- Pillowy Soft Crumb: Potato flour adds a subtle sweetness and makes the texture so light, it’s my new sandwich obsession.
- Weeknight Hero: Between us, this bread saves dinner when I’ve got nothing else planned.
- Budget Stretcher: A small bag of potato flour goes a long way, and this loaf costs pennies compared to store-bought.
Step-by-Step Instructions for Potato Flour Bread in a Bread Machine
Here’s how to get that perfect rise and texture with minimal effort.
Step 1: Prepare and Measure the Wet Ingredients
Start by warming the 1.25 cups Water to about 110°F—it should feel warm but not hot to the touch. I use a kitchen thermometer for accuracy because water that’s too hot will kill the yeast, and water that’s too cold won’t activate it properly.
In a small bowl, whisk together the 0.25 cup Milk, 1 whole Large Egg, 2 tbsp Unsalted Butter (melted and cooled), and 1 tbsp Honey. The mixture should look smooth and slightly frothy. This ensures all the wet ingredients are evenly distributed before they meet the dry ones.
Step 2: Combine Dry Ingredients in the Bread Pan
Add the 3 cups Bread Flour to the bread machine pan first, then sprinkle the 0.25 cup Potato Flour evenly over the top. Next, add the 2 tbsp Granulated Sugar and 1.5 tsp Salt to opposite corners of the pan. This keeps the salt from coming into direct contact with the yeast, which could inhibit its activity.
Make a small well in the center of the flour mixture and add the 2.25 tsp Active Dry Yeast. Be careful not to let the yeast touch the liquid ingredients yet. I’ve found that this method prevents premature activation and ensures a consistent rise.
Step 3: Add Wet Ingredients and Start the Machine
Pour the prepared wet ingredient mixture into the bread pan, ensuring it pools around the yeast but doesn’t submerge it completely. Close the lid and select the basic bread setting on your machine. I recommend using a light or medium crust setting for this recipe to keep the loaf soft and tender.
Set the machine for a 2-pound loaf and press start. The kneading cycle should begin within a few minutes. Watch through the window during the first 5-10 minutes to ensure the dough forms a smooth, elastic ball. If it looks too dry, add 1-2 teaspoons of warm water; if too sticky, sprinkle in 1-2 teaspoons of bread flour.
Step 4: Monitor the Rise and Bake Cycles
About halfway through the cycle, check that the dough has doubled in size and looks smooth and slightly tacky. The potato flour helps retain moisture, so the dough might look softer than traditional bread dough. This is normal and exactly what you want for a light, airy texture.
During the baking cycle, resist the urge to open the lid. The bread machine needs to maintain a consistent temperature for even baking. The loaf is done when the machine beeps and the internal temperature reaches 190-200°F. If your machine doesn’t have a temperature probe, rely on the automatic cycle timing.
Step 5: Cool Properly Before Slicing
Once the baking cycle completes, carefully remove the bread pan from the machine using oven mitts. Let the loaf cool in the pan for 5 minutes, then transfer it to a wire rack. This prevents the bottom from becoming soggy as it cools.
Allow the bread to cool for at least 1 hour before slicing. I know it’s tempting to cut into it right away, but cooling ensures the crumb sets properly and prevents a gummy texture. The finished loaf should have a soft, slightly sweet crumb with a thin, golden crust—perfect for sandwiches or toast.
Pro Tips For Making Potato Flour Bread Recipe Bread Machine
- Use lukewarm water: I learned this the hard way—anything hotter than 110°F kills the yeast, and your bread won’t rise. Use a thermometer or test it on your wrist like a baby bottle.
- Measure potato flour accurately: Potato flour is dense and clumps easily, so spoon it into the measuring cup and level it off. Packing it in like brown sugar will throw off the texture.
- Skip the overproofing: Bread machine dough can collapse if it rises too long in the bucket. Start the machine and resist the urge to let it sit longer “just in case.”
- Add yeast last: Keep the yeast away from salt and wet ingredients until the machine starts mixing. I dump it on top of the flour so it stays dry until the cycle begins.
Common Mistakes When Making This Dish
Yeast Contact Mistake
Never let yeast touch liquid ingredients until mixing begins. I’ve ruined batches by adding 2.25 tsp Active Dry Yeast directly to wet ingredients. This causes premature activation, leading to a dense, flat loaf. Always create a well in dry ingredients first. 💡
Incorrect Water Temp
Water that’s too hot (over 110°F) kills yeast instantly, while cold water won’t activate it. I use a thermometer to ensure the 1.25 cups Water is just right—warm but not hot to the touch.
Skipping the Crust Setting
Using the wrong crust setting can ruin your loaf’s texture. For this recipe, always select light or medium crust on your bread machine. A dark crust setting will overbake the exterior before the inside cooks through.
Overlooking Dough Consistency
During the first 5-10 minutes of kneading, check the dough. If it’s too dry, add 1-2 tsp warm water. If too sticky, sprinkle in 1-2 tsp bread flour. The dough should form a smooth, elastic ball.
Opening the Lid Early
Resist opening the lid during baking—it disrupts the machine’s temperature. I learned this the hard way when my loaf collapsed. The machine needs a stable environment to bake evenly. 🔥
Cutting Too Soon
Let the loaf cool for at least 1 hour before slicing. Cutting early results in a gummy texture. I know it’s tempting, but patience ensures the crumb sets properly.
Nutrition Facts
Frequently Asked Questions
Can I use potato starch instead of potato flour?
No, they’re not interchangeable. Potato flour absorbs more liquid and adds density. Potato starch would make the bread gummy. Stick to potato flour for the best texture.
What setting should I use on my bread machine?
Use the basic or white bread setting with a light or medium crust option. This ensures even baking without over-browning. Most machines have this as a default.
Why is my dough too sticky or dry?
Adjust during the first 5-10 minutes of kneading. Add 1-2 tsp water if dry or 1-2 tsp bread flour if sticky. The dough should form a smooth, elastic ball.
How do I store leftovers?
Keep in an airtight container at room temperature for 3-4 days. For longer storage, slice and freeze for up to 3 months. Toast from frozen for best results.

- Pressure Cooker Ketchup Recipe With Canned Tomatoes: Homemade Tangy Richness in Half the Time - October 30, 2026
- Pottukadalai Sweet Recipe in Tamil: Festive Roasted Gram Delight - October 30, 2026
- Potato Salad Recipe With Egg and Sour Cream: Creamy Tang With Classic Crunch - October 30, 2026