
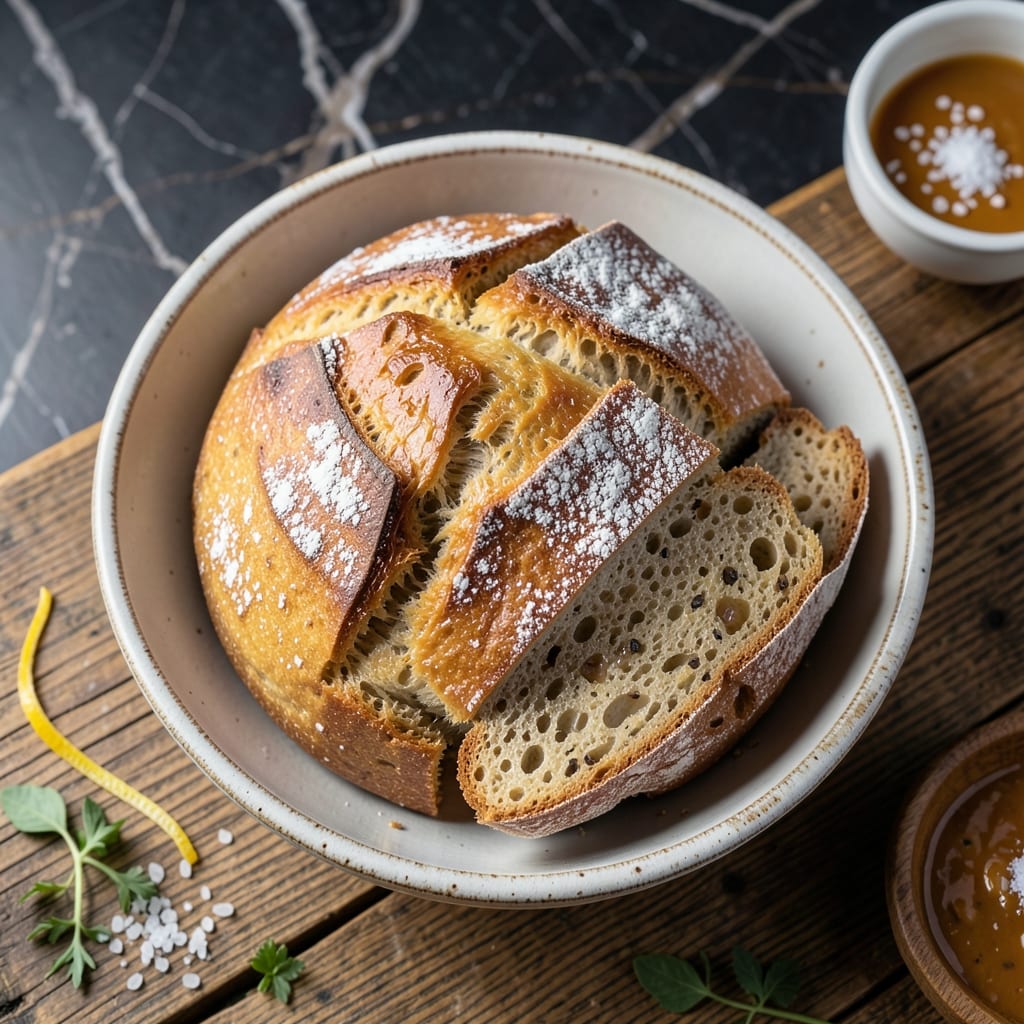
Gluten-free bread doesn’t have to be dense or crumbly—this potato flour recipe changes everything.
Using potato flour as the base creates a light, airy texture that rivals traditional wheat bread. The dough comes together quickly with simple ingredients and requires only one rise before baking.
What emerges from the oven is a golden loaf with a soft crust and a tender, moist interior. It holds its shape beautifully and slices cleanly, making it perfect for sandwiches or toast.
Best of all, it’s naturally gluten-free and delivers the satisfaction of homemade bread without the usual pitfalls. Here’s how to make it.
Ingredients for Potato Flour Bread Recipe Gluten Free
A few gluten-free staples create a bread that actually tastes like the real thing.
| Ingredient | Amount | Notes |
|---|---|---|
| Potato Flour 🥔 | 2 cups | Ensure certified gluten-free brand |
| White Rice Flour 🌾 | 1 ½ cups | Fine grind preferred for texture |
| Tapioca Starch 🌿 | ½ cup | Also called tapioca flour |
| Xanthan Gum 🧪 | 1 tsp | Essential for binding structure |
| Sea Salt 🧂 | 1 tsp | Fine grain for even distribution |
| Granulated Sugar 🍚 | 1 tbsp | Organic cane sugar preferred |
| Active Dry Yeast 🍞 | 2 ¼ tsp | One standard packet equivalent |
| Warm Water 💧 | 1 ¼ cups | 110°F for yeast activation |
| Unsweetened Applesauce 🍎 | ½ cup | Replaces eggs for moisture |
| Olive Oil 🫒 | 2 tbsp | Extra-virgin for richness |
| Apple Cider Vinegar 🍏 | 1 tbsp | Enhances rise and flavor |
| Flaxseed Meal 🌾 | 1 tbsp | Optional for extra binding |
The potato flour is non-negotiable here—it’s what gives this loaf its signature lightness. Bob’s Red Mill and Anthony’s Goods are reliable brands you’ll find at Whole Foods or Amazon. Look for fine-milled white rice flour; coarse textures make dense bread. The xanthan gum is your insurance policy against crumbles—don’t skip it. Yeast needs that warm water at exactly 110°F (use a thermometer).
No applesauce? Mashed banana or pumpkin puree works at a 1:1 swap. Out of potato flour? Sweet potato flour at equal measure is your best bet. For the vinegar, any mild type like white or rice vinegar is fine. The flaxseed meal is optional but adds structure—chia seed meal works too. If your blend feels too dry, add warm water 1 tbsp at a time until it comes together.
Store the loaf wrapped tightly at room temperature for up to 3 days. For longer storage, slice and freeze in a sealed bag for 1 month. Reheat frozen slices in a toaster. The flours keep in the freezer for 6-12 months to prevent spoilage (those little bugs love starch).
Why You’ll Love This Recipe
- No Fuss Mixing: I just stir the dry ingredients—potato flour, rice flour, tapioca starch—and let the xanthan gum do the heavy lifting.
- Warm, Earthy Bite: The potato flour gives it this subtle, comforting flavor that’s way more interesting than plain white bread.
- My Freezer MVP: Honestly, I double the batch and freeze loaves—pull one out and it toasts up like fresh-baked every time.
- Budget Stretcher: A little potato flour goes a long way, and these staples cost pennies compared to store-bought gluten-free loaves.
Step-by-Step Instructions for Potato Flour Bread Gluten Free
This method ensures a light, airy texture with a perfect crumb every time.
Step 1: Activate the Yeast and Prepare Wet Ingredients
In a small bowl, dissolve the 1 tbsp Granulated Sugar in the 1.25 cups Warm Water heated to exactly 110°F. Add the 2.25 tsp Active Dry Yeast and let it sit for 5-7 minutes until foamy and fragrant. This confirms the yeast is active and ready to work.
In a separate bowl, whisk together the 0.5 cup Unsweetened Applesauce, 2 tbsp Olive Oil, 1 tbsp Apple Cider Vinegar, and 1 tbsp Flaxseed Meal. The vinegar enhances the rise while the flaxseed meal adds structure to compensate for the lack of gluten.
Step 2: Combine Dry Ingredients for Optimal Texture
In a large mixing bowl, whisk together the 2 cups Potato Flour, 1.5 cups White Rice Flour, 0.5 cup Tapioca Starch, 1 tsp Xanthan Gum, and 1 tsp Sea Salt. The xanthan gum is non-negotiable—it mimics gluten’s elasticity, preventing a crumbly texture.
Fine grind white rice flour is ideal here, as it creates a smoother crumb. The tapioca starch adds a slight chewiness, balancing the density of potato flour. Ensure all dry ingredients are evenly distributed before introducing the wet mixture.
Step 3: Mix and Knead the Dough
Pour the activated yeast mixture and the prepared wet ingredients into the dry ingredients. Using a stand mixer fitted with a paddle attachment, mix on medium speed for 3-4 minutes until the dough comes together. It will be stickier than traditional bread dough but should pull away from the sides of the bowl.
If the dough feels too wet, resist adding more flour—gluten-free doughs are inherently stickier. Instead, wet your hands with water to handle it. The dough should be smooth and slightly tacky, not dry or overly firm.
Step 4: Proof the Dough Until Doubled
Transfer the dough to a greased bowl, cover with a damp towel, and place it in a warm, draft-free environment. Let it rise for 1 to 1.5 hours or until doubled in volume. Gluten-free dough rises slower than wheat-based dough, so patience is key.
Check the dough after 1 hour—it should be puffy and jiggle slightly when gently shaken. If it hasn’t risen sufficiently, give it more time. The apple cider vinegar helps with lift, but ambient temperature also plays a role.
Step 5: Bake to Golden Perfection
Preheat your oven to 375°F. Transfer the dough to a greased loaf pan, smoothing the top with wet hands. Bake for 45-50 minutes or until the top is golden brown and the internal temperature reaches 205°F when measured with an instant-read thermometer.
Remove the loaf from the pan and let it cool on a wire rack for at least 30 minutes before slicing. This cooling period allows the structure to set, preventing a gummy texture. The bread should be light, slightly springy, and hold its shape when sliced.
Pro Tips For Making Potato Flour Bread Recipe Gluten Free
- Measure Precisely: Potato flour is dense and absorbs liquid differently than other flours—use a kitchen scale for accuracy, as even 5 grams extra can make your loaf gummy. I learned this the hard way after my first few attempts came out like bricks.
- Hydrate the Xanthan: Mix the xanthan gum with your dry ingredients first, then whisk thoroughly before adding liquids. This prevents those unpleasant, chewy gum blobs that ruin the texture.
- Rest the Batter: Let the batter sit for 10-15 minutes before baking—this gives the flours time to fully hydrate and the xanthan gum time to work its magic. Sounds weird, but it works.
- Check Early: Gluten-free breads brown faster than wheat-based ones, so start checking for doneness at 25 minutes. A toothpick should come out clean, but don’t overbake or it’ll dry out.
Storing and Reheating This Dish
Room Temperature Storage
Once completely cooled, wrap your loaf tightly in aluminum foil or place it in an airtight container. It stays fresh at room temperature for up to 3 days. The texture remains best when stored in a cool, dry place away from direct sunlight. 🥖
Refrigerator Storage
For slightly longer storage, refrigerate the wrapped loaf for up to 5 days. However, gluten-free breads tend to dry out faster in the fridge. I recommend slicing before refrigerating for easy grab-and-go portions.
Freezing for Longevity
Slice the loaf and wrap individual slices in plastic wrap, then place them in a freezer-safe bag. It freezes well for up to 1 month without losing texture. This method preserves that light, airy quality you worked so hard to achieve.
Toaster Reheating
For the best results, toast frozen slices directly from the freezer. Use the medium setting on your toaster for 1-2 cycles until warm and crisp. This revives the bread beautifully, maintaining its soft interior. ❄️
Oven Reheating
Preheat your oven to 350°F and wrap the loaf in aluminum foil. Heat for 10-15 minutes until warmed through. Add a damp paper towel inside the foil to prevent drying out.
Microwave Method
Place a slice on a microwave-safe plate and cover with a damp paper towel. Heat on high for 20-30 seconds. This works in a pinch but may slightly soften the crust. 🔥
Nutrition Facts
Frequently Asked Questions
Can I use regular flour instead?
No, this recipe is specifically formulated for gluten-free flours. Regular wheat flour has gluten, which changes the texture and structure completely. The potato flour and rice flour blend is what creates the light, airy result.
Why is xanthan gum necessary?
Xanthan gum replaces gluten’s binding properties in the dough. Without it, your loaf may crumble and won’t hold its shape. Use exactly 1 tsp for best results.
Can I make this without a stand mixer?
Yes! Mix by hand with a sturdy spoon or dough whisk. The dough will be sticky, so wet your hands to handle it. Mix for 5-6 minutes to achieve proper texture.
How do I know when it’s fully baked?
Use an instant-read thermometer to check the center reaches 205°F. The top should be golden brown and sound hollow when tapped. Underbaking causes a gummy interior.

- Pressure Cooker Ketchup Recipe With Canned Tomatoes: Homemade Tangy Richness in Half the Time - October 30, 2026
- Pottukadalai Sweet Recipe in Tamil: Festive Roasted Gram Delight - October 30, 2026
- Potato Salad Recipe With Egg and Sour Cream: Creamy Tang With Classic Crunch - October 30, 2026