
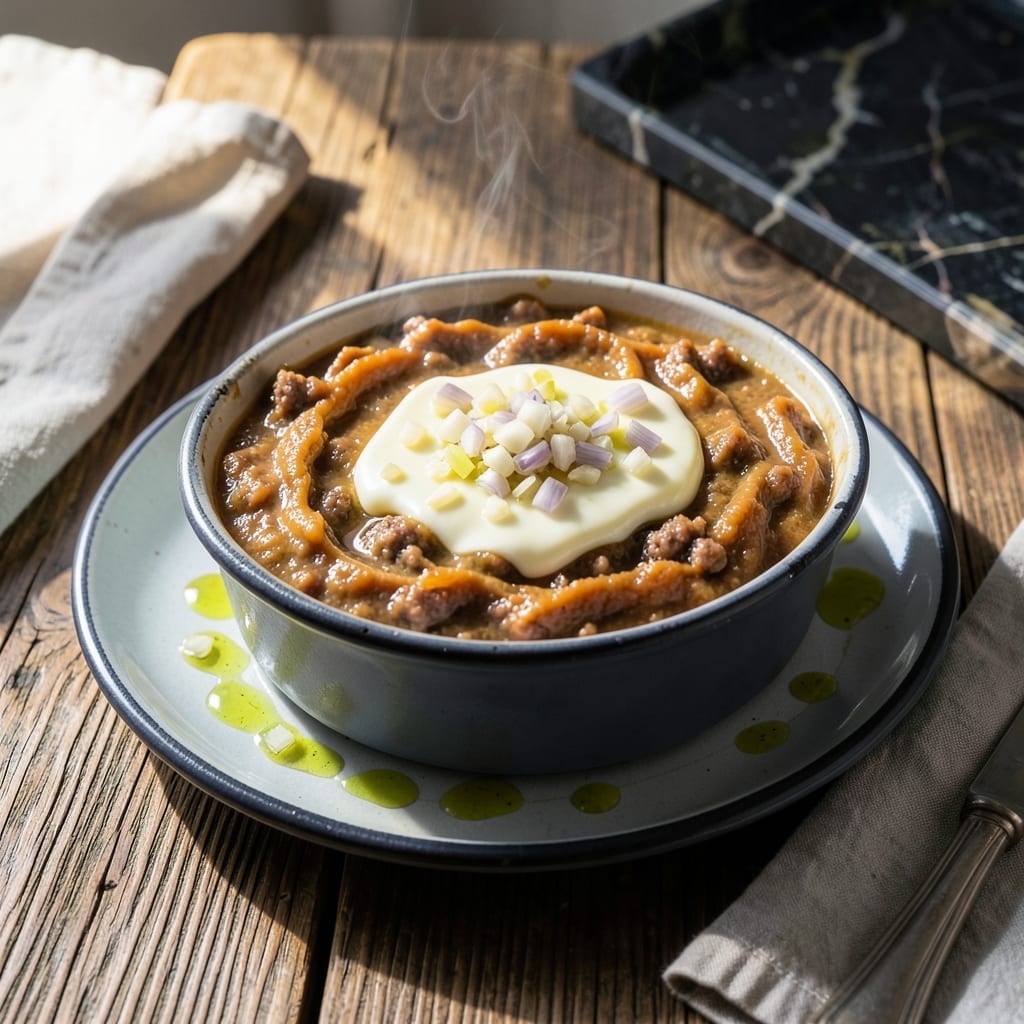
This retro spread brings nostalgic flavor and surprising versatility to your table. Potted meat was a staple in my family’s kitchen, and I’ve rediscovered its charm through modern twists.
The process is simpler than you think—just slow-cooked meat blended with fat and seasonings, then chilled. The result is a rich, spreadable creation that’s perfect for sandwiches, crackers, or even as a filling for pastries.
What makes this special is its adaptability. Use it as a base for appetizers, a quick protein boost, or a flavorful addition to your charcuterie board. It keeps well in the fridge for up to two weeks.
Try it with different seasonings or meats for endless variations. Here’s how to make this timeless recipe.
Ingredients for Potted Meat Recipe Ideas
These rich, meaty ingredients blend into a spreadable masterpiece with nostalgic charm and modern appeal.
| Ingredient | Amount | Notes |
|---|---|---|
| Ground Pork 🥩 | 1 ½ lb | Or substitute ground beef |
| Ground Beef 🥩 | 1 lb | 80/20 fat ratio preferred |
| Unsalted Butter 🧈 | ½ cup | Room temperature for blending |
| Pork Fat 🥓 | ¼ cup | Rendered, or substitute lard |
| Yellow Onion 🧅 | 1 whole | Finely diced for even texture |
| Garlic Cloves 🧄 | 3 cloves | Minced for depth of flavor |
| Dijon Mustard 🟡 | 2 tbsp | Smooth, not whole grain |
| Worcestershire Sauce 🫒 | 1 tbsp | Adds umami complexity |
| Dried Thyme 🌿 | 1 tsp | Rubbed between fingers to release aroma |
| Dried Rosemary 🌿 | 1 tsp | Crushed for better infusion |
| Ground Allspice 🌶️ | ¼ tsp | Key for authentic retro flavor |
| Ground Nutmeg 🌰 | ¼ tsp | Freshly grated if possible |
| Kosher Salt 🧂 | 1 ½ tsp | Adjust to taste after cooking |
| Freshly Ground Black Pepper 🌶️ | ½ tsp | Coarse grind preferred |
| Beef or Chicken Stock 🥣 | ½ cup | Low-sodium for control |
The meat base is non-negotiable for that classic texture. Ground pork shoulder has the right fat content, but chuck beef (80/20) works too. I grab mine from Whole Foods or a trusted butcher—look for vibrant color and good marbling. The pork fat (or lard) adds that unctuous mouthfeel; don’t skip it. Render your own from pork belly scraps, or ask your butcher to save some for you.
No pork fat? Extra butter (unsalted, always) gets you close. Swap the allspice and nutmeg for ground mace if that’s what you’ve got. The Worcestershire can be subbed with soy sauce plus a dash of vinegar. Onion powder works in a pinch if you’re out of fresh, but freshly diced is far superior. Want it smoother? Pulse the meat and onions in a food processor before cooking.
This keeps beautifully—2 weeks in the fridge, tightly sealed. The flavors deepen after a day or two, so make it ahead. For longer storage, pack into sterilized jars and cover with a thin layer of melted butter. Freezing isn’t ideal (texture separates), but it’ll keep for 1 month if needed.
Why You’ll Love This Recipe
- One Pot Wonder: I brown the ground pork and beef with onion, melt in the butter and fat, and it’s done—no fancy steps, no extra pans.
- Rich and Savory: The pork fat and butter make it unapologetically rich, while the onion adds just enough sweetness to balance it out.
- Feeds Everyone: I pack it into small jars for sandwiches, crackers, or even a quick pasta sauce—versatile doesn’t cover it.
- Stretches Far: Honestly, it’s one of the most budget-friendly meals I make, and leftovers taste even better the next day.
Step-by-Step Instructions for Potted Meat
This retro technique transforms simple ingredients into a rich, spreadable delight with minimal effort.
Step 1: Sauté Aromatics Until Translucent
Heat a large skillet over medium heat and add the pork fat. Once it shimmers, add the finely diced yellow onion and cook for 5-6 minutes until it turns soft and translucent—this builds the flavor base.
Add the minced garlic cloves and cook for 30-45 seconds until fragrant but not browned. Garlic burns easily, so keep it moving. The aroma should be rich but not acrid.
Step 2: Brown the Meats Thoroughly
Increase heat to medium-high and add the 1.5 lb ground pork and 1 lb ground beef. Break the meat into small pieces with a wooden spoon and cook for 8-10 minutes until it’s deeply browned and cooked through.
Don’t rush this step—browning develops deep, savory flavors. The meat should be uniformly brown with no pink remaining. If the pan seems dry, add a splash of the beef or chicken stock to deglaze.
Season with 1.5 tsp kosher salt and 0.5 tsp freshly ground black pepper as the meat cooks. This ensures the seasoning is evenly distributed throughout the mixture.
Step 3: Incorporate Liquids and Spices
Reduce the heat to medium-low and stir in the 2 tbsp Dijon mustard, 1 tbsp Worcestershire sauce, 1 tsp dried thyme, 1 tsp dried rosemary, 0.25 tsp ground allspice, and 0.25 tsp ground nutmeg.
Pour in the remaining 0.5 cup beef or chicken stock and cook for 3-4 minutes until most of the liquid has evaporated. The mixture should be moist but not soupy—this is where the magic happens.
I crush the dried herbs between my fingers as I add them to release their essential oils, which intensifies their flavor in the final spread.
Step 4: Finish with Butter for Creaminess
Remove the skillet from heat and stir in the 0.5 cup unsalted butter until it melts completely and blends into the mixture. The butter adds a luxurious, silky texture that’s essential for a proper potted meat.
Taste and adjust seasoning if needed, though the mixture should already be well-balanced. The butter will also slightly cool the mixture, making it easier to handle in the next step.
Step 5: Pack and Chill for Optimal Texture
Transfer the warm mixture into small ramekins or jars, pressing it down firmly to remove any air pockets. This ensures a smooth, uniform texture when chilled. Let it cool to room temperature before covering.
Once cooled, cover with a thin layer of melted butter (optional) to seal and refrigerate for at least 4 hours, preferably overnight. This chilling time allows the flavors to meld and the mixture to set into a spreadable consistency.
The final result should be firm enough to hold its shape but soft enough to spread easily on crackers or bread.
Pro Tips For Making Potted Meat Recipe Ideas
- Render the Fat First: Start by slowly rendering the pork fat before adding the ground meats—this builds a rich base and prevents the mixture from turning greasy. I learned this the hard way after my first batch separated like a sad oil slick.
- Sauté Onions Low: Cook the yellow onion on medium-low heat until totally soft and sweet, about 8-10 minutes. Rushing this step leaves them raw and harsh in the final potted meat.
- Season in Layers: Salt the ground pork and beef lightly before browning, then adjust seasoning at the end. More salt than you think is needed if using unsalted butter, but you can always add, never subtract.
- Use a Food Processor: Pulse the cooked mixture briefly for a finer, more spreadable texture—this upgrade takes 30 seconds and makes the potted meat feel more luxurious. Sounds weird, but it works.
Pro Cooking Tips for This Dish
Fat Selection Matters
For the most authentic texture, use rendered pork fat—I render my own from pork belly scraps or ask my butcher to save some. If unavailable, lard works perfectly, or substitute with an equal amount of unsalted butter. The fat content is crucial for that signature unctuous spreadability. 💡
Low and Slow Browning
Don’t rush the meat browning step. Cook over medium-high heat for 8-10 minutes, breaking the meat into small pieces. This develops deep, savory flavors through the Maillard reaction. If the pan gets too dry, deglaze with a splash of stock to lift those flavorful browned bits.
Herb Activation Trick
Always crush dried herbs like thyme and rosemary between your fingers before adding. This releases their essential oils, intensifying their aroma and flavor in the final spread. I learned this from Nonna—she’d never skip this step when making her version in our tiny Boston kitchen.
Butter Integration
Remove the skillet from heat before stirring in the 0.5 cup unsalted butter. This prevents the butter from separating and ensures it blends smoothly into the mixture. The butter should melt completely, creating that silky texture we all love in a good potted meat.
Chilling for Perfection
Press the mixture firmly into ramekins or jars to eliminate air pockets, then refrigerate for at least 4 hours. Overnight chilling is ideal—the flavors meld beautifully, and the texture sets perfectly. I often make a batch on Sunday for easy lunches all week. ❄️
Texture Troubleshooting
If your spread seems too dry after chilling, stir in 1-2 tbsp melted butter or stock to restore creaminess. If it’s too loose, return it to the skillet and cook off excess moisture over low heat for 3-4 minutes.
Nutrition Facts
Frequently Asked Questions
Can I use ground turkey instead?
Yes, but add 2 tbsp olive oil or melted butter since turkey is leaner. The texture will be slightly less rich but still flavorful.
How long does it keep in the fridge?
Sealed in an airtight container, it stays fresh for up to 2 weeks. For longer storage, cover with melted butter to create a seal.
Can I make it in a slow cooker?
Brown the meat first, then cook on low for 4-5 hours. Stir in butter at the end for the best texture.
Why did my mixture turn out greasy?
This usually happens if the fat isn’t rendered properly. Spoon off excess fat before adding butter, or chill and skim the top layer.

- Progresso Recipe Starters Creamy Parmesan Basil Cooking Sauce: Rich Herb-Infused Base for Pasta and More - November 3, 2026
- Pudding Recipe With Egg Yolks: Silky Smooth Custard in Minutes - November 3, 2026
- Pudding Pops Recipe Cook and Serve: Silky Frozen Treats Without the Machine - November 3, 2026