
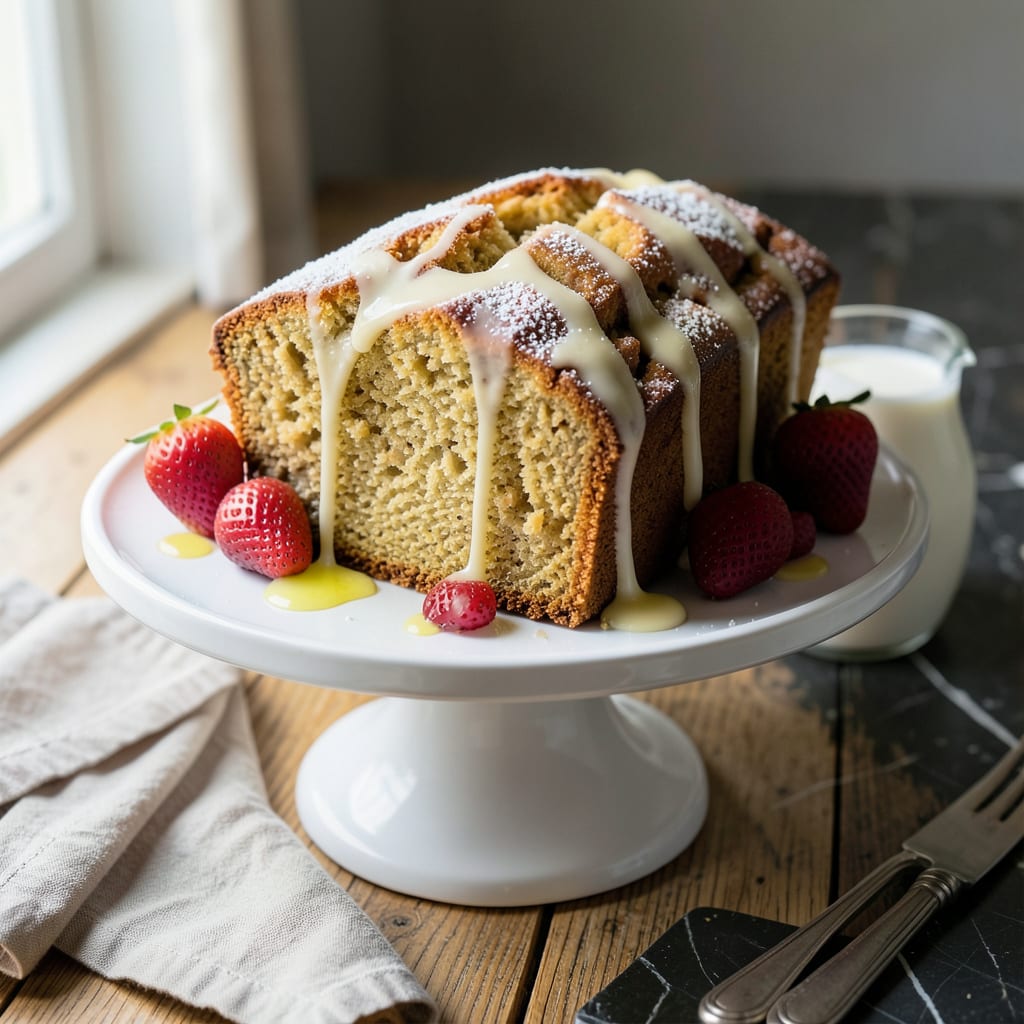
This classic pound cake delivers a moist, tender crumb with minimal effort, thanks to the convenience of self-rising flour. The result is a rich, buttery cake that’s perfect for any occasion.
Self-rising flour eliminates the need for separate leavening agents, streamlining the process without sacrificing texture. With just a few simple ingredients and one bowl, you’ll achieve a cake that’s dense yet light, with a golden crust and a melt-in-your-mouth finish.
Ingredients for Pound Cake Recipe with Self Rising Flour
Butter, sugar, eggs, and self-rising flour come together for a rich, moist cake.
| Ingredient | Amount | Notes |
|---|---|---|
| Unsalted Butter 🧈 | 1 lb | Softened to room temperature |
| Granulated Sugar 🍚 | 2 cups | Fine grain for even distribution |
| Large Eggs 🥚 | 6 whole | Room temperature for best texture |
| Self-Rising Flour 🌾 | 3 cups | Sifted for lighter crumb |
| Vanilla Extract 🫒 | 2 tsp | Pure extract for best flavor |
| Whole Milk 🥛 | ¼ cup | Adds richness to the batter |
| Salt 🧂 | ½ tsp | Balances sweetness and flavor |
| Almond Extract 🌰 | ½ tsp | Optional for depth of flavor |
The butter is key here—use high-quality unsalted (I like Plugra or Kerrygold). Self-rising flour saves the hassle of measuring baking powder and salt separately. Most grocery stores carry it in the baking aisle, but King Arthur’s version is my go-to for consistent results. Room temperature eggs and butter are non-negotiable—they cream together properly for that signature tender crumb.
No self-rising flour? Make your own with 3 cups all-purpose flour plus 1 tbsp baking powder and 1 tsp salt. For extra richness, swap the milk for buttermilk or even heavy cream. If you’re out of vanilla, a splash of bourbon or rum adds a nice depth (just don’t overdo it). The almond extract is optional but worth the extra minute for that bakery-style flavor.
This cake stays fresh for 5 days wrapped in plastic at room temperature. It actually tastes better the next day once the flavors meld. Freeze slices for up to 3 months—perfect for impromptu desserts or care packages.
Why You’ll Love This Recipe
- I’ll be real: leftovers taste just as good the next day, and the recipe uses pantry staples I always have on hand.
- No Fuss Mixing: I just cream the butter and sugar, add the eggs, then fold in the self-rising flour—no measuring baking powder or salt separately.
- Buttery Vanilla Bliss: The unsalted butter and real vanilla extract make it rich and fragrant, with that classic pound cake taste I crave.
- Dessert or Snack: Honestly, it works as a fancy dessert with berries or a simple afternoon treat with my coffee.
Step-by-Step Instructions for Pound Cake With Self-Rising Flour
This method guarantees that signature dense-yet-tender crumb with a buttery richness in every bite.
Step 1: Cream Butter and Sugar to Ribbon Stage
In a stand mixer fitted with the paddle attachment, beat the 1 lb Unsalted Butter and 2 cups Granulated Sugar on medium-high speed for 4-5 minutes. You’re aiming for a pale, fluffy mixture that clings to the whisk in long ribbons when lifted.
This creaming process incorporates air, which creates that fine, velvety texture in the finished cake. Stop occasionally to scrape down the sides of the bowl with a silicone spatula. The butter should be properly softened—not melted—to achieve the right consistency.
Step 2: Incorporate Eggs Gradually for Emulsion
Add the 6 whole Large Eggs one at a time, mixing for 20-30 seconds after each addition until fully emulsified. The mixture should look thick and glossy, almost like a custard. If it appears curdled at any point, add 1 tablespoon of the measured 3 cups Self-Rising Flour to stabilize it.
Room-temperature eggs are essential here—they blend more evenly into the butter-sugar mixture, preventing a separated or greasy batter. I always pull my eggs out of the fridge 30 minutes before starting to ensure they’re at the right temperature.
Step 3: Alternate Dry Ingredients and Liquid
In a separate bowl, whisk together the remaining 3 cups Self-Rising Flour and 0.5 tsp Salt. With the mixer on low speed, add about one-third of the flour mixture, mixing just until combined. Pour in the 0.25 cup Whole Milk and mix again.
Repeat this process, ending with the last third of flour. Overmixing develops gluten, which can make the cake tough, so stop as soon as the batter comes together. The batter should be thick but still pourable, with no visible flour streaks.
Step 4: Add Flavorings and Finish the Batter
Stir in the 2 tsp Vanilla Extract and 0.5 tsp Almond Extract until just combined. The almond extract enhances the vanilla’s sweetness and adds depth, but don’t overdo it—too much can make the cake taste artificial.
Give the batter one final fold with a spatula to ensure everything is evenly distributed. The batter will be dense and slightly sticky, which is perfect for a pound cake. At this point, you’re ready to transfer it to your prepared pan.
Step 5: Bake to Golden Perfection
Pour the batter into a greased and floured 10-12 cup Bundt pan or two 9×5-inch loaf pans. Smooth the top with a spatula and tap the pan firmly on the counter 2-3 times to remove any air bubbles.
Bake in a preheated 325°F oven for 1 hour to 1 hour 15 minutes (for a Bundt pan) or 50-60 minutes (for loaf pans). The cake is done when a toothpick inserted into the center comes out clean and the top is golden brown.
Let it cool in the pan for 15 minutes, then transfer to a wire rack to cool completely. This resting period allows the cake to set, making it easier to slice without crumbling. The result should be a moist, buttery cake with a tight, tender crumb.
Pro Tips For Making Pound Cake Recipe With Self Rising Flour
- Cream Butter Longer: Beat the butter and sugar for a full 5-7 minutes until pale and fluffy—I learned this the hard way after my early cakes turned out dense. The extra air makes a real difference with self-rising flour.
- Room Temp Eggs: Pull your eggs out 30 minutes before starting, or soak them in warm water for 10. Cold eggs seize up the butter, and you’ll end up with a cake that’s tough instead of tender.
- Skip Overmixing: Once you add the self-rising flour, mix just until the streaks disappear. Overworking it activates the leavening too early, and your cake won’t rise like it should.
- Test with a Skewer: Start checking at 50 minutes—insert a wooden skewer in the center. If it comes out with just a few moist crumbs, pull it out. Waiting for a clean skewer means you’ll overbake.
Essential Equipment for This Dish
Stand Mixer
A stand mixer with a paddle attachment is essential for proper creaming of butter and sugar. I use my KitchenAid 5-quart for this recipe. The paddle attachment ensures even mixing without overworking the batter. 💛
Bundt Pan
A 10-12 cup Bundt pan gives that classic pound cake shape with beautiful ridges. I recommend Nordic Ware for even baking and easy release. Always grease and flour it thoroughly, even if it’s nonstick.
Cooling Rack
A sturdy wire cooling rack allows air circulation around the cake as it cools. This prevents the bottom from becoming soggy. I like the OXO Good Grips rack with non-slip feet.
Silicone Spatula
A heat-resistant silicone spatula helps scrape every bit of batter from the bowl. Look for one with a stiff edge for folding. I keep a Cuisinox spatula in my kitchen at all times.
Toothpick Tester
Don’t underestimate the importance of a simple wooden toothpick for testing doneness. Insert it into the center—when it comes out clean, your cake is ready. This method is more reliable than just looking at the color.
Kitchen Scale
For perfect results every time, a digital kitchen scale ensures precise measurements. I use my Escali Primo for all baking projects. It’s especially helpful when dividing batter between multiple pans.
Nutrition Facts
Frequently Asked Questions
Can I use all-purpose flour instead?
Yes, but you’ll need to add 1 tbsp baking powder and 1 tsp salt per 3 cups of flour to replicate self-rising flour. Mix these in thoroughly before combining with wet ingredients.
Why is my cake dense?
Overmixing the batter develops gluten, which can make the cake tough. Mix just until the flour disappears. Also, ensure your butter is softened, not melted, for proper creaming.
How do I store leftovers?
Wrap cooled cake tightly in plastic wrap or store in an airtight container at room temperature for up to 5 days. For longer storage, freeze slices for up to 3 months.
Can I bake this in a different pan?
Use two 9×5-inch loaf pans or a 10-inch tube pan. Adjust baking time to 50-60 minutes for loaves and check doneness with a toothpick.

- BBQ Sausage Recipe Oven: Smoky Depth Without the Grill - September 28, 2026
- BBQ Chicken Bowl Recipe Rice: Smoky Sweetness Over Fluffy Grains - September 28, 2026
- Beef Cutlet Recipe Ideas: Crispy Breaded Patties With Bold Seasonings - September 28, 2026