
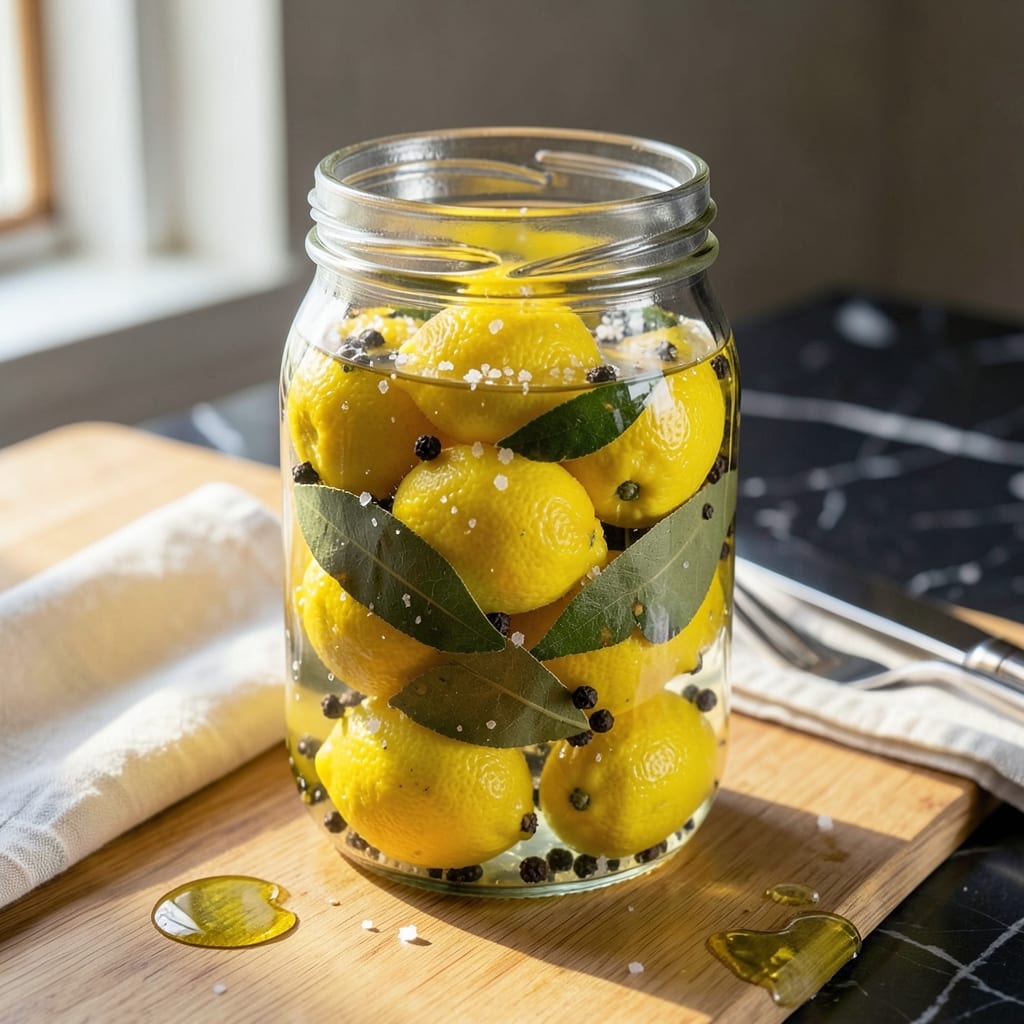
Transform your dishes with this 5-day preserved lemon method that delivers bright, tangy flavor without the weekslong wait. The traditional process can take a month, but this accelerated technique cuts the time dramatically while maintaining authentic taste.
Simple salt and lemon juice create the brine that softens the rinds and mellows their bitterness. The result is a versatile condiment that adds depth to salads, tagines, and roasted vegetables with minimal effort.
Store these in a clean jar in the refrigerator, where they’ll keep for up to 6 months. The flavor intensifies over time, making each batch more valuable than the last.
Use the peels and pulp to elevate everything from dressings to main courses. This shortcut delivers professional-quality results in record time.
Ingredients for Preserved Lemons Recipe Quick
Bright citrus and salt create this versatile fermented condiment in just days.
| Ingredient | Amount | Notes |
|---|---|---|
| Lemons 🍋 | 6 whole | Meyer or Eureka, thoroughly washed |
| Kosher Salt 🧂 | ½ cup | Diamond Crystal preferred for texture |
| Fresh Lemon Juice 💧 | 1 cup | From additional lemons if needed |
| Water 💧 | 1 cup | Filtered or distilled recommended |
| Bay Leaves 🍃 | 2 whole | Optional for aromatic depth |
| Black Peppercorns 🌶️ | 1 tsp | Lightly crushed for subtle heat |
| Coriander Seeds 🌿 | 1 tsp | Optional for Moroccan flair |
| Cinnamon Stick 🌰 | 1 whole | Optional for warm undertones |
The lemons are everything here. Meyer lemons offer a sweeter, more floral profile, but standard Eureka or Lisbon varieties work perfectly. Source them from farmers markets or specialty grocers like Whole Foods for peak freshness. Look for firm, heavy fruit with vibrant yellow skins (avoid green or overly soft specimens). Diamond Crystal kosher salt is ideal for its coarse texture and clean flavor.
No Meyer lemons? Standard grocery store lemons are absolutely fine—just ensure they’re unwaxed if possible (organic often are). Short on salt? Any coarse salt works, but avoid iodized table salt as it can impart a metallic taste. The spices are optional but transformative: bay leaves add depth, while coriander and cinnamon introduce North African complexity. Skip them if you prefer a cleaner, more universal flavor.
These keep for 6 months refrigerated in a sterilized jar. The flavor deepens beautifully over time—wait at least 5 days before using, though 2 weeks yields optimal results. Always use non-reactive containers (glass or ceramic) to prevent metallic off-flavors.
Why You’ll Love This Recipe
- Set and Forget: I mix lemons, salt, and juice in a jar, then let time do the work—no babysitting required.
- Zingy Depth: The salt transforms the rind into this tangy, complex flavor that brightens any dish it touches.
- Tagine Ready: Honestly, I toss these into everything from couscous to roasted chicken, and it’s always a win.
- Pantry MVP: One batch lasts months in the fridge, so I’m never without that secret citrus punch.
Step-by-Step Instructions for Preserved Lemons
This accelerated method delivers fully fermented lemons with bright, complex flavor in just five days.
Step 1: Sterilize and Prepare the Lemons
Begin by thoroughly washing the 6 whole lemons under warm water to remove any wax or residue. I recommend using a vegetable brush to ensure complete cleanliness, especially if the lemons aren’t organic.
Slice each lemon lengthwise into quarters, leaving the base intact so the segments remain attached. This technique allows the kosher salt to penetrate deeply while maintaining structural integrity during fermentation.
Step 2: Pack with Salt and Aromatics
In a clean, dry quart-sized jar, layer the bottom with 2 tablespoons of the 0.5 cup kosher salt. Place the lemon quarters cut-side up in the jar, sprinkling 1 tablespoon of salt between each layer.
Add the 2 whole bay leaves, 1 tsp black peppercorns, 1 tsp coriander seeds, and 1 whole cinnamon stick to the jar. These aromatics infuse subtle complexity during the short fermentation period.
Press down firmly to compress the lemons and release their juices. The lemons should be completely submerged in their own liquid by the end of this process.
Step 3: Add Brine and Seal
Combine the 1 cup fresh lemon juice and 1 cup water in a separate container. Pour this mixture over the lemons until they are fully submerged, leaving ½ inch of headspace at the top of the jar.
If the lemons float to the surface, use a fermentation weight or a smaller jar filled with water to keep them submerged. This is critical to prevent mold growth and ensure even fermentation.
Seal the jar tightly and give it a gentle shake to distribute the kosher salt and aromatics evenly throughout the brine.
Step 4: Ferment and Store
Store the jar at room temperature, away from direct sunlight, for 5 days. I recommend placing the jar on a small plate or tray to catch any potential overflow as the lemons begin to ferment.
Check daily to ensure the lemons remain submerged, pressing them down with a clean spoon if necessary. You should begin to see small bubbles forming within 24-48 hours, indicating active fermentation.
After 5 days, transfer the jar to the refrigerator. The preserved lemons will continue to develop flavor for up to 6 months, though they’re ready to use immediately.
Pro Tips For Making Preserved Lemons Recipe Quick
- Slice Evenly: Cut your lemons into 8 even wedges—thinner ones soften too fast, thicker ones take forever. I learned this the hard way after ending up with half-mush, half-raw lemons in my first batch.
- Pack Tight: Cram those lemon wedges into the jar as tightly as possible to eliminate air gaps. Sounds weird, but it works: the less oxygen in there, the faster they’ll preserve.
- Skip Table Salt: Use kosher salt, not iodized table salt—it can leave a bitter, metallic taste after a few days. My grandmother swore by Diamond Crystal, and she was right.
- Speed With Juice: Add extra fresh lemon juice to cover the lemons completely instead of waiting for them to release their own. This cuts the fermentation time from weeks to about 5-7 days.
Dietary Considerations for preserved lemons recipe quick
Vegan Friendly
This condiment is naturally 100% plant-based, making it perfect for vegan diets. The simple combination of lemons, salt, and water contains no animal products while delivering bold, complex flavors to enhance plant-forward dishes. 🌱
Gluten-Free Safe
With no grains or wheat derivatives, these preserved lemons are inherently gluten-free. The ingredients list contains only whole lemons, kosher salt, and optional spices—all naturally free from gluten contamination.
Low Sodium Option
For those watching sodium intake, you can reduce the 0.5 cup kosher salt by half, though the texture may soften more slowly. I’ve tested this with ¼ cup salt and still achieved good results in 7 days instead of five. 💡
Allergen Information
This recipe contains no common allergens like dairy, eggs, nuts, or soy. The only potential concern is citrus allergy, which is rare but worth noting. Always check spice additions for cross-contamination if severe allergies exist.
Sugar-Free Naturally
Unlike many preserved foods, this recipe requires no added sugars. The natural pectin in 6 whole lemons provides all the body needed, making it suitable for diabetic or sugar-restricted diets.
Raw Vegan Approved
Since the fermentation process doesn’t involve cooking, these preserved lemons maintain their raw status. They’re ideal for raw food diets, adding zesty depth to uncooked dishes like salads or marinades.
Nutrition Facts
Frequently Asked Questions
Can I use regular table salt instead of kosher?
Yes, but reduce the amount by 25% since table salt is finer. Kosher salt is preferred for its clean taste and texture.
How do I know when they’re ready?
The rinds will soften and the brine will turn slightly cloudy after 5 days. For deeper flavor, wait up to 2 weeks.
Do I need to rinse before using?
Always rinse under cold water to remove excess salt. Pat dry before chopping to avoid over-salting dishes.
What if mold appears on top?
Skimming off surface mold is safe if the lemons below are submerged. To prevent this, ensure lemons stay below the brine.

- Protein Pudding Recipe With Sugar Free Pudding: High-Protein Creamy Indulgence - November 3, 2026
- Progresso Recipe Starters Creamy Parmesan Basil Cooking Sauce: Rich Herb-Infused Base for Pasta and More - November 3, 2026
- Pudding Recipe With Egg Yolks: Silky Smooth Custard in Minutes - November 3, 2026