
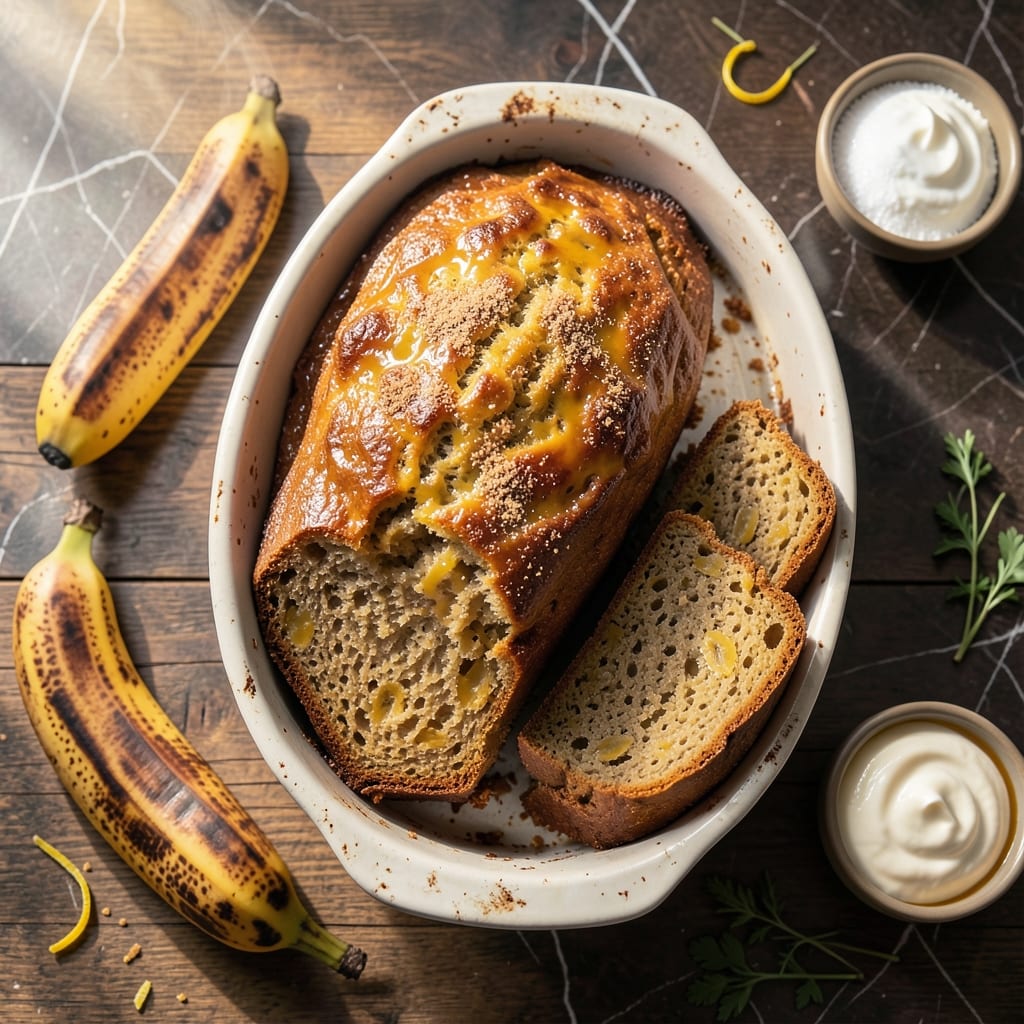
I’ve been baking this banana bread for years, and it’s the only recipe my family requests on repeat.
This version delivers moist, nutty slices every time, thanks to ripe bananas and a touch of sour cream. The walnuts add just the right crunch to each bite, making it irresistible straight from the oven.
No fancy techniques here—just mix, pour, and bake. The aroma alone will have everyone gathering in the kitchen.
Serve warm with butter or enjoy as a grab-and-go breakfast. It’s comfort in loaf form.
Ingredients for Priya Has a Recipe for Banana Bread
Ripe bananas and a few pantry staples create this family-loved loaf everyone craves.
| Ingredient | Amount | Notes |
|---|---|---|
| Ripe Bananas 🍌 | 3 whole | Very brown, heavily speckled |
| All-Purpose Flour 🌾 | 1 ¾ cups | Spoon and level method |
| Granulated Sugar 🍚 | ¾ cup | White or raw cane |
| Light Brown Sugar 🧈 | ½ cup | Packed firmly |
| Large Eggs 🥚 | 2 whole | Room temperature preferred |
| Sour Cream 🥛 | ½ cup | Full-fat for moisture |
| Vegetable Oil 🫒 | ½ cup | Or melted coconut oil |
| Vanilla Extract 🌿 | 1 tsp | Pure vanilla recommended |
| Baking Soda 🧂 | 1 tsp | Ensures proper rise |
| Salt 🧂 | ½ tsp | Kosher or sea salt |
| Ground Cinnamon 🌿 | 1 tsp | Fresh for best flavor |
| Chopped Walnuts 🌰 | ¾ cup | Toasted optional for crunch |
| Unsalted Butter 🧈 | 2 tbsp | For greasing pan and serving |
The bananas are key—use the ones with brown spots all over. I grab mine from Trader Joe’s when they’re on sale and let them ripen on the counter. The sour cream is non-negotiable for that moist texture (full-fat, no substitutions). Walnuts add crunch, so grab raw or lightly salted from the bulk bins at Whole Foods (they let you buy just what you need).
No sour cream? Greek yogurt at a 1:1 ratio works in a pinch. Swap walnuts for pecans or omit entirely if allergies are a concern. Brown sugar can be all white sugar, but you’ll lose some depth. The oil can be melted coconut oil if you prefer, though it adds a slight coconut note. Always measure flour correctly—spoon it in, don’t scoop directly from the bag.
This loaf stays fresh wrapped in foil at room temp for 2-3 days. Slice and freeze for longer storage—up to 3 months. Warm slices taste best (the butter melts right in). I always make two loaves: one to eat now, one for later.
Why You’ll Love This Recipe
- One Bowl Magic: I just dump the mashed bananas, sugars, and eggs into a single bowl, stir, and fold in the flour—no mixer, no fuss.
- Caramelized Sweetness: The combo of granulated and light brown sugar gives it that deep, molasses-kissed flavor with every bite.
- Breakfast or Dessert: Honestly, I serve it for breakfast with coffee or as a late-night snack—it works both ways.
- No Waste: Those overripe bananas on my counter? They’re the star here, so nothing goes to waste.
Step-by-Step Instructions for Banana Bread
Here’s the method. Simple steps, foolproof results, perfect every time.
Step 1: Mash Bananas and Mix Wet Ingredients
In a large bowl, mash the 3 whole Ripe Bananas with a fork until nearly smooth. A few small lumps are fine—they add texture. I like to use bananas that are very brown with plenty of speckles; the riper they are, the sweeter and more flavorful your bread will be.
Add the 0.75 cup Granulated Sugar, 0.5 cup Light Brown Sugar, 2 whole Large Eggs, 0.5 cup Sour Cream, 0.5 cup Vegetable Oil, and 1 tsp Vanilla Extract. Whisk everything together until the mixture is smooth and fully combined. This wet base ensures the bread stays moist and tender.
Step 2: Combine Dry Ingredients and Fold into Wet Mixture
In a separate bowl, whisk together the 1.75 cups All-Purpose Flour, 1 tsp Baking Soda, 0.5 tsp Salt, and 1 tsp Ground Cinnamon. This dry mix will give your bread structure while the cinnamon adds a warm, aromatic depth to the flavor.
Gradually add the dry ingredients to the wet mixture, folding gently with a spatula until just combined. Be careful not to overmix—stir only until you no longer see streaks of flour. Overmixing will make your bread dense instead of light and fluffy.
Step 3: Fold in Walnuts and Prepare the Pan
Add the 0.75 cup Chopped Walnuts to the batter and fold them in evenly. If you prefer, you can toast the walnuts first for extra crunch, but it’s optional. The nuts add a nice texture contrast and a subtle nuttiness that pairs perfectly with the banana flavor.
Preheat your oven to 350°F. Grease a 9×5-inch loaf pan with the 2 tbsp Unsalted Butter, making sure to coat the bottom and sides evenly. This prevents sticking and helps the bread release cleanly after baking.
Step 4: Bake Until Golden and Aromatic
Pour the batter into the prepared loaf pan and smooth the top with a spatula. Bake in the preheated oven for 55-65 minutes, or until the bread is golden brown and a toothpick inserted into the center comes out clean or with just a few moist crumbs.
About halfway through baking, check that the top isn’t browning too quickly. If it is, tent the pan loosely with aluminum foil to prevent over-browning while the center continues to cook. The bread is done when the top springs back lightly when touched and the sides begin to pull away from the pan.
Step 5: Cool and Serve
Remove the pan from the oven and let the bread cool in the pan for 10 minutes. This brief rest allows the bread to set and makes it easier to remove from the pan without breaking. After 10 minutes, transfer the bread to a wire rack to cool completely.
Let the bread cool for at least 1 hour before slicing. This ensures the texture is perfect and the flavors have fully developed. Serve warm or at room temperature, and enjoy the moist, nutty goodness of your homemade banana bread.
Pro Tips For Making Priya Has A Recipe For Banana Bread
- Mash Bananas Thoroughly: I learned this the hard way—lumpy bananas mean uneven texture. Use a fork or potato masher until they’re smooth, especially if they’re extra ripe.
- Room Temp Eggs: After ending up with dense bread once, I now always pull the eggs out 30 minutes early. They blend better with the sugars and bananas.
- Don’t Overmix: Stir just until the flour disappears. Overmixing develops gluten, and you’ll get tough banana bread instead of tender.
- Test with a Skewer: I used to guess doneness and ended up with raw centers. Now I check at 50 minutes with a toothpick—clean means it’s ready.
Essential Equipment for Perfect Results
Loaf Pan Essentials
For this recipe, a 9×5-inch loaf pan is non-negotiable—it ensures even baking and the perfect rise. I use a heavy-gauge aluminum pan from USA Pan because it distributes heat evenly and prevents over-browning on the edges. Avoid glass pans, as they can cause the bottom to cook too quickly. 💡
Mixing Bowls
A set of nested mixing bowls makes prep seamless. I prefer stainless steel for durability—they won’t absorb odors or stains like plastic. The 3-quart bowl from OXO Good Grips is my go-to for the wet ingredients, while a 2-quart handles the dry mix perfectly.
Whisk and Spatula
A sturdy balloon whisk blends the wet ingredients smoothly without overworking them. For folding in flour, a silicone spatula with a flexible head ensures you scrape every bit of batter from the bowl. I’ve had my Cuisinox whisk for years and it’s still going strong.
Mashing Tool
Mash those bananas with a simple fork—no fancy gadgets needed. A potato masher works too, but I find a fork gives me better control over texture. Leave a few small lumps for bursts of banana flavor in every bite. It’s the little details that make this bread special.
Cooling Rack
Never skip the wire cooling rack—it prevents the bottom of your loaf from getting soggy as it cools. I use a stainless steel rack with a grid pattern for maximum airflow. Let the bread cool for at least 1 hour before slicing to maintain structure. 🍞
Measuring Cups
Accurate measurements are key, so invest in a set of dry measuring cups for flour and sugar. I love the stainless steel set from King Arthur Baking because the handles are easy to grip and the cups nest neatly. Spoon and level your flour—never scoop directly from the bag.
Nutrition Facts
Frequently Asked Questions
Can I use frozen bananas?
Yes, thaw them completely and drain excess liquid. Frozen bananas work well and are often riper, which enhances flavor. Just ensure they’re fully thawed to room temperature before mashing.
Why does my bread turn out dense?
Overmixing the batter is the most common cause. Stir just until the flour disappears. Also, ensure your baking soda is fresh and measure flour correctly by spooning it in.
How can I make it gluten-free?
Swap the all-purpose flour for a 1:1 gluten-free baking blend. Add 1/2 tsp xanthan gum if your blend doesn’t include it. The texture will be slightly different but still delicious.
Can I bake it in a different pan size?
A 8×4-inch pan works but may need 5-10 extra minutes. For muffins, bake at 350°F for 20-25 minutes. Adjust time based on your oven’s behavior.

- Protein Pudding Recipe With Sugar Free Pudding: High-Protein Creamy Indulgence - November 3, 2026
- Progresso Recipe Starters Creamy Parmesan Basil Cooking Sauce: Rich Herb-Infused Base for Pasta and More - November 3, 2026
- Pudding Recipe With Egg Yolks: Silky Smooth Custard in Minutes - November 3, 2026