
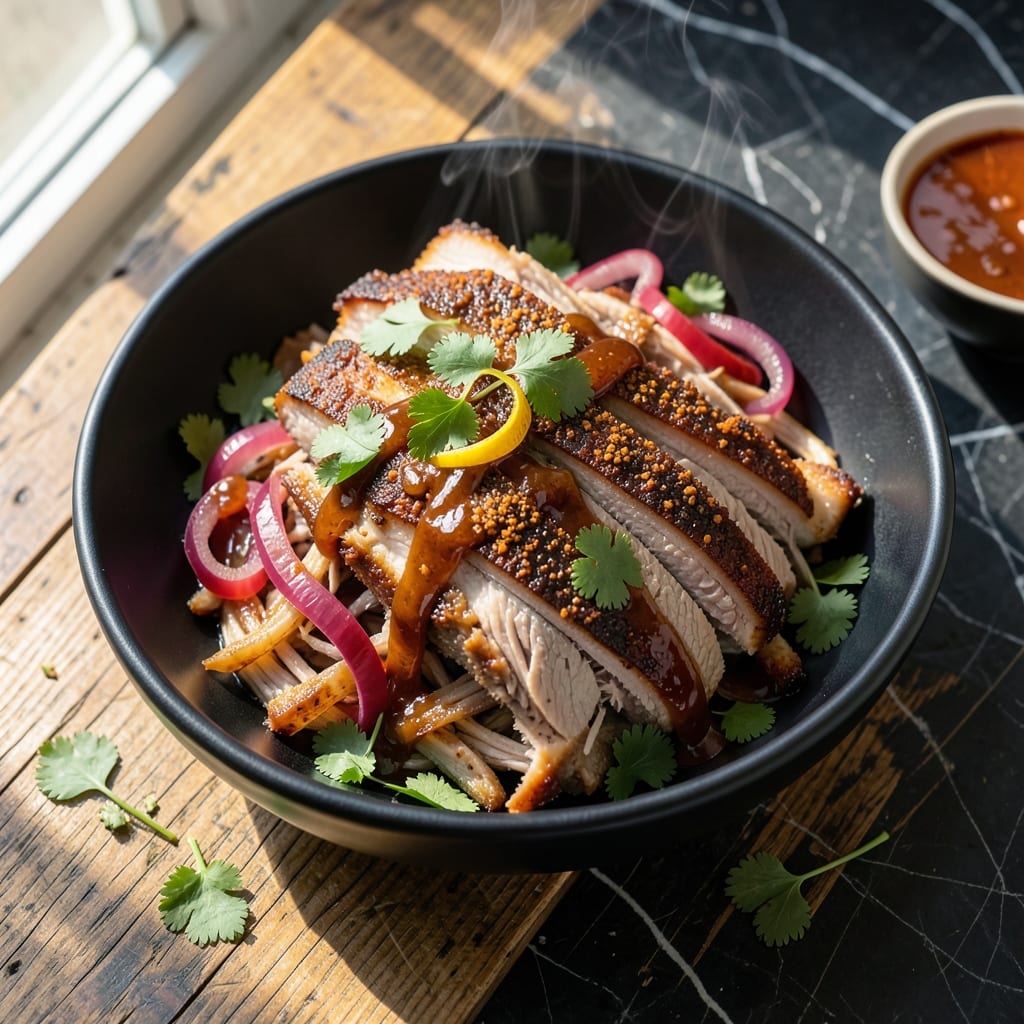
Achieving tender pulled pork without a smoker is absolutely possible with this oven method. The low, slow heat transforms tough pork shoulder into fall-apart perfection.
I’ve refined this technique to deliver that signature smoky flavor using simple pantry spices and a long cooking time. The result is juicy, flavorful meat that shreds with ease.
What you get is pork so tender it nearly melts in your mouth, with a rich bark on the outside. The aroma alone will have everyone gathering in the kitchen.
Serve on buns with your favorite sauce, or use in tacos, sandwiches, and more. This method delivers consistent results every time.
Ingredients for Pulled Pork Recipe Oven
Pantry staples meet pork shoulder for that fall-apart texture everyone loves.
| Ingredient | Amount | Notes |
|---|---|---|
| Pork Shoulder 🥩 | 4 lb | Bone-in for best flavor |
| Brown Sugar 🍚 | ½ cup | Light or dark variety |
| Paprika 🌶️ | 2 tbsp | Smoked paprika preferred |
| Garlic Powder 🧄 | 1 tbsp | Not garlic salt |
| Onion Powder 🧅 | 1 tbsp | Fresh ground preferred |
| Ground Cumin 🌿 | 1 tsp | Toasted for deeper flavor |
| Salt 🧂 | 2 tsp | Kosher or sea salt |
| Black Pepper 🌶️ | 2 tsp | Freshly ground preferred |
| Cayenne Pepper 🔥 | ½ tsp | Adjust for heat preference |
| Apple Cider Vinegar 🍏 | ½ cup | For tangy moisture |
| Liquid Smoke 💨 | 1 tbsp | For smoky depth |
| Olive Oil 🫒 | 2 tbsp | For searing pork |
| Barbecue Sauce 🍅 | 2 cups | Your favorite variety |
| Chicken Broth 🥘 | 1 cup | Low-sodium preferred |
The pork shoulder is non-negotiable here—bone-in gives you the juiciest result. Look for good marbling at Costco or your local butcher (they’ll often have larger cuts you can portion yourself). Smoked paprika is key for that authentic flavor, and Penzeys has the best selection if you’re ordering online. Don’t skip the liquid smoke (it’s the secret to smoky depth without a smoker).
No bone-in shoulder? Pork butt works just as well—it’s essentially the same cut. Swap apple cider vinegar for white vinegar in a pinch, but the apple adds a nice sweetness. Liquid smoke can be omitted, but the flavor won’t be as rich. For a tangier result, add an extra splash of vinegar. Low-sodium broth keeps the salt level in check.
Cooked pork keeps in the fridge for 4-5 days or freezes beautifully for 3 months. Portion it into meal-sized containers before freezing—makes weeknight dinners a breeze. The bark stays crispy if you store it in its juices (don’t drown it though).
Why You’ll Love This Recipe
- Set and Forget: I just rub the pork shoulder with brown sugar and spices, pop it in the oven, and let it work its magic for hours.
- Smoky Sweetness: The paprika and brown sugar caramelize into this ridculously good, sticky-sweet crust.
- Meal Prep Hero: I make a big batch on Sunday and it turns into tacos, sandwiches, or salads all week long.
- Budget Feast: Pork shoulder is so affordable, and this recipe stretches to feed a crowd with leftovers for days.
Step-by-Step Instructions for Pulled Pork Oven
Here’s my foolproof method for achieving smoky, fall-apart tender pulled pork right in your oven.
Step 1: Prepare and Season the Pork Shoulder
Pat the 4 lb Pork Shoulder dry with paper towels. This ensures the rub adheres properly and promotes even browning. In a small bowl, combine the 0.5 cup Brown Sugar, 2 tbsp Paprika, 1 tbsp Garlic Powder, 1 tbsp Onion Powder, 1 tsp Ground Cumin, 2 tsp Salt, 2 tsp Black Pepper, and 0.5 tsp Cayenne Pepper.
Rub this mixture all over the pork, pressing it into the meat so it forms a thick, flavorful crust. Don’t skip the underside—every bite should be packed with flavor. Let it sit at room temperature for 30 minutes while you preheat the oven to 300°F.
Step 2: Sear the Pork for Depth of Flavor
Heat the 2 tbsp Olive Oil in a large Dutch oven over medium-high heat. Once shimmering, add the pork shoulder and sear for 3-4 minutes per side until deeply browned. This step builds a flavorful fond at the bottom of the pot, which will infuse into the meat as it cooks.
Pour in the 0.5 cup Apple Cider Vinegar, 1 tbsp Liquid Smoke, and 1 cup Chicken Broth. The vinegar will deglaze the pan, lifting all those browned bits, while the liquid smoke adds that classic barbecue depth. Bring the liquid to a gentle simmer.
Step 3: Slow-Bake Until Fork-Tender
Cover the Dutch oven with a tight-fitting lid and transfer it to the preheated oven. Bake for 4-5 hours, turning the pork halfway through the cooking time. You’ll know it’s ready when a fork slides in effortlessly and the meat shreds with minimal pressure.
Real talk: Resist the urge to check it too often. Every time you open the oven, you lose precious heat and extend the cooking time. Trust the process—the low and slow method guarantees that tender, juicy result promised in the title.
Step 4: Shred and Sauce the Pork
Remove the pork from the oven and transfer it to a large cutting board. Use two forks to shred the meat into bite-sized pieces, discarding any large chunks of fat. Skim excess fat from the cooking liquid, then pour about ½ cup of it over the shredded pork to keep it moist.
Stir in 2 cups Barbecue Sauce until the pork is evenly coated. If the mixture seems dry, add a splash more of the reserved cooking liquid. This ensures every strand of meat is flavorful and glistening with sauce.
Pro Tips For Making Pulled Pork Recipe Oven
- Use Low and Slow: Set your oven to 275°F and give it at least 6 hours—rushing with higher heat just turns the pork tough instead of tender.
- Score the Fat Cap: I learned this the hard way: slice shallow cuts into the fat cap before seasoning so the rub actually penetrates and the fat renders properly.
- Skip the Water Bath: Resist the urge to add liquid to the pan; the pork releases enough juices on its own, and extra moisture just steams it instead of roasting.
- Rest Before Shredding: After pulling it from the oven, tent the pork with foil and let it sit 15-20 minutes—it reabsorbs the juices and shreds way easier.
Pro Cooking Tips for pulled pork recipe oven
Perfect Dutch Oven Choice
I swear by my Le Creuset 7-quart Dutch oven for this recipe—it distributes heat evenly and retains moisture beautifully. A budget-friendly Lodge enameled cast iron works just as well. The heavy lid creates a steamy environment that breaks down the connective tissues perfectly.
Searing Pro Tips
Don’t crowd the pork in the pot—if your Dutch oven is too small, use a heavy skillet for searing. Get that oil shimmering hot before adding the meat to achieve a deep, flavorful crust. I always hear that sizzle when the pork hits the pan, which tells me it’s ready.
Temperature Control
Maintain that 300°F oven temperature consistently—no peeking for the first 2 hours. If your oven runs hot, check the pork at 3.5 hours. An oven thermometer helps verify accuracy, as many home ovens can be off by 25-50°F. 🌡️
Enhance the Bark
For extra crispy bark, remove the lid for the last 30 minutes of cooking. The exposed surface will caramelize beautifully. Just watch closely to prevent drying out—this technique works best with bone-in cuts that retain moisture longer.
Rest Before Shredding
Let the pork rest in its juices for 20-30 minutes after removing from the oven. This allows the meat to reabsorb some of the cooking liquid, making it juicier when shredded. I always notice the texture improves dramatically with this simple step. 💡
Sauce Integration
Fold in the barbecue sauce while the pork is still warm—it absorbs better than when cold. Use a light hand at first; you can always add more. I prefer mixing the sauce in gradually to avoid overwhelming the natural pork flavor.
Nutrition Facts
Frequently Asked Questions
What cut of pork works best?
Use bone-in pork shoulder or pork butt for the juiciest results. These cuts have ample marbling that breaks down beautifully during the 4-5 hour cook time, creating that signature tenderness.
Can I cook it at a higher temperature to save time?
Not recommended. The 300°F low-and-slow method is key for breaking down collagen. Higher temps risk drying out the meat before it becomes tender.
How do I know when it’s done?
The pork is ready when a fork inserts effortlessly and the meat shreds with minimal pressure. This typically happens at an internal temp of 195-203°F.
Should I add liquid during cooking?
Only if the pan looks dry. The initial 1 cup broth and vinegar create enough steam. Adding too much liquid can dilute the flavors and prevent bark formation.

- BBQ Sausage Recipe Oven: Smoky Depth Without the Grill - September 28, 2026
- BBQ Chicken Bowl Recipe Rice: Smoky Sweetness Over Fluffy Grains - September 28, 2026
- Beef Cutlet Recipe Ideas: Crispy Breaded Patties With Bold Seasonings - September 28, 2026