
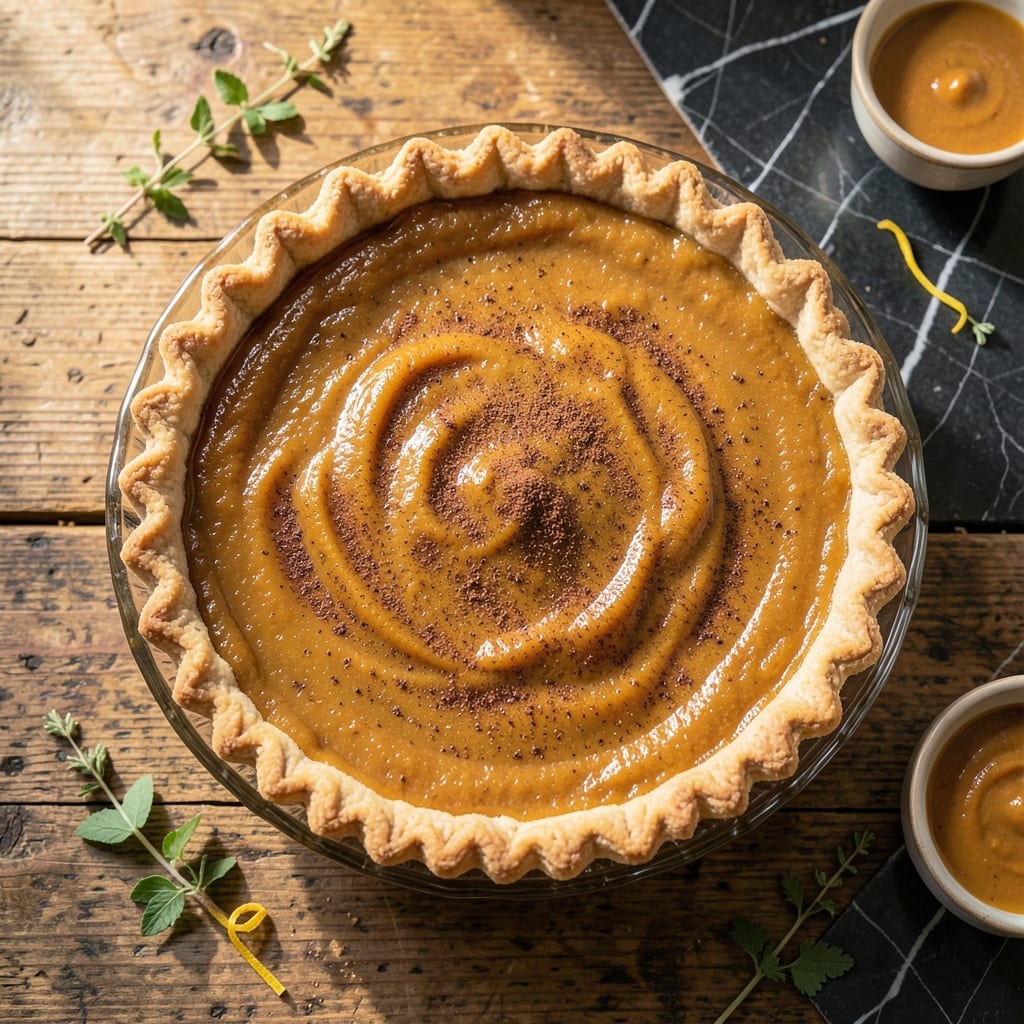
This classic dessert transforms canned pumpkin into a velvety custard with warm spices and a flaky crust.
Using evaporated milk creates the perfect creamy texture without curdling, while a pre-baked crust prevents sogginess.
Ingredients for Pumpkin Pie Recipe with Evaporated Milk
A handful of pantry staples transforms canned pumpkin into that velvety holiday classic you crave.
| Ingredient | Amount | Notes |
|---|---|---|
| Canned Pumpkin Puree 🎃 | 15 oz | Not pumpkin pie filling |
| Evaporated Milk 🥛 | 12 oz | Whole milk variety preferred |
| Granulated Sugar 🍚 | ¾ cup | Fine white sugar |
| Light Brown Sugar 🟤 | ¼ cup | Packed firmly |
| Large Eggs 🥚 | 2 whole | Room temperature preferred |
| Ground Cinnamon 🌿 | 1 tsp | Freshly ground if possible |
| Ground Ginger 🌿 | ½ tsp | Dry ground spice |
| Ground Nutmeg 🌰 | ¼ tsp | Freshly grated preferred |
| Ground Cloves 🌿 | ¼ tsp | Strong flavor, measure precisely |
| Salt 🧂 | ½ tsp | Fine table salt |
| Unbaked Pie Crust 🥧 | 1 whole | 9-inch standard size |
| Unsalted Butter 🧈 | 2 tbsp | For crust pre-baking |
The evaporated milk is non-negotiable for that signature creamy texture—Carnation or store brand both work, but avoid sweetened condensed milk. For the pumpkin, Libby’s 100% pure pumpkin is the standard; it’s thick and rich without additives. The spices should be fresh; if your cinnamon smells like nothing, it’s time to replace it. I source mine from Penzeys for consistent quality.
No evaporated milk? Heavy cream at half the volume works, but the texture will differ slightly. Brown sugar can be all granulated in a pinch (add 1 tbsp molasses to compensate). For the crust, a store-bought refrigerated pie crust saves time, or use your favorite homemade. The eggs are essential for structure—no reliable vegan swap for this version.
Pre-bake the crust up to 2 days ahead—store covered at room temperature. The filling can be mixed 1 day ahead and refrigerated. Baked pie keeps 3-4 days in the fridge or freezes beautifully for 2 months. Always thaw overnight before serving.
Why You’ll Love This Recipe
- One Bowl Wonder: I just dump the pumpkin puree, evaporated milk, sugars, and eggs in a bowl, whisk, and pour—no fuss, no extra dishes.
- Rich Creamy Bite: The evaporated milk gives it that velvety texture that’s way better than regular milk, and the brown sugar adds a deep caramel note.
- Holiday Staple: Honestly, it’s my go-to for Thanksgiving, but I’ve also made it for random Sunday dinners just because.
- Budget Friendly: A can of pumpkin and evaporated milk cost pennies, and one pie feeds my whole family with leftovers for breakfast.
Step-by-Step Instructions for Pumpkin Pie With Evaporated Milk
This method ensures a silky custard with perfectly balanced spices and a flaky crust.
Step 1: Pre-Bake the Unbaked Pie Crust
Preheat your oven to 425°F. Press the unbaked pie crust into a 9-inch pie dish, crimping the edges as desired. Prick the bottom all over with a fork to prevent air bubbles.
Line the crust with parchment paper and fill with pie weights or dried beans. Bake for 8 minutes, then carefully remove the parchment and weights. Return to the oven for 4-5 minutes until the crust is light golden brown and set. Brush the hot crust with 2 tbsp unsalted butter melted, then let cool slightly.
Step 2: Combine Wet Ingredients and Sugars
In a large bowl, whisk together 15 oz canned pumpkin puree, 12 oz evaporated milk, 0.75 cup granulated sugar, and 0.25 cup light brown sugar packed firmly. Use a sturdy whisk and mix until the sugars fully dissolve and the mixture is smooth.
The evaporated milk creates a richer, creamier texture than regular milk. Ensure no lumps remain in the brown sugar—this guarantees a uniform custard without graininess.
Step 3: Incorporate Eggs and Spices
Add 2 whole large eggs one at a time, whisking vigorously after each addition until fully incorporated. This step is crucial for achieving the signature velvety texture.
Sprinkle in 1 tsp ground cinnamon, 0.5 tsp ground ginger, 0.25 tsp ground nutmeg, 0.25 tsp ground cloves, and 0.5 tsp salt. Whisk for an additional 30 seconds to evenly distribute the spices. The mixture should appear slightly thickened and uniform in color.
Step 4: Pour and Bake the Filling
Pour the filling into the pre-baked crust. Smooth the top with a spatula. Bake at 425°F for 15 minutes, then reduce the temperature to 350°F and continue baking for 40-50 minutes.
The pie is done when the edges are set but the center still has a slight wobble—2-3 inches in diameter—when gently shaken. This indicates the custard will finish setting as it cools without overbaking.
Step 5: Cool and Serve
Remove the pie from the oven and transfer to a wire rack. Let it cool completely at room temperature for at least 2 hours. This cooling period allows the custard to fully set and develop its characteristic smooth texture.
Once cooled, the pie can be served immediately or refrigerated for up to 2 days. For the best texture, bring refrigerated pie to room temperature for 30 minutes before slicing and serving.
Pro Tips For Making Pumpkin Pie Recipe With Evaporated Milk
- Preheat the Oven: Always start with a 425°F oven for the first 15 minutes, then drop to 350°F. I learned this the hard way—skipping this step gives you a soggy crust instead of that perfect flaky base.
- Use Room-Temp Eggs: Pull your eggs out 30 minutes before mixing. Sounds weird, but it works: they blend smoother into the pumpkin and evaporated milk, preventing lumps in your custard.
- Don’t Overmix: Stir just until the evaporated milk, sugars, and pumpkin are combined. After burning three batches, I finally figured out overmixing adds air, which cracks the surface as it bakes.
- Check at 50 Minutes: Start testing doneness at 50 minutes—insert a knife near the center. If it comes out clean (but not dry), pull it out. My grandmother swore by this, and she was right: overbaking ruins the creamy texture.
Health Benefits of pumpkin pie recipe with evaporated milk
Vitamin A Boost
This dish delivers an impressive 245% of your daily vitamin A needs per slice, thanks to the pumpkin’s rich beta-carotene content. Vitamin A supports vision, immune function, and skin health. I notice my skin looks brighter after enjoying this treat. 💛
Fiber Rich Dessert
Each serving provides about 3 grams of fiber, which aids digestion and helps maintain stable blood sugar levels. The pumpkin puree is the star here, offering more fiber than you’d expect from a dessert. It’s a guilt-free indulgence.
Calcium Source
The evaporated milk contributes a significant amount of calcium—about 20% of your daily value per slice. This mineral is essential for bone health and muscle function. It’s a great way to sneak in some nutrition.
Antioxidant Spices
The warming spices like cinnamon and cloves aren’t just for flavor—they’re packed with antioxidants. Cinnamon, in particular, has anti-inflammatory properties. These spices make this dessert as nourishing as it is delicious.
Moderate Calories
A single slice contains around 320 calories, which is reasonable for a dessert. The evaporated milk keeps the texture creamy without adding excessive fat. I appreciate that it satisfies my sweet tooth without overindulgence.
Protein Content
While not a high-protein food, each slice still provides about 6 grams of protein, mainly from the eggs and evaporated milk. This helps balance the natural sugars from the pumpkin and sugars. It’s a well-rounded treat.
Frequently Asked Questions
Why use evaporated milk instead of regular milk?
Evaporated milk has 60% less water than regular milk, creating a richer, creamier custard that sets perfectly. It also prevents curdling and adds a velvety texture that regular milk can’t achieve.
Can I make this pie ahead of time?
Yes! Bake the pie up to 2 days ahead and refrigerate. The pre-baked crust can be made 2 days in advance, and the filling can be mixed 1 day ahead. Bring to room temperature before serving.
How do I know when the pie is done?
The edges should be set with a slight 2-3 inch wobble in the center. Overbaking causes cracking. The custard firms as it cools, reaching perfect texture after 2 hours.
Nutrition Facts

- BBQ Sausage Recipe Oven: Smoky Depth Without the Grill - September 28, 2026
- BBQ Chicken Bowl Recipe Rice: Smoky Sweetness Over Fluffy Grains - September 28, 2026
- Beef Cutlet Recipe Ideas: Crispy Breaded Patties With Bold Seasonings - September 28, 2026