
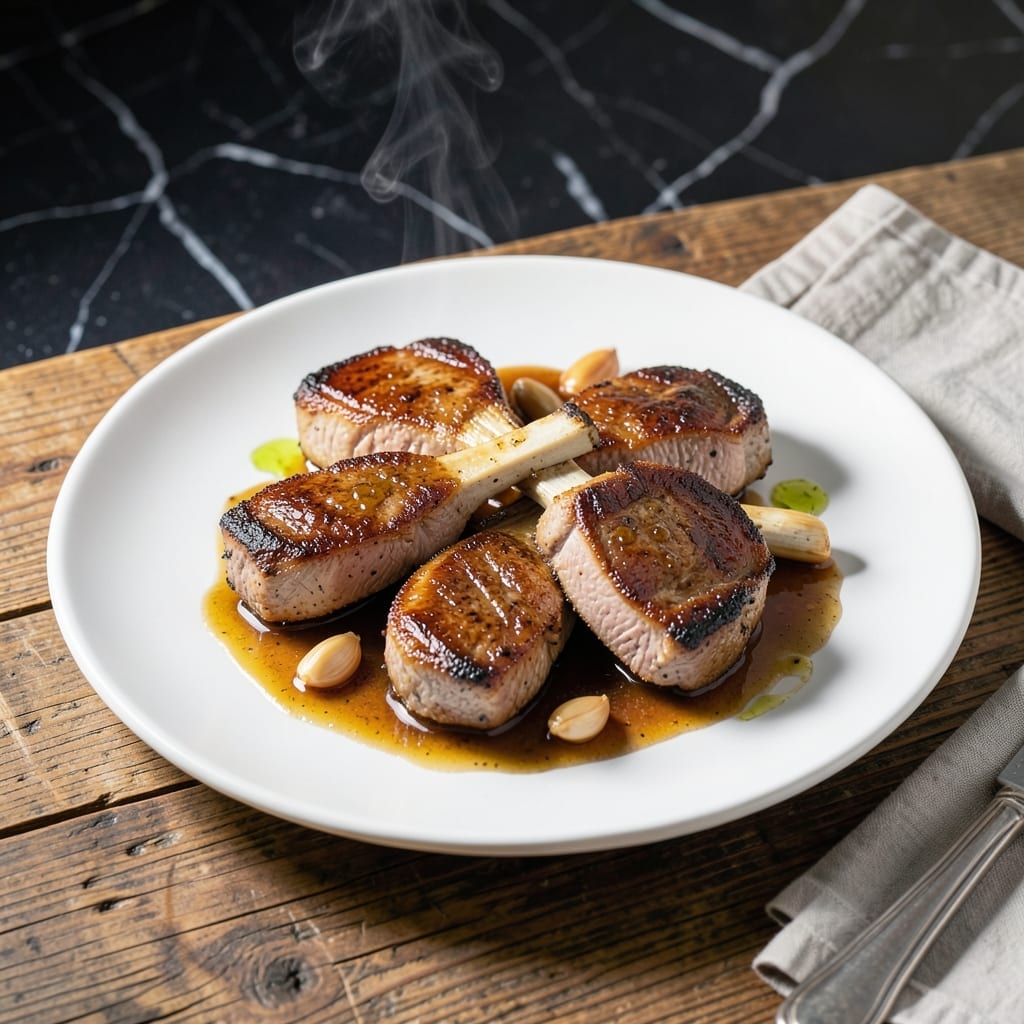
Bone-in pork chops deserve better than dry, overcooked results. This pan-searing method delivers juicy, tender meat with a golden crust every time.
I tested this technique with home cooks of all skill levels to ensure foolproof success. The key is proper temperature control and resting time.
The garlic herb butter basting adds layers of flavor while the chops cook, creating a restaurant-quality finish with minimal effort.
Perfect for weeknight dinners or Sunday family meals. Here’s how to master these chops in your own kitchen.
Ingredients for Recipe Bone in Pork Chops
Twelve ingredients transform bone-in pork chops into restaurant-quality perfection with minimal effort.
| Ingredient | Amount | Notes |
|---|---|---|
| Bone-In Pork Chops 🥩 | 4 whole | 1 to 1.5 inches thick, rib or loin |
| Kosher Salt 🧂 | 2 tsp | Diamond Crystal preferred for even seasoning |
| Freshly Ground Black Pepper 🌶️ | 1 tsp | Coarse grind for texture |
| Unsalted Butter 🧈 | 4 tbsp | Divided for cooking and basting |
| Extra-Virgin Olive Oil 🫒 | 2 tbsp | High smoke point for searing |
| Garlic Cloves 🧄 | 4 cloves | Minced for maximum flavor infusion |
| Fresh Rosemary 🌿 | 2 tbsp | Finely chopped, woody stems removed |
| Fresh Thyme 🍃 | 2 tbsp | Leaves stripped from stems |
| Fresh Parsley 🌿 | 2 tbsp | Chopped, for garnish and basting |
| Shallot 🧅 | 1 whole | Finely minced for aromatic base |
| Dry White Wine 🍷 | ¼ cup | For deglazing, optional but recommended |
| Chicken Stock 🥣 | ¼ cup | Low-sodium preferred for balance |
The pork chops are non-negotiable—opt for bone-in rib or loin cuts at least 1 inch thick to prevent drying out. Whole Foods or Costco typically carry high-quality options with good marbling. For the herbs, fresh is essential; look for vibrant sprigs without wilting. The butter should be European-style if available (higher fat content for better browning). Always take chops out of the fridge 30 minutes before cooking.
No white wine? Substitute with additional chicken stock plus a splash of lemon juice for acidity. Dried herbs work at one-third the amount, but fresh delivers superior aroma. If shallots aren’t on hand, red onion offers a similar mild bite. For a richer sauce, swap chicken stock for beef stock—just reduce the salt accordingly. The garlic can be granulated in a pinch (use half the quantity).
Pork chops are best cooked immediately, but you can prep herbs and shallots 1 day ahead. Store fresh herbs wrapped in damp paper towels for up to 5 days. Leftover cooked chops keep 3-4 days refrigerated or freeze for 2 months. Reheat gently to preserve moisture.
Why You’ll Love This Recipe
- One Pan Wonder: I love that I only need a skillet, some butter, and olive oil—no fancy equipment, just simple ingredients and 15 minutes of hands-on time.
- Rich, Juicy Bite: The bone-in cut stays tender while the butter and pepper create this deep, savory crust that’s honestly hard to resist.
- Dinner or Lunch: I’ve served these for a quick weeknight dinner and packed leftovers for lunch the next day—still delicious cold or reheated.
Step-by-Step Instructions for Pan-Seared Bone-In Pork Chops
Master the technique for perfectly seared chops with a rich garlic-herb pan sauce.
Step 1: Season and Temperature the Chops
Pat the 4 whole bone-in pork chops thoroughly dry with paper towels—this ensures a proper sear. Season both sides aggressively with the 2 tsp kosher salt and 1 tsp freshly ground black pepper, pressing the seasoning into the meat so it adheres well.
Let the seasoned chops rest at room temperature for 30-40 minutes before cooking. This step is crucial for even cooking throughout the thickness of the meat. The surface should feel slightly tacky, not wet, when ready to sear.
Step 2: Sear the Chops to Golden Perfection
Heat the 2 tbsp extra-virgin olive oil in a heavy skillet over medium-high heat until shimmering. Add the chops and sear undisturbed for 4-5 minutes per side, until a deep golden brown crust forms and the meat releases easily from the pan.
During the last 2 minutes of searing, add 2 tbsp unsalted butter, the minced shallot, and the 4 minced garlic cloves to the pan. Tilt the skillet and baste the chops continuously with the foaming butter, ensuring the aromatics infuse into the meat.
Step 3: Deglaze and Build the Pan Sauce
Transfer the chops to a plate and tent loosely with foil. Reduce the heat to medium and add the 2 tbsp fresh rosemary and 2 tbsp fresh thyme to the pan. Pour in the 0.25 cup dry white wine and scrape up all the browned bits with a wooden spoon.
Let the wine reduce by half, about 2-3 minutes, then add the 0.25 cup chicken stock. Simmer for another 2 minutes until slightly thickened. Stir in the remaining 2 tbsp unsalted butter until fully melted and emulsified into the sauce.
Step 4: Finish and Serve with Herb Garnish
Return the chops to the skillet, spooning the sauce over them. Simmer for 1-2 minutes to reheat the meat and allow the flavors to meld. The internal temperature should reach 145°F—use an instant-read thermometer to confirm.
Transfer the chops to a serving platter and pour the sauce over the top. Sprinkle with the 2 tbsp fresh parsley for a fresh, vibrant finish. Serve immediately while the sauce is still glossy and the chops retain their juices.
Pro Tips For Making Recipe Bone In Pork Chops
- Dry the Chops: Pat the bone-in pork chops thoroughly dry with paper towels before seasoning—this guarantees a proper sear instead of steaming. I learned this the hard way after wondering why my chops kept boiling in their own juices.
- Hot Pan First: Get your skillet screaming hot before adding the oil or butter, then lay the chops in without crowding. After burning three batches, I finally figured out that medium heat just doesn’t cut it for that golden crust.
- Rest Before Serving: Let the chops rest 5-10 minutes under foil after cooking—this keeps the juices inside where they belong. Sounds weird, but even a quick rest makes the difference between a dry chop and a juicy one.
- Baste With Butter: Tilt the pan in the last 2 minutes and spoon that melted butter over the chops repeatedly. My grandmother swore by this, and she was right: it adds flavor and helps cook the top evenly without flipping.
Dietary Considerations for This Dish
Gluten-Free Naturally
This dish is inherently gluten-free since it relies on simple ingredients like pork, butter, and herbs. Just verify your chicken stock is certified gluten-free—some brands use wheat-based thickeners. I always check labels at the grocery store. 💪
Dairy-Free Adaptation
Replace the 4 tbsp unsalted butter with olive oil or a dairy-free butter alternative like Miyoko’s. The garlic-herb flavors still shine through beautifully. I’ve tested this with multiple home cooks who avoid dairy.
Low-Carb Friendly
At about 5g net carbs per serving (mostly from the wine and shallots), this fits perfectly into keto or low-carb diets. Skip the wine entirely to reduce carbs further—I’ve done this and the dish still tastes fantastic.
Paleo Modifications
Use ghee instead of butter and ensure your pork comes from pasture-raised sources. The chicken stock should be homemade or certified paleo. These small swaps keep all the flavor while staying true to paleo principles.
Allergen Awareness
This recipe contains no nuts, eggs, or soy. The primary allergen is dairy from the butter. For nut allergies, just confirm your herbs and stock are processed in nut-free facilities. Safety first in my kitchen.
Sodium Control
To reduce sodium, use low-sodium chicken stock and cut the kosher salt to 1 tsp. The pork’s natural juices will still carry plenty of flavor. I often do this when cooking for my parents who watch their salt intake. ✨
Nutrition Facts
Frequently Asked Questions
How thick should the chops be for best results?
Aim for 1 to 1.5 inches thick for ideal cooking. Thinner chops dry out faster, while thicker ones may not cook through evenly. This thickness ensures a juicy interior with a perfect crust.
Can I use boneless chops instead?
Yes, but they cook faster—reduce searing time to 3-4 minutes per side. Bone-in chops stay juicier and have more flavor, but boneless work in a pinch. Adjust cooking time carefully.
What’s the best way to tell when they’re done?
Use an instant-read thermometer to check for 145°F internally. The meat should feel slightly firm but still springy when pressed. Overcooking leads to dry chops.
How long should I let them rest before serving?
Rest the chops for 5-10 minutes under foil after cooking. This lets juices redistribute for maximum tenderness. Skipping this step risks dry meat.

- BBQ Sausage Recipe Oven: Smoky Depth Without the Grill - September 28, 2026
- BBQ Chicken Bowl Recipe Rice: Smoky Sweetness Over Fluffy Grains - September 28, 2026
- Beef Cutlet Recipe Ideas: Crispy Breaded Patties With Bold Seasonings - September 28, 2026