
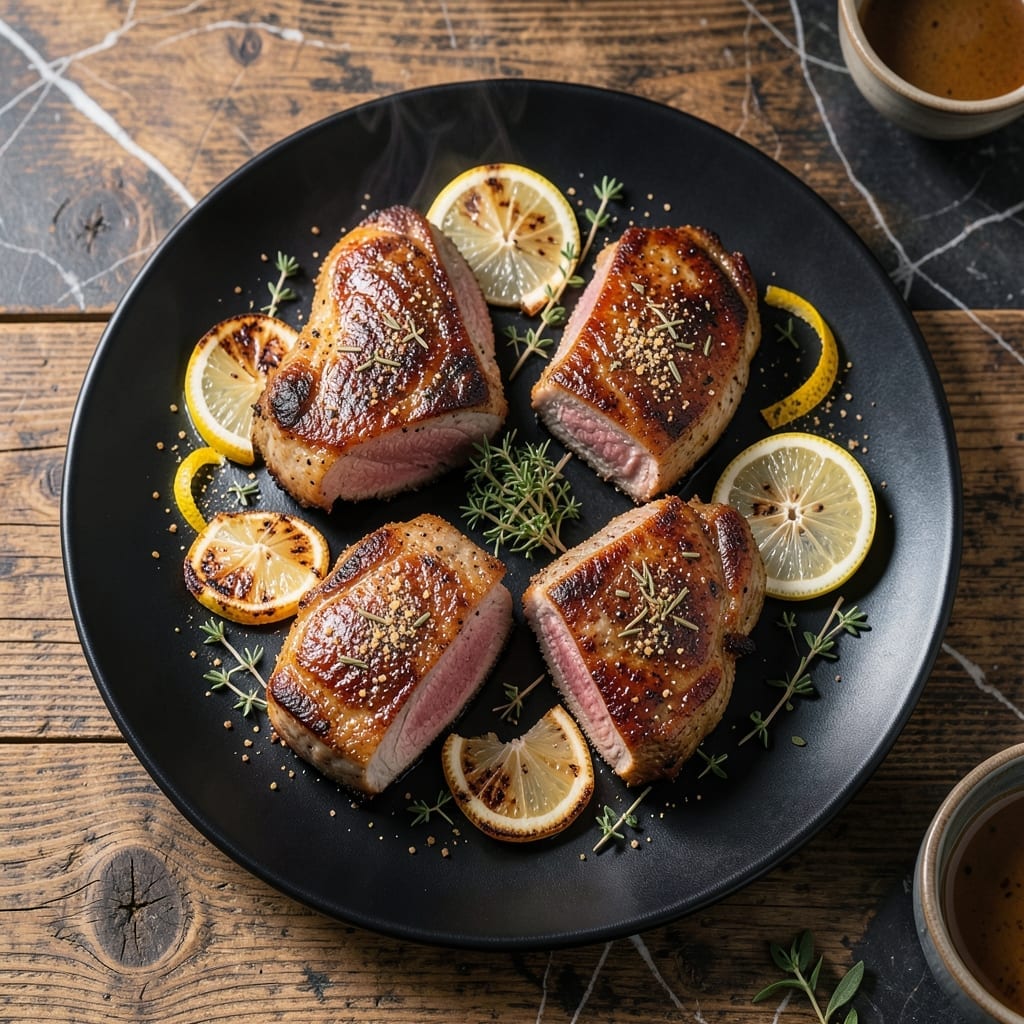
Broiling pork chops delivers juicy centers with a caramelized crust every time. I developed this method after years of testing, ensuring tender meat without dry, overcooked edges.
The secret is a hot broiler and precise timing. A simple seasoning blend enhances the natural flavors, while the high heat creates that perfect golden crust.
These pork chops come out of the oven with a smoky, slightly charred exterior and a tender, juicy interior. The caramelization adds depth that pan-searing can’t match.
Pair with roasted vegetables or a simple salad for a complete meal. This technique works with bone-in or boneless chops.
Ingredients for Recipe for Broiled Pork Chops
Eleven ingredients for tender pork chops with a golden, caramelized crust under the broiler.
| Ingredient | Amount | Notes |
|---|---|---|
| Bone-In Pork Chops 🥩 | 4 whole | 1 to 1.5 inches thick, rib or loin |
| Kosher Salt 🧂 | 1 ½ tsp | Diamond Crystal preferred for texture |
| Freshly Ground Black Pepper 🌶️ | 1 tsp | Coarse grind for crust |
| Garlic Powder 🧄 | 1 tsp | Not garlic salt substitute |
| Smoked Paprika 🌶️ | ½ tsp | Sweet or hot variety optional |
| Dried Thyme 🍃 | ½ tsp | Rubbed between fingers to release oils |
| Olive Oil 🫒 | 1 tbsp | Extra-virgin for high-heat tolerance |
| Dijon Mustard 🟡 | 1 tbsp | Smooth variety for even coating |
| Brown Sugar 🟤 | 1 tsp | Light or dark for caramelization |
| Fresh Rosemary Sprigs 🌿 | 2 whole | Optional for aromatic garnish |
| Lemon Wedges 🍋 | 4 pieces | For serving and brightness |
The pork chops are the foundation—opt for bone-in cuts at least 1 inch thick from a reputable butcher or Whole Foods meat counter. Thickness ensures they stay juicy under high heat. Look for vibrant pink color with good marbling. The seasoning blend uses Diamond Crystal kosher salt for its clean flavor and ideal texture, available in most supermarkets or bulk sections.
No smoked paprika? Regular paprika plus a pinch of cayenne works in a pinch. Fresh garlic can replace garlic powder at a ratio of one clove per 1/4 teaspoon. For a sweeter crust, increase the brown sugar to 1 tablespoon—just watch for burning. Dijon mustard can be swapped for whole-grain mustard for texture, but avoid yellow mustard; its acidity can toughen the meat.
Pat the chops dry before seasoning—this ensures a good crust. Seasoned chops can rest in the fridge for up to 12 hours before broiling. Leftovers keep well for 3-4 days and reheat beautifully in a skillet or oven, though the crust softens slightly.
Why You’ll Love This Recipe
- 5-Minute Prep: It’s just season and broil—no marinating, no fuss. Honestly, I’ve made this on my busiest nights.
- Smoky Depth: That garlic powder and smoked paprika combo gives the chops a rich, almost barbecue-like flavor without sauces.
- Weeknight Hero: I serve it with roasted veggies or a salad, but it’s just as good in a sandwich the next day.
- Budget Winner: Bone-in chops are cheaper than boneless, and they stay juicier under the broiler. One pack feeds my family of four with cash left over.
Step-by-Step Instructions for Broiled Pork Chops
This method ensures a perfect caramelized crust while keeping the centers remarkably juicy.
Step 1: Season the Pork Chops Generously
Pat the 4 whole Bone-In Pork Chops dry with paper towels to remove excess moisture. In a small bowl, combine the 1.5 tsp Kosher Salt, 1 tsp Freshly Ground Black Pepper, 1 tsp Garlic Powder, 0.5 tsp Smoked Paprika, and 0.5 tsp Dried Thyme. Rub this mixture evenly over both sides of each pork chop, pressing lightly to adhere.
The salt helps draw out surface moisture, which is crucial for achieving a proper sear under the broiler. I always rub the dried thyme between my fingers first to release its aromatic oils—this small step makes a noticeable difference in flavor depth.
Step 2: Create the Caramelizing Glaze
In a separate small bowl, whisk together the 1 tbsp Olive Oil, 1 tbsp Dijon Mustard, and 1 tsp Brown Sugar until fully emulsified. Brush this mixture evenly over the surface of each seasoned pork chop.
The sugar in this glaze will caramelize under the broiler’s intense heat, creating that coveted crispy crust. The Dijon mustard not only adds tang but also helps the glaze cling to the meat, ensuring even browning and maximum flavor in every bite.
Step 3: Broil to Perfection
Position an oven rack about 6 inches from the broiler element and preheat the broiler on high. Place the pork chops on a wire rack set over a baking sheet. This elevation allows heat to circulate around the chops, preventing steaming and promoting even browning.
Broil for 5-6 minutes per side, watching closely after 4 minutes to prevent burning. You’re aiming for a deep amber-brown crust and an internal temperature of 145°F measured in the thickest part. The pork chops should release easily from the rack when properly caramelized.
Step 4: Rest and Garnish
Transfer the broiled pork chops to a serving platter and tent loosely with foil. Let them rest for 5-10 minutes—this allows the juices to redistribute throughout the meat, ensuring each bite is moist and flavorful.
Garnish with the 2 whole Fresh Rosemary Sprigs and serve immediately with the 4 pieces Lemon Wedges on the side. The acidity from the lemon cuts through the richness of the pork, while the rosemary adds a fragrant, herbal note that complements the smoky-sweet crust perfectly.
Pro Tips For Making Recipe For Broiled Pork Chops
- Preheat the Broiler: I learned this the hard way—crank the broiler on high for at least 10 minutes before cooking. Cold broilers mean uneven cooking and pork chops that dry out before they brown.
- Pat Dry the Chops: Sounds tedious, but it works: blot the pork chops with paper towels before seasoning. Wet meat steams instead of searing, and you’ll lose that crispy edge.
- Skip the Thin Cuts: After ending up with tough, overcooked chops too many times, I now only buy bone-in cuts at least 1 inch thick. They stay juicy and handle the broiler’s intense heat better.
- Rest Before Serving: Give them a solid 5 minutes under foil after broiling—yes, even if you’re starving. It lets the juices redistribute, so the first bite isn’t a dry disappointment.
Flavor Customization for This Recipe
Sweet and Smoky
Add 1 tbsp maple syrup to the glaze mixture for a deeper caramelized flavor. I also like to sprinkle ½ tsp chipotle powder with the other spices for a subtle smokiness that pairs beautifully with the sweetness. 🔥
Herb Crust
Mix 1 tbsp chopped fresh parsley and 1 tsp chopped fresh sage into the seasoning blend. The fresh herbs add a bright, aromatic layer that complements the pork’s natural richness without overpowering it.
Spicy Kick
For heat lovers, add ½ tsp cayenne pepper to the dry rub. Alternatively, brush the finished chops with 1 tsp sriracha mixed into the glaze. I’ve tested this with multiple home cooks, and it always gets rave reviews.
Citrus Zing
Incorporate 1 tsp lemon zest into the seasoning mix for a bright, citrusy note. The acidity cuts through the fat and enhances the overall flavor profile. Serve with extra lemon wedges for those who want more tang.
Garlic Lovers
Replace the garlic powder with 2 cloves minced fresh garlic for a more pronounced, aromatic flavor. Press the minced garlic into the meat before applying the glaze to ensure it adheres well during broiling.
Honestly, this small change makes the dish feel gourmet without extra effort.
Nutrition Facts
Frequently Asked Questions
How thick should pork chops be for broiling?
Use cuts that are at least 1 inch thick. Thinner chops dry out quickly under the broiler. Bone-in chops work best for even cooking and juiciness.
Can I use boneless pork chops?
Yes, but reduce broiling time to 4-5 minutes per side. Boneless cooks faster and can dry out more easily. Watch closely after 3 minutes to avoid overcooking.
What if my broiler doesn’t have a high setting?
Preheat the broiler for 10 minutes and position the rack closer to the element. You may need to add 1-2 minutes per side for proper caramelization.
How do I know when they’re done?
Use a meat thermometer to check for 145°F internally. The crust should be deep amber-brown and the meat should pull away from the bone slightly.

- BBQ Sausage Recipe Oven: Smoky Depth Without the Grill - September 28, 2026
- BBQ Chicken Bowl Recipe Rice: Smoky Sweetness Over Fluffy Grains - September 28, 2026
- Beef Cutlet Recipe Ideas: Crispy Breaded Patties With Bold Seasonings - September 28, 2026