
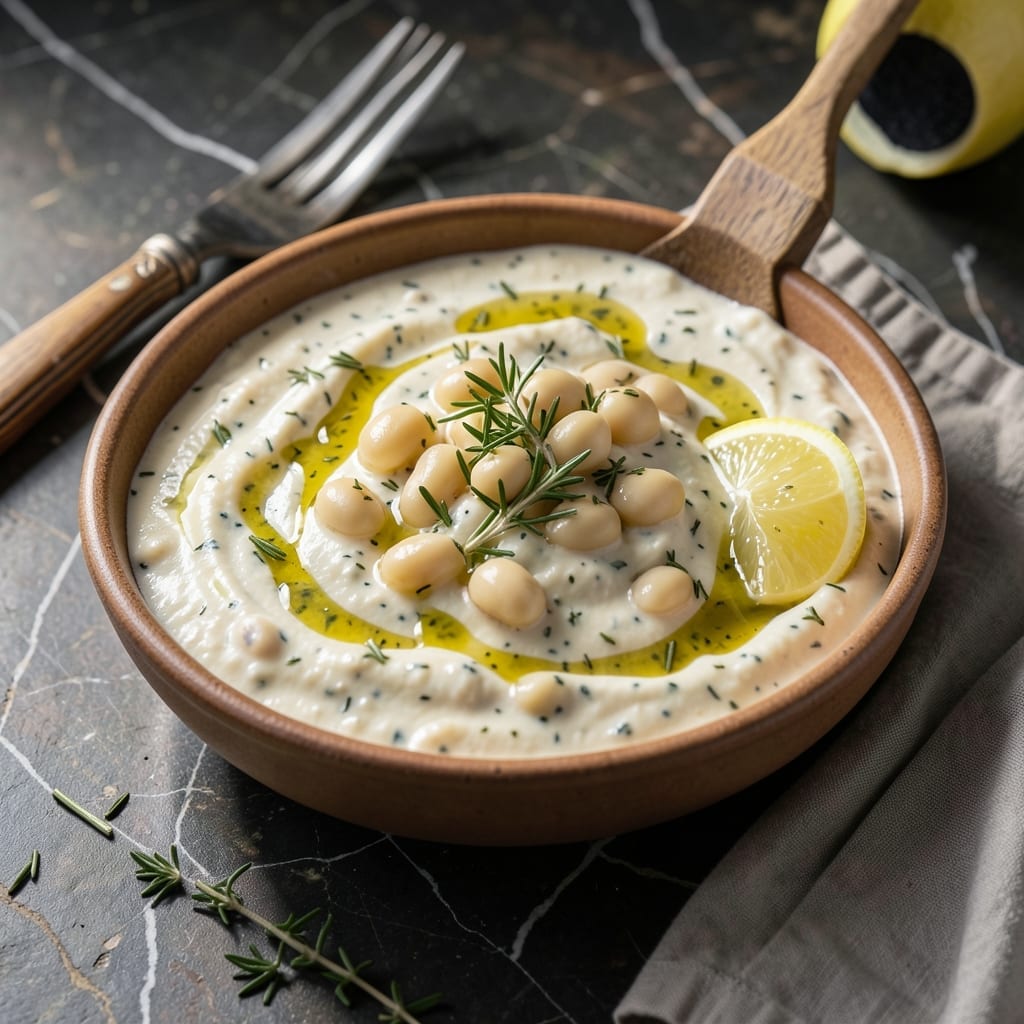
This smooth white bean dip transforms simple cannellini beans into a rich, velvety spread with minimal effort. The blend of garlic, lemon, and herbs creates a flavor profile that’s both fresh and deeply satisfying.
Perfect for parties or meal prep, this dip comes together in 10 minutes and stays fresh for days. Serve with warm pita, crudités, or as a sandwich spread for a protein-packed boost.
Ingredients for Recipe for Cannellini Bean Dip
Cannellini beans, fresh herbs, and bright citrus create this luxurious, protein-rich spread.
| Ingredient | Amount | Notes |
|---|---|---|
| Cannellini Beans 🫘 | 2 cans | Drained and rinsed thoroughly |
| Garlic Cloves 🧄 | 4 cloves | Peeled and minced |
| Extra-Virgin Olive Oil 🫒 | ¼ cup | High quality, fruity notes |
| Fresh Lemon Juice 🍋 | 3 tbsp | Newly squeezed preferred |
| Fresh Rosemary 🌿 | 1 tbsp | Finely chopped |
| Fresh Thyme Leaves 🍃 | 1 tbsp | Stems removed |
| Salt 🧂 | 1 tsp | Sea salt or kosher salt |
| Ground Cumin 🌿 | ½ tsp | Toasted for enhanced aroma |
| Black Pepper 🌶️ | ½ tsp | Freshly cracked |
The cannellini beans are the foundation, so opt for organic brands like Eden or Westbrae—they have better texture and flavor. Trader Joe’s also carries a great canned version that’s consistently creamy. Look for beans packed in water (not salted) and rinse them thoroughly to remove any metallic taste. Fresh herbs matter here, so grab them from the produce section rather than the dried spice aisle for maximum impact.
No fresh rosemary or thyme? Dried herbs work at one-third the amount, but add them earlier in the process to rehydrate. Swap lemon juice for apple cider vinegar if that’s what you have on hand. For extra creaminess, a spoonful of tahini blends in beautifully. The olive oil should be extra-virgin—this isn’t the time for neutral oils.
This dip stays fresh in an airtight container for 4-5 days in the fridge. For longer storage, freeze in small batches for up to 3 months. A thin layer of olive oil on top prevents discoloration. Serve at room temperature for the creamiest texture.
Why You’ll Love This Recipe
- Blender Magic: I just dump the beans, garlic, olive oil, and lemon in and let it do the work.
- Garlic-Rosemary Punch: That fresh rosemary with the garlic hits just right—bright, herby, and rich all at once.
- Party or Snack: Honestly, I serve it as a dip for parties or spread on toast for a quick lunch.
- Pantry Hero: Cannellini beans are cheap, and this recipe stretches them into something crave-worthy.
Step-by-Step Instructions for Cannellini Bean Dip
This technique delivers a silky texture and balanced flavors every time.
Step 1: Prepare the Base Ingredients
Drain and rinse the 2 cans Cannellini Beans thoroughly under cold water to remove excess sodium and starch. This step ensures a cleaner flavor and smoother consistency in the final dip.
Peel and mince the 4 cloves Garlic Cloves finely. I use a microplane for the garlic to create a near-paste consistency, which distributes evenly throughout the dip without overpowering any single bite.
Step 2: Infuse the Olive Oil with Herbs
In a small saucepan, combine the 0.25 cup Extra-Virgin Olive Oil with the 1 tbsp Fresh Rosemary and 1 tbsp Fresh Thyme Leaves. Heat over low heat for 3-4 minutes until the oil becomes fragrant and the herbs begin to sizzle gently.
Remove from heat and let it steep for 5 minutes to extract maximum flavor. This infused oil will serve as the aromatic foundation for your creation, adding depth that raw herbs simply can’t provide.
Step 3: Blend the Components
In a food processor, combine the prepared Cannellini Beans, minced Garlic Cloves, and the herb-infused Extra-Virgin Olive Oil. Add the 3 tbsp Fresh Lemon Juice, 1 tsp Salt, 0.5 tsp Ground Cumin, and 0.5 tsp Black Pepper.
Pulse the mixture for 30-45 seconds until completely smooth, scraping down the sides as needed. The texture should be velvety with no visible bean pieces remaining. For an ultra-smooth finish, you can blend for an additional 15-20 seconds.
Step 4: Adjust and Chill
Taste and adjust seasoning if needed, though the specified amounts typically yield perfect balance. The Ground Cumin should provide a subtle warmth without overpowering the fresh herb notes from the Rosemary and Thyme Leaves.
Transfer to a serving bowl and refrigerate for at least 1 hour to allow the flavors to meld completely. This chilling time transforms the dip from good to exceptional by letting the ingredients fully harmonize.
Pro Tips For Making Recipe For Cannellini Bean Dip
- Warm the Beans: Heat the cannellini beans in their liquid for 2-3 minutes before blending—this softens them further and gives the dip a creamier texture.
- Toast the Garlic: Lightly toast the garlic cloves in olive oil for 30 seconds until fragrant, but don’t let it brown or it’ll turn bitter.
- Skip Canned Lemon: Fresh lemon juice makes a real difference here; bottled stuff lacks the brightness that balances the richness of the beans and oil.
- Infuse the Oil: Gently heat the olive oil with the rosemary for 1-2 minutes to extract its flavor before mixing it in—I learned this the hard way after tasting flat dips without it.
Flavor Customization for recipe for cannellini bean dip
Herb Variations
Swap the rosemary and thyme for 1 tbsp fresh dill and 1 tbsp fresh parsley for a brighter, Mediterranean twist. I love this version with pita chips. Alternatively, try 1 tbsp fresh sage for an earthy, autumnal flavor. 🌿
Spice Adjustments
Add ½ tsp smoked paprika for a subtle smokiness that pairs well with grilled vegetables. For heat, a pinch of cayenne pepper or red pepper flakes adds a nice kick without overpowering the creamy base.
Citrus Swaps
Replace the lemon juice with 3 tbsp lime juice for a zesty, slightly sweeter profile. Or use 2 tbsp lemon juice and 1 tbsp orange juice for a citrus blend that brightens the dip beautifully.
Creamy Additions
Blend in 2 tbsp tahini for extra richness and a nutty depth. Or stir in ¼ cup Greek yogurt after blending for a tangier, lighter texture. Both additions keep the dip vegan if you use plant-based yogurt.
Garlic Variations
For a milder garlic flavor, roast the 4 cloves first until golden and soft. Or add 1 tsp garlic powder instead of fresh for convenience. I find roasted garlic adds a sweet, mellow note. 💛
Texture Tweaks
Leave the dip slightly chunky by pulsing the food processor for just 15-20 seconds. For a thinner spread, stir in 1-2 tbsp water or olive oil until reaching your desired consistency. This works great as a sandwich spread.
Frequently Asked Questions
Can I make this dip without a food processor?
Yes! Mash the beans with a fork for a rustic texture. Finely mince all other ingredients and mix well. The consistency won’t be as smooth, but it’ll still taste great.
How long will the dip stay fresh?
It keeps for 4-5 days in an airtight container in the fridge. A thin layer of olive oil on top helps prevent discoloration.
Can I use dried herbs instead of fresh?
Yes, use 1/3 the amount of dried herbs and add them earlier to rehydrate. Fresh herbs provide the best flavor, but dried work in a pinch.
What can I serve with this dip?
Try warm pita, crudités, crackers, or use it as a sandwich spread. It pairs well with grilled veggies or as a topping for bruschetta.
Nutrition Facts

- BBQ Sausage Recipe Oven: Smoky Depth Without the Grill - September 28, 2026
- BBQ Chicken Bowl Recipe Rice: Smoky Sweetness Over Fluffy Grains - September 28, 2026
- Beef Cutlet Recipe Ideas: Crispy Breaded Patties With Bold Seasonings - September 28, 2026