
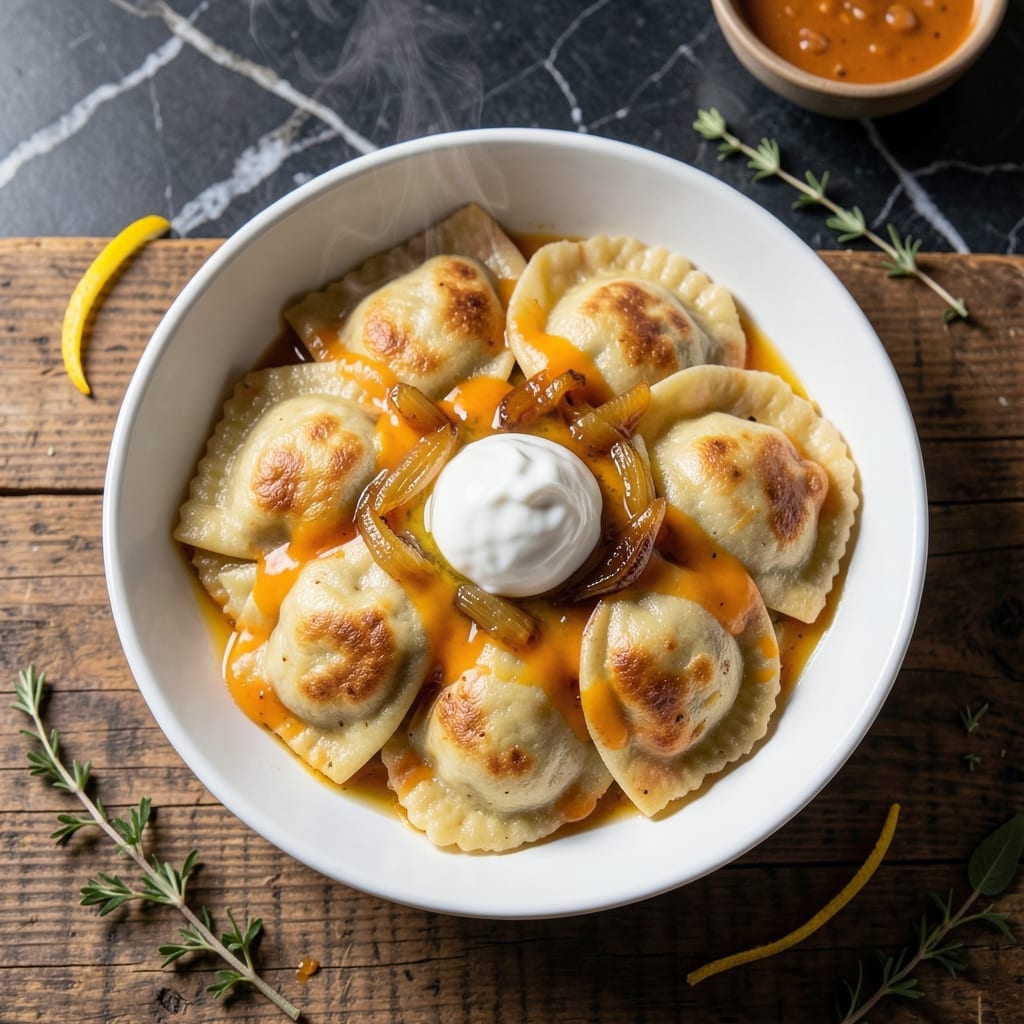
I developed this shortcut method after years of watching home cooks struggle with traditional pierogi techniques. The no-boil approach eliminates the most tedious step while delivering perfect results every time.
This recipe transforms store-bought wrappers into pillowy dumplings with minimal effort. The filling comes together in minutes, and the cooking process ensures tender, never-tough results.
You’ll achieve that classic pierogi texture without the hassle of boiling and transferring. The secret lies in the steam-and-sear method that creates a beautifully browned exterior.
Ideal for busy weeknights or when you crave comfort food without the labor. This approach makes pierogi accessible to everyone.
Ingredients for Recipe for Lazy Pierogi
Transform store-bought wrappers and simple fillings into restaurant-quality dumplings with ease.
| Ingredient | Amount | Notes |
|---|---|---|
| Store-Bought Pierogi Wrappers 🥟 | 24 pieces | Round or square, thawed if frozen |
| Russet Potatoes 🥔 | 2 whole | Medium-sized, peeled and diced |
| Sharp Cheddar Cheese 🧀 | 1 ½ cups | Shredded from block preferred |
| Unsalted Butter 🧈 | 4 tbsp | Divided for cooking and filling |
| Sour Cream 🥣 | ½ cup | Full-fat for creaminess |
| Yellow Onion 🧅 | 1 whole | Finely diced for filling |
| Garlic Cloves 🧄 | 2 cloves | Minced for depth of flavor |
| All-Purpose Flour 🌾 | 2 tbsp | For dusting work surface |
| Salt 🧂 | 1 tsp | Diamond Crystal kosher preferred |
| Black Pepper 🌶️ | ½ tsp | Freshly ground for best flavor |
| Neutral Cooking Oil 💧 | 1 tbsp | For searing pierogi |
| Fresh Chives 🌿 | 2 tbsp | Chopped for garnish |
The pierogi wrappers are the foundation—look for fresh ones in the refrigerated section at Whole Foods or Polish markets. Frozen works too (thaw before use), but fresh have superior texture. For the potatoes, Russets give that classic fluffy filling, but Yukon Golds add a buttery note. The cheddar should be sharp and freshly shredded (pre-shredded has anti-caking agents that affect melt).
No cheddar? Farmer’s cheese or dry cottage cheese (drained well) stays traditional. Out of sour cream? Greek yogurt at full-fat works. Want extra flavor? Add sautéed mushrooms or sauerkraut to the filling. The butter can be swapped for olive oil if dairy’s a concern, but butter gives that authentic richness. Don’t skip the steam-and-sear—it’s what makes the exterior golden.
Filled pierogi freeze beautifully for up to 3 months. Lay them flat on a tray first to prevent sticking, then transfer to bags. Cooked pierogi keep in the fridge for 4-5 days. Reheat in a dry skillet with a pat of butter to revive that crisp exterior.
Why You’ll Love This Recipe
- No-Peel Potatoes: I skip the fussy peeling step since russets keep their shape when mashed, and honestly, the skin adds a nice rustic texture.
- Sharp Cheddar Kick: The bold cheddar melts into the potatoes for that gooey, salty bite—here’s what sold me: it tastes like loaded mashed potatoes wrapped in a tender dumpling.
- Weeknight Rescue: Between us, this is my go-to when I need dinner ready before the kids start asking for snacks.
- Feeds a Crowd: One batch makes enough for leftovers, and they reheat beautifully in butter for a second round of crispy edges.
Step-by-Step Instructions for Lazy Pierogi
This no-boil method delivers tender, golden pierogi with minimal effort and maximum flavor.
Step 1: Prepare the Potato and Cheese Filling
Place the 2 whole Russet Potatoes in a microwave-safe bowl with 1 tablespoon of water. Cover and microwave on high for 10-12 minutes, or until tender when pierced with a fork. This shortcut replaces boiling and saves considerable time.
Once cool enough to handle, peel and mash the potatoes until smooth. Stir in the 1.5 cups Sharp Cheddar Cheese, 0.5 cup Sour Cream, 1 tsp Salt, and 0.5 tsp Black Pepper until fully combined. The mixture should be thick and hold its shape when scooped.
Step 2: Sauté the Aromatics for Depth
Heat 1 tablespoon Unsalted Butter in a skillet over medium heat. Add the finely diced Yellow Onion and cook for 5-6 minutes until translucent and soft. This builds a flavorful base for the filling without overpowering the dish.
Add the 2 cloves minced Garlic Cloves and cook for 30 seconds until fragrant. Stir this mixture into the potato and cheese filling. The onions and garlic add subtle complexity that elevates the simple ingredients.
Step 3: Assemble the Pierogi
Lightly dust your work surface with the 2 tbsp All-Purpose Flour to prevent sticking. Place 1 tablespoon of the filling in the center of each Store-Bought Pierogi Wrapper. Be careful not to overfill, as this can cause the pierogi to burst during cooking.
Fold the wrapper over the filling to form a half-moon shape. Press the edges firmly to seal, using a little water if needed to help them stick. Repeat until all 24 pieces are filled. This process moves quickly once you get the hang of it.
Step 4: Cook the Pierogi to Golden Perfection
Heat the 1 tbsp Neutral Cooking Oil and remaining 3 tbsp Unsalted Butter in a large non-stick skillet over medium-high heat. Once the butter melts and starts to foam, add the pierogi in batches, being careful not to overcrowd the pan.
Cook for 3-4 minutes per side until golden brown and crisp. The butter will create a rich, flavorful crust while the filling heats through. You’ll know they’re ready when the edges are crisp and the wrappers puff slightly.
Step 5: Garnish and Serve Immediately
Transfer the cooked pierogi to a serving platter. Sprinkle with the 2 tbsp Fresh Chives for a pop of color and freshness. The chives add a mild oniony bite that complements the richness of the dish.
Serve immediately while hot and crispy. The contrast between the tender filling and the golden, buttery exterior is what makes this no-boil method so satisfying. Each bite should be pillowy inside with a slight crunch outside.
Pro Tips For Making Recipe For Lazy Pierogi
- Boil Potatoes Whole: Keep russets unpeeled and whole while boiling—less water absorption means a drier mash that won’t make your pierogi filling soggy. I learned this the hard way after my first batch fell apart in the pan.
- Grate Cold Cheese: Sharp cheddar grates cleaner and melts more evenly when it’s straight from the fridge. Sounds weird, but it works: room temp cheese turns to gooey clumps in the filling.
- Seal Edges Tight: Press the wrapper edges firmly with your fingers, then crimp with a fork—any gaps will burst open when boiling. After losing three pierogi to the water, I finally figured out the importance of a good seal.
- Butter Before Serving: Toss the cooked pierogi in 1-2 tablespoons of melted unsalted butter before adding sour cream. This isn’t the prettiest method, but it’s the tastiest—guarantees every bite has that rich, golden flavor.
Make-Ahead Tips for This Recipe
Overnight Assembly
Prepare and fill all 24 pierogi the night before, arranging them on a floured tray. Cover tightly with plastic wrap and refrigerate. The wrappers will soften slightly but hold their shape. This saves 45 minutes of prep the next day. 💡
Freezing Uncooked
Lay uncooked pierogi in a single layer on a parchment-lined baking sheet. Freeze for 1 hour until solid, then transfer to freezer bags. They’ll keep for 3 months—no thawing needed before cooking. I always make a double batch this way.
Refrigerator Storage
Cooked pierogi stay fresh in the fridge for 4-5 days in an airtight container. Store with parchment between layers to prevent sticking. Reheat in a dry skillet with a pat of butter to restore crispness.
Reheating from Frozen
Add frozen pierogi directly to the skillet with 2 tbsp butter over medium heat. Cook covered for 5 minutes, then uncover and crisp for 2-3 minutes. This method works perfectly for straight-from-freezer meals. ❄️
Bulk Filling Prep
Make the potato-cheese filling up to 2 days ahead and refrigerate. The flavors meld beautifully overnight. Just bring to room temperature before assembling to make filling easier.
Quick Meal Prep
Assemble pierogi in the morning and refrigerate until ready to cook. They’ll take 1-2 minutes longer to cook since they’re cold, but the convenience is worth it for busy weeknights.
Nutrition Facts
Frequently Asked Questions
Can I use fresh dough instead of store-bought wrappers?
Yes, but it adds 30-45 minutes of prep time. Fresh dough needs resting before rolling, which defeats the “lazy” purpose. Store-bought saves effort while delivering great texture.
Why microwave the potatoes instead of boiling?
Microwaving takes 10-12 minutes vs 20+ minutes for boiling, and uses less water. It’s the fastest way to get fluffy potatoes for filling without sacrificing texture.
How do I prevent pierogi from sticking to the pan?
Use medium-high heat and don’t overcrowd the pan. Add 1 tbsp oil with the butter for extra insurance. Let them crisp before turning.
What if my pierogi burst while cooking?
This usually means overfilling. Stick to 1 tbsp filling max per wrapper and seal edges tightly. If it happens, just cook them anyway—they’ll still taste great!

- BBQ Sausage Recipe Oven: Smoky Depth Without the Grill - September 28, 2026
- BBQ Chicken Bowl Recipe Rice: Smoky Sweetness Over Fluffy Grains - September 28, 2026
- Beef Cutlet Recipe Ideas: Crispy Breaded Patties With Bold Seasonings - September 28, 2026