
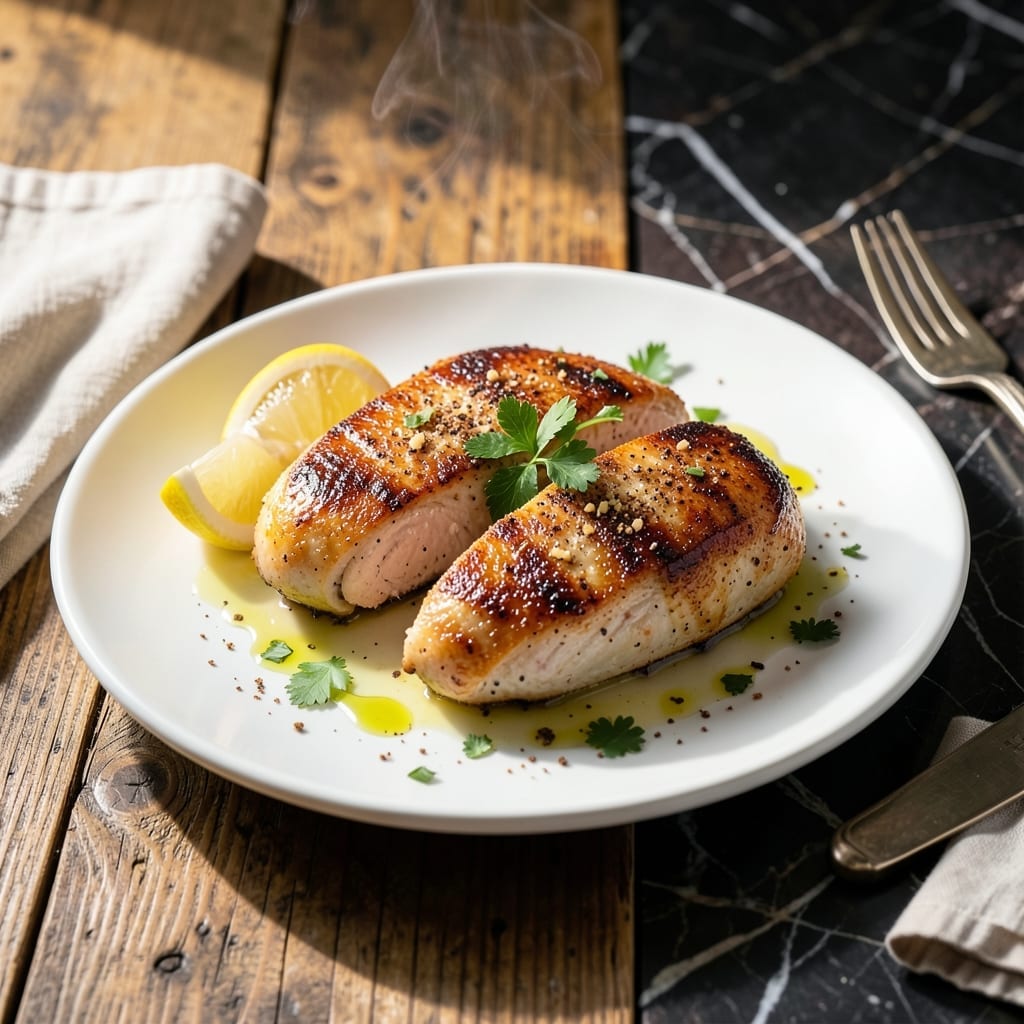
Achieving juicy pan-fried chicken breast with a golden crust requires precision and patience. This method ensures tender meat every time.
Start with even thickness and proper seasoning. The key is high heat for the crust and controlled cooking to preserve moisture inside.
Ingredients for Recipe of Chicken Breast Pan Fried
Precise ingredients create that perfect golden crust with consistently juicy centers every time.
| Ingredient | Amount | Notes |
|---|---|---|
| Boneless Skinless Chicken Breast 🍗 | 1 ½ lb | Pounded to even 1/2-inch thickness |
| Kosher Salt 🧂 | 1 ½ tsp | Diamond Crystal preferred for even seasoning |
| Freshly Ground Black Pepper 🌶️ | ¾ tsp | Coarse grind for texture |
| Garlic Powder 🧄 | 1 tsp | Not garlic salt |
| Smoked Paprika 🌶️ | ½ tsp | For depth of flavor |
| All-Purpose Flour 🌾 | ½ cup | For light dredging to enhance crust |
| Extra-Virgin Olive Oil 🫒 | 3 tbsp | High smoke point for searing |
| Unsalted Butter 🧈 | 2 tbsp | For basting and richness |
| Fresh Thyme Sprigs 🌿 | 4 sprigs | Optional for aromatic basting |
| Fresh Rosemary Sprigs 🌿 | 2 sprigs | Optional for aromatic basting |
| Lemon 🍋 | ½ whole | Juiced for finishing acidity |
The chicken breast quality is paramount. Air-chilled, never previously frozen ensures optimal texture and moisture retention. Source from Whole Foods or local butchers for consistent sizing. Pounding to an even thickness (target 1/2-inch) prevents uneven cooking. Diamond Crystal kosher salt is the professional standard—its coarse texture and clean flavor make it ideal for even seasoning distribution.
Substitutions must maintain moisture balance. Chicken thighs can replace breasts but require adjusted cooking times. For dairy-free versions, avocado oil replaces butter in basting. No smoked paprika? Regular paprika plus pinch of cayenne works. The flour dredge is optional but creates superior crust—cornstarch at half the amount yields extra crispiness.
Store chicken in its original packaging on a tray to catch drips—use within 2 days for peak freshness. The seasoning blend keeps indefinitely in airtight containers. Cooked leftovers maintain quality for 4 days refrigerated. Never freeze previously frozen chicken after thawing.
Why You’ll Love This Recipe
- One Pan Wonder: I love that I only need a single skillet and five ingredients to get this on the table.
- Smoky Depth: That smoked paprika and garlic powder combo gives it a rich, savory kick without overpowering the chicken.
- Meal Prep Hero: I make a big batch on Sunday and it stays juicy for salads and wraps all week.
- Budget Stretch: Boneless skinless chicken breast is affordable, and this method makes it taste anything but cheap.
Step-by-Step Instructions for Chicken Breast Pan Fried
Master the technique for achieving a golden crust while preserving the juiciness inside.
Step 1: Prepare and Season the Chicken
Begin by pounding the 1.5 lb boneless skinless chicken breast to an even ½-inch thickness using a meat mallet or rolling pin. This ensures uniform cooking and prevents dry, overdone edges while the center catches up. Place each piece between plastic wrap to avoid tearing.
Pat the chicken thoroughly dry with paper towels to remove excess moisture—this is critical for proper browning. Season both sides evenly with the 1.5 tsp kosher salt, 0.75 tsp freshly ground black pepper, 1 tsp garlic powder, and 0.5 tsp smoked paprika. The spices should adhere well to the slightly tacky surface.
Step 2: Dredge and Rest for Crust Formation
Spread the 0.5 cup all-purpose flour on a large plate. Lightly dredge each seasoned chicken breast, pressing gently to ensure an even, thin coating. Shake off any excess flour—too much will create a gummy texture rather than a crisp crust.
Let the dredged chicken rest on a wire rack for 10 minutes. This brief pause allows the flour to absorb some moisture from the surface, creating a better sear when it hits the hot pan. The coating should look dry to the touch, not wet or clumpy.
Step 3: Sear to Golden Perfection
Heat the 3 tbsp extra-virgin olive oil in a large, heavy skillet over medium-high heat until it shimmers but does not smoke. Carefully lay the chicken in the pan, working in batches if necessary to avoid crowding. Cook undisturbed for 4-5 minutes per side until the crust is deep golden brown and crisp.
Add the 2 tbsp unsalted butter, 4 sprigs fresh thyme sprigs, and 2 sprigs fresh rosemary sprigs to the pan during the last 2 minutes of cooking. Tilt the pan slightly and spoon the foaming butter and herbs over the chicken repeatedly to baste. The internal temperature should reach 160°F in the thickest part.
Step 4: Rest and Finish with Brightness
Transfer the chicken to a cutting board or warm plate. Tent loosely with foil and let it rest for 5-10 minutes. This allows the juices to redistribute throughout the meat, ensuring every bite stays moist and flavorful. The temperature will rise to 165°F during this time.
Just before serving, squeeze the juice from the 0.5 whole lemon over the chicken. This final touch cuts through the richness of the butter and oil, balancing the dish with a bright, fresh finish. Slice against the grain and serve immediately while the crust remains crisp.
Pro Tips For Making Recipe Of Chicken Breast Pan Fried
- Pound the Breasts: Use a rolling pin or meat mallet to even out the thickness—aim for about ¾ inch. I learned this the hard way after too many dry, overcooked edges while waiting for the thicker parts to finish.
- Season Twice: Hit the chicken with kosher salt and smoked paprika before cooking, then finish with a pinch of garlic powder and fresh black pepper right as it comes out of the pan. Sounds weird, but it works.
- Skip the Crowding: Cook one breast at a time if your pan isn’t huge—overcrowding steams the meat instead of browning it. After burning three batches, I finally figured out patience pays off here.
- Rest Under Foil: Give it a solid 5-10 minutes under foil after cooking. My grandmother swore by this, and she was right: it keeps the juices where they belong—in the meat, not on the cutting board.
Pro Cooking Tips for This Recipe
Perfect Pounding Technique
Use a meat mallet or rolling pin to pound chicken to an even ½-inch thickness. Place between plastic wrap to prevent tearing. I prefer a flat mallet face for consistent results without creating divots in the meat. 💡
Heat Control Matters
Your pan must be hot enough to sizzle when chicken hits it, but not smoking. I test by flicking a drop of water—it should dance across the surface. Medium-high heat works best for 3 tbsp olive oil in a heavy skillet.
Basting for Flavor
During the last 2 minutes, add 2 tbsp butter and herbs, then tilt the pan to pool the butter. Spoon it continuously over the chicken—this creates that golden crust and infuses aromatic flavors into every bite.
Resting is Non-Negotiable
Always rest your chicken for 5-10 minutes after cooking. This allows juices to redistribute. I cover loosely with foil to keep it warm while maintaining that crispy exterior we worked so hard to achieve.
Temperature Precision
Pull chicken from the pan at 160°F internal temperature. The carryover heat will bring it to the safe 165°F during resting. Use an instant-read thermometer—I recommend ThermoWorks for accuracy.
Finish with Acid
The final squeeze of ½ lemon brightens all the rich flavors. Don’t skip this step—it cuts through the butter and makes every bite taste balanced and fresh. I always have lemons on hand for this purpose. 🍋
Frequently Asked Questions
Why pound the chicken to ½-inch thickness?
Pounding ensures even cooking throughout. Without it, thinner edges dry out while thicker centers remain undercooked. ½-inch is the sweet spot for consistent results.
Can I skip the flour dredging?
You can, but the crust won’t be as crisp. The ½ cup flour creates a golden barrier that locks in juices while adding texture. For gluten-free, use cornstarch instead.
How do I know when it’s done?
Use a thermometer—pull at 160°F. The temp rises to 165°F during resting. Visual cues like golden crust and clear juices help, but a thermometer is foolproof.
What if my chicken sticks to the pan?
Your pan likely wasn’t hot enough or you moved the chicken too soon. Heat the 3 tbsp oil until shimmering, then resist the urge to poke it for 4-5 minutes.
Nutrition Facts

- BBQ Sausage Recipe Oven: Smoky Depth Without the Grill - September 28, 2026
- BBQ Chicken Bowl Recipe Rice: Smoky Sweetness Over Fluffy Grains - September 28, 2026
- Beef Cutlet Recipe Ideas: Crispy Breaded Patties With Bold Seasonings - September 28, 2026