
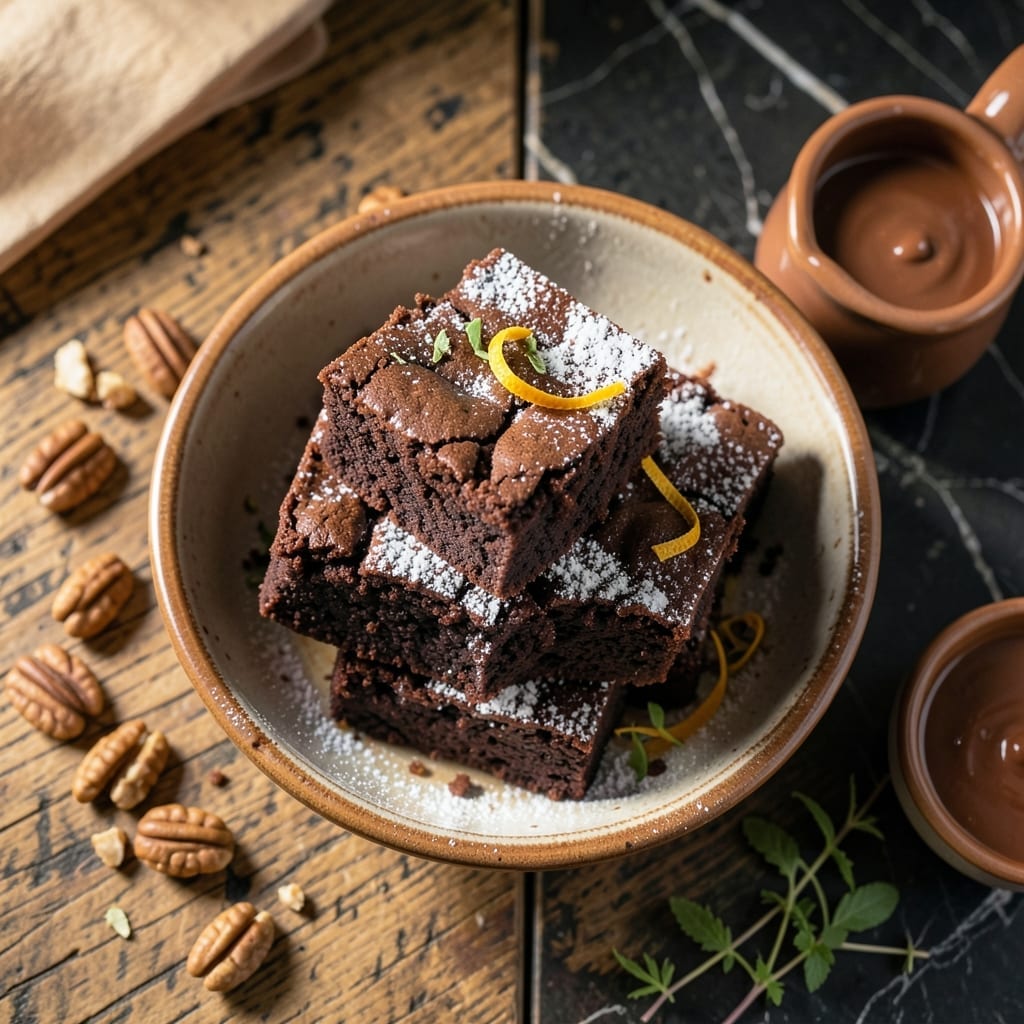
This eggless chocolate brownie delivers the perfect balance of dense fudgy interior and signature crackly top without a single egg. The secret lies in a precise combination of ingredients that mimic traditional texture.
With simple pantry staples and 30 minutes of baking time, you’ll achieve restaurant-quality results that satisfy even the most discerning chocolate lovers. The process is as rewarding as the outcome.
Ingredients for Recipe of Chocolate Brownie Eggless
Simple pantry staples create these rich, fudgy eggless chocolate brownies with crackly tops.
| Ingredient | Amount | Notes |
|---|---|---|
| All-Purpose Flour 🌾 | 1 cup | Sifted for even texture |
| Granulated Sugar 🍚 | 1 ½ cups | Fine grain for smooth batter |
| Unsweetened Cocoa Powder 🍫 | ¾ cup | Dutch-processed preferred |
| Vegetable Oil 🫒 | ½ cup | Neutral flavor like canola |
| Water 💧 | ½ cup | Room temperature for mixing |
| Vanilla Extract 🌿 | 2 tsp | Pure extract for best flavor |
| Baking Powder 🧂 | 1 tsp | Ensures proper rise |
| Salt 🧂 | ½ tsp | Fine sea salt preferred |
| Semi-Sweet Chocolate Chips 🍫 | ½ cup | Dairy-free for vegan diet |
| Chopped Walnuts 🌰 | ½ cup | Optional, for texture contrast |
| Apple Cider Vinegar 🍏 | 1 tbsp | Reacts with baking powder |
| Instant Coffee Granules ☕ | 1 tsp | Enhances chocolate flavor |
The cocoa powder is critical here—Dutch-processed delivers smoother, richer chocolate flavor. Look for Hershey’s Special Dark or Ghirardelli at most supermarkets. For the chocolate chips, Enjoy Life offers excellent dairy-free options. The vegetable oil should be neutral; canola or sunflower oil work perfectly. Avoid strongly flavored oils like coconut unless you want that hint of flavor.
No Dutch-processed cocoa? Natural cocoa powder works but may yield slightly less dense brownies. Out of apple cider vinegar? White vinegar or lemon juice at the same amount. For nut-free versions, omit walnuts or swap in dairy-free chocolate chunks. The instant coffee is subtle but important—espresso powder at half the amount deepens the chocolate notes without tasting like coffee.
Store brownies in an airtight container at room temperature for up to 5 days. For longer storage, freeze for 3 months. The flavor actually improves after 24 hours as the fudgy texture sets. Cut into squares once completely cooled to prevent crumbling.
Why You’ll Love This Recipe
- One Bowl Wonder: I just dump flour, sugar, cocoa, oil, and water in a bowl—no mixer, no fuss.
- Rich Chocolate Fix: That deep cocoa flavor hits just right, no eggs needed to get it spot-on.
- Crowd Pleaser: Honestly, I’ve served these at potlucks and no one guessed they’re eggless.
- Budget Friendly: All pantry staples, and a batch costs me under five bucks.
Step-by-Step Instructions for Chocolate Brownie Eggless
Master the technique for rich, fudgy brownies with that coveted crackly top and perfect texture.
Step 1: Combine Wet Ingredients with Precision
In a large mixing bowl, whisk together the 0.5 cup vegetable oil, 1.5 cups granulated sugar, and 0.5 cup water until fully emulsified. The sugar should appear completely dissolved in the liquid—this prevents graininess in the final texture.
Add the 2 tsp vanilla extract, 1 tbsp apple cider vinegar, and 1 tsp instant coffee granules. The vinegar reacts with the baking powder to create lift, while the coffee deepens the chocolate flavor without tasting like coffee. Whisk for 30 seconds until uniform.
Step 2: Incorporate Dry Ingredients for Structure
Sift the 1 cup all-purpose flour, 0.75 cup unsweetened cocoa powder, 1 tsp baking powder, and 0.5 tsp salt directly into the wet mixture. Sifting aerates the dry ingredients for even distribution and prevents clumps in the batter.
Using a silicone spatula, fold the dry ingredients into the wet mixture just until no streaks of flour remain visible. Overmixing develops gluten, which would make the brownies cakey instead of dense and fudgy. The batter should be thick but pourable.
Step 3: Add Texture Elements and Prepare for Baking
Fold in the 0.5 cup semi-sweet chocolate chips and 0.5 cup chopped walnuts until evenly distributed. The chocolate chips will melt slightly during baking, creating gooey pockets, while the walnuts add a satisfying crunch.
Transfer the batter to a parchment-lined 8×8-inch or 9×9-inch baking pan, spreading it evenly with the spatula. The surface should be smooth but not perfectly flat—small peaks will create the signature crackly top as it bakes.
Step 4: Bake to Fudgy Perfection
Preheat your oven to 350°F. Bake the brownies on the center rack for 25-30 minutes. The edges should appear set with a slight pull from the pan sides, while the center should still have a subtle jiggle when gently shaken.
Look for the top to develop a glossy, crackly crust—this is the visual cue that the sugar has caramelized properly. A toothpick inserted into the center should come out with a few moist crumbs but not wet batter. This ensures the interior remains dense and fudgy rather than dry.
Step 5: Cool Completely Before Slicing
Remove the pan from the oven and let the brownies cool completely in the pan on a wire rack for at least 1 hour. This cooling period allows the structure to set properly—cutting too soon will result in a gummy, underdeveloped texture.
Once fully cooled, lift the brownies from the pan using the parchment paper and transfer to a cutting board. Use a sharp knife to cut into 16 squares for serving. The crackly top should have a slight sheen, while the interior reveals a rich, dense fudginess with visible chocolate chip pockets throughout.
Pro Tips For Making Recipe Of Chocolate Brownie Eggless
- Preheat the Pan: Always start with your oven fully preheated to 350°F—I learned this the hard way after pulling out gooey centers from a lukewarm oven.
- Sift the Cocoa: Sift the unsweetened cocoa powder first to break up clumps, or you’ll end up with dry pockets in the batter.
- Don’t Overmix: Stir just until the flour disappears; overmixing makes eggless brownies dense instead of fudgy.
- Use Hot Water: Replace cold water with hot (not boiling) water—about 1/2 cup—to help bloom the cocoa flavor more deeply.
Storing and Reheating This Dish
Room Temperature Storage
Let your brownies cool completely before storing. I place mine in an airtight container lined with parchment paper to prevent sticking. They’ll stay fresh at room temperature for up to 5 days. The flavors actually deepen overnight as the ingredients meld together.
Refrigerator Storage
For longer freshness, store brownies in the refrigerator in an airtight container with parchment between layers. They’ll keep for up to 1 week. I recommend bringing them to room temperature before serving for the best texture and flavor.
Freezing for Later
These brownies freeze beautifully for up to 3 months. Wrap individual squares in plastic wrap, then place in a freezer bag. When ready to eat, thaw at room temperature for 2-3 hours. The texture remains perfect after freezing. ❄️
Reheating Methods
For that just-baked warmth, microwave a single brownie for 10-15 seconds. For multiple brownies, warm them in a 300°F oven for 5-10 minutes. I prefer the oven method as it revives the crackly top beautifully.
Reviving Stale Brownies
If your brownies have dried out slightly, place a slice of bread in the storage container overnight. The bread’s moisture will transfer to the brownies. Alternatively, briefly warm them in the microwave with a damp paper towel.
Serving Temperature
I find these taste best at room temperature or slightly warm. The chocolate chips will be gooey when warm, while the fudgy texture is most pronounced at room temperature. Avoid serving straight from the fridge as the texture will be too firm. 💛
Frequently Asked Questions
What replaces eggs in this recipe?
The combination of vegetable oil, apple cider vinegar, and baking powder creates the needed structure and moisture. The vinegar reacts with baking powder for lift, while oil keeps the texture rich and fudgy.
Why add coffee to chocolate brownies?
Instant coffee granules deepen the chocolate flavor without tasting like coffee. It enhances the cocoa’s natural richness, creating a more complex, restaurant-quality taste.
Can I make these gluten-free?
Yes! Substitute the all-purpose flour with a 1:1 gluten-free baking flour. Ensure all ingredients, especially chocolate chips, are certified gluten-free to avoid cross-contamination.
How do I get the crackly top?
The granulated sugar caramelizes during baking at 350°F. Don’t overmix the batter, and bake until the top looks glossy with visible cracks—this happens in 25-30 minutes.
Nutrition Facts

- BBQ Sausage Recipe Oven: Smoky Depth Without the Grill - September 28, 2026
- BBQ Chicken Bowl Recipe Rice: Smoky Sweetness Over Fluffy Grains - September 28, 2026
- Beef Cutlet Recipe Ideas: Crispy Breaded Patties With Bold Seasonings - September 28, 2026