
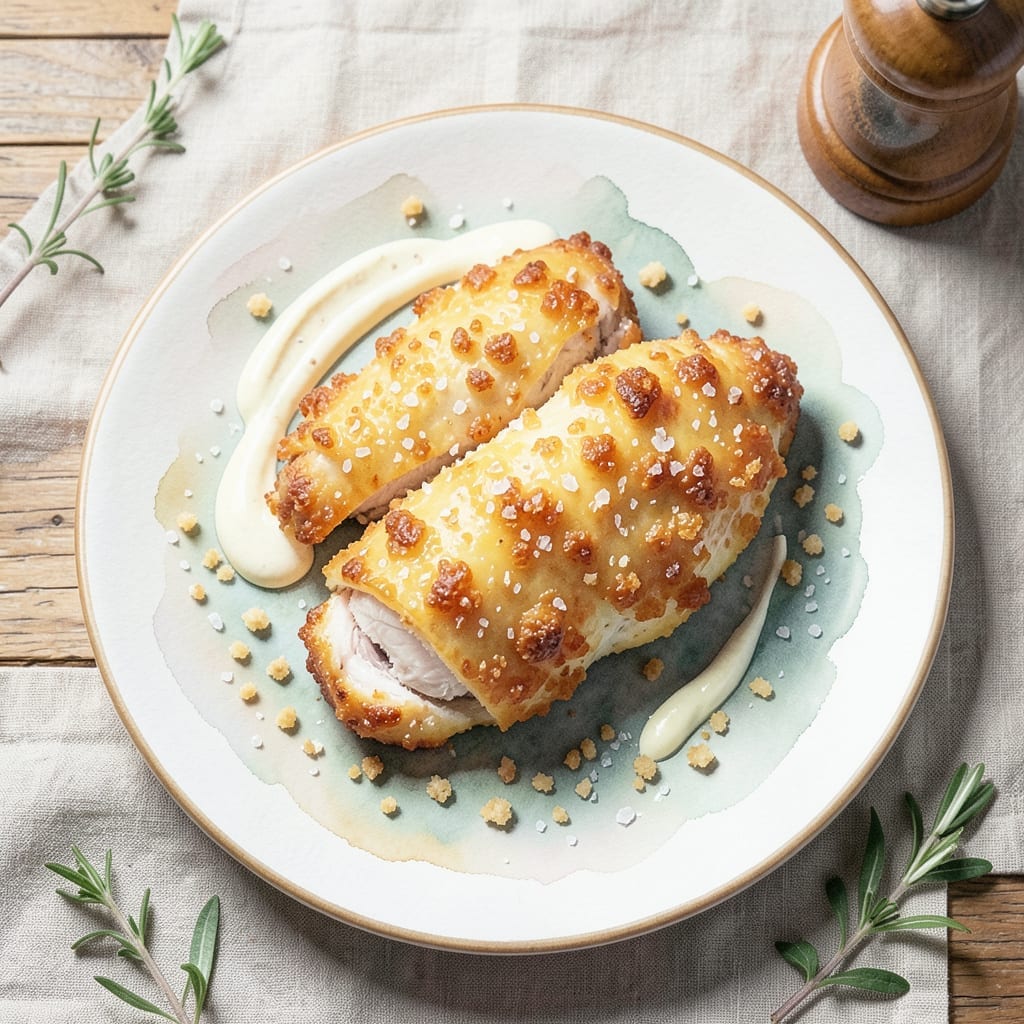
This parmesan chicken delivers a crispy golden crust with minimal effort. The mayo in the coating creates a perfect bond for the breading, ensuring it stays put during cooking.
I developed this method after testing various techniques in my small kitchen. The result is consistently crispy chicken with a tender interior, ready in under 30 minutes.
Ingredients for Recipe Parmesan Chicken with Mayo
Pantry staples and chicken come together for that perfect crispy crust we all love.
| Ingredient | Amount | Notes |
|---|---|---|
| Boneless Skinless Chicken Breasts 🍗 | 1 ½ lb | Pounded to even thickness |
| Mayonnaise 🥫 | ½ cup | Full-fat for best results |
| All-Purpose Flour 🌾 | ½ cup | For initial dredging |
| Large Egg 🥚 | 1 whole | Beaten for binding |
| Parmesan Cheese 🧀 | 1 cup | Freshly grated from block |
| Panko Breadcrumbs 🍞 | 1 ½ cups | Japanese-style for extra crisp |
| Garlic Powder 🧄 | 1 tsp | For seasoning breading |
| Onion Powder 🧅 | 1 tsp | Adds depth of flavor |
| Dried Oregano 🍃 | 1 tsp | Mediterranean herb blend |
| Salt 🧂 | 1 tsp | Kosher or sea salt |
| Black Pepper 🌶️ | ½ tsp | Freshly ground preferred |
| Paprika 🌶️ | 1 tsp | Sweet or smoked variety |
| Olive Oil 🫒 | ¼ cup | For frying chicken |
| Unsalted Butter 🧈 | 2 tbsp | Optional for extra crisp |
The chicken needs to be uniform thickness so it cooks evenly—Whole Foods or your local butcher can pound it for you if you’re short on time. The mayo is the secret here (it browns beautifully), and Duke’s or Hellmann’s give the best texture. For the Parmesan, skip the pre-grated stuff—a wedge from the deli counter melts better and has more punch.
No panko on hand? Crushed cornflakes or saltines work in a pinch (same volume). Pre-grated Parm is fine if that’s all you’ve got, just use a little extra since it’s less dense. The spices can all be swapped for Italian seasoning at half the amount. And if you’re out of mayo, Greek yogurt gets you 90% there.
Cooked chicken keeps 3-4 days in the fridge—reheat in the oven to keep it crisp. Freezes well for 2 months (thaw before reheating). The breading mixture? Make extra and store in a jar for next time (lasts 1 month).
Why You’ll Love This Recipe
- One Bowl Wonder: I mix everything right in the same dish—flour, egg, mayo, and parmesan—so cleanup is a breeze.
- Crispy, Creamy Crunch: The mayo in the breading gives it this golden, crispy crust with a rich, cheesy center that’s honestly addictive.
- Weeknight Hero: It’s my go-to for busy evenings when I need something fast but still impressive for the family.
- Stretches Further: Boneless chicken breasts stay juicy, and the parmesan adds big flavor without breaking the bank.
Step-by-Step Instructions for Parmesan Chicken With Mayo
This method delivers that promised crispy golden crust with minimal effort and maximum flavor.
Step 1: Prep and Season the Chicken
Start by pounding the 1.5 lb boneless skinless chicken breasts to an even ½-inch thickness between two sheets of plastic wrap. This ensures uniform cooking and prevents dry spots. Season both sides generously with 1 tsp salt, 0.5 tsp black pepper, and 1 tsp paprika for a subtle smoky depth.
Here’s the thing—don’t skip pounding. Uneven pieces lead to overcooked edges while the thick parts stay raw. I’ve found that using the flat side of a meat mallet works best, but a rolling pin in a pinch does the trick too.
Step 2: Create the Breading Station
Set up three shallow bowls. In the first, whisk together 0.5 cup all-purpose flour, 1 tsp garlic powder, 1 tsp onion powder, and 1 tsp dried oregano. In the second bowl, beat 1 whole large egg with 0.5 cup mayonnaise until smooth. In the third, combine 1.5 cups panko breadcrumbs with 1 cup parmesan cheese.
This three-step dredging process is what creates that ultra-crispy exterior. The flour provides structure, the mayo-egg mixture acts as a glue, and the panko-parmesan combo delivers both crunch and rich umami flavor. Real talk: fresh parmesan makes all the difference here.
Step 3: Dredge and Coat Thoroughly
Dredge each chicken breast in the flour mixture, shaking off any excess. Then dip into the mayo-egg mixture, letting any excess drip off. Finally, press each piece firmly into the panko-parmesan mixture, ensuring complete coverage on all sides. The key is pressing hard enough that the coating adheres well and doesn’t fall off during cooking.
Place the breaded chicken on a wire rack set over a baking sheet. This allows air to circulate underneath, preventing the coating from becoming soggy. Let it rest for 5-10 minutes while you heat the oil—this helps the breading set and stick better during frying.
Step 4: Pan-Fry to Golden Crispiness
Heat 0.25 cup olive oil and 2 tbsp unsalted butter in a large skillet over medium heat until the butter stops foaming. Add the chicken and cook for 4-5 minutes per side until the coating is deep golden brown and the internal temperature reaches 165°F.
Don’t crowd the pan—cook in batches if necessary. The oil temperature will drop if you add too many pieces at once, leading to greasy rather than crispy results. You’ll know it’s ready to flip when the edges start to look golden and the coating releases easily from the pan.
Step 5: Rest and Serve
Transfer the cooked chicken to a paper towel-lined plate to drain any excess oil. Let it rest for 2-3 minutes before serving. This brief rest allows the juices to redistribute, ensuring moist meat beneath that crispy exterior.
Serve immediately while still hot. The parmesan should be melted and bubbly, with a crisp coating that gives way to tender, juicy chicken. If you need to keep it warm, place it on a wire rack in a 200°F oven for up to 10 minutes—but it’s best fresh out of the pan.
Pro Tips For Making Recipe Parmesan Chicken With Mayo
- Pound the Chicken: Even out those boneless breasts to ½-inch thickness with a rolling pin or heavy pan—I learned this the hard way after too many dry, overcooked edges while the centers finished cooking.
- Use Full-Fat Mayo: Skip the light stuff; the fat in regular mayonnaise is what makes the parmesan coating crisp up and cling properly to the chicken.
- Rest Before Breading: Let the floured, egg-dipped chicken sit for 5 minutes before adding the parmesan layer—this keeps the coating from sliding right off when it hits the pan.
- Hot Pan, Medium Heat: Start with a screaming hot pan, then drop to medium once the chicken’s in; high heat from the get-go gives that golden crust, but medium keeps it from burning before the chicken cooks through.
Perfect Pairings for recipe parmesan chicken with mayo
Side Dish Pairings
For a balanced meal, serve this with a simple green salad—toss 4 cups mixed greens with 2 tbsp balsamic vinaigrette. The acidity cuts through the richness of the chicken beautifully, just like Nonna used to do with her fried dishes. 🥗
Starch Options
I love pairing this with garlic mashed potatoes—the creamy texture contrasts perfectly with the crispy chicken. For something lighter, try roasted fingerling potatoes tossed with rosemary and olive oil. Both soak up any extra parmesan flavor.
Vegetable Sides
Steamed asparagus or roasted broccoli work wonderfully. Toss with 1 tbsp lemon zest and 1 tsp red pepper flakes for brightness. The crisp-tender veggies complement the chicken’s texture without competing for attention.
Wine Pairings
A crisp Pinot Grigio from Italy pairs beautifully—the citrus notes enhance the parmesan. For red lovers, a light Chianti works. I always grab a bottle from my local Boston Italian deli for that authentic touch. 🍷
Quick Bread Option
Warm garlic bread made with a baguette, ½ cup butter, and 3 minced garlic cloves is perfect for soaking up any extra flavors. It’s my go-to when I want to recreate those cozy family dinners.
Nutrition Facts
Frequently Asked Questions
Why use mayo instead of egg wash?
Mayo creates a richer, crispier crust that browns beautifully. It also helps the breading adhere better than egg alone, preventing it from falling off during cooking.
Can I use regular breadcrumbs?
Yes, but panko gives the best crunch. If using regular, toast them first for extra crispness. The texture will be slightly different but still delicious.
How do I know when it’s fully cooked?
Use a meat thermometer—the internal temp should reach 165°F. The coating will be deep golden brown and the juices should run clear. Never guess with chicken!
Can I bake this instead of pan-frying?
Bake at 400°F for 20-25 minutes, flipping halfway. Use a wire rack on a baking sheet for even crispiness. The flavor will be just as good!

- BBQ Sausage Recipe Oven: Smoky Depth Without the Grill - September 28, 2026
- BBQ Chicken Bowl Recipe Rice: Smoky Sweetness Over Fluffy Grains - September 28, 2026
- Beef Cutlet Recipe Ideas: Crispy Breaded Patties With Bold Seasonings - September 28, 2026