
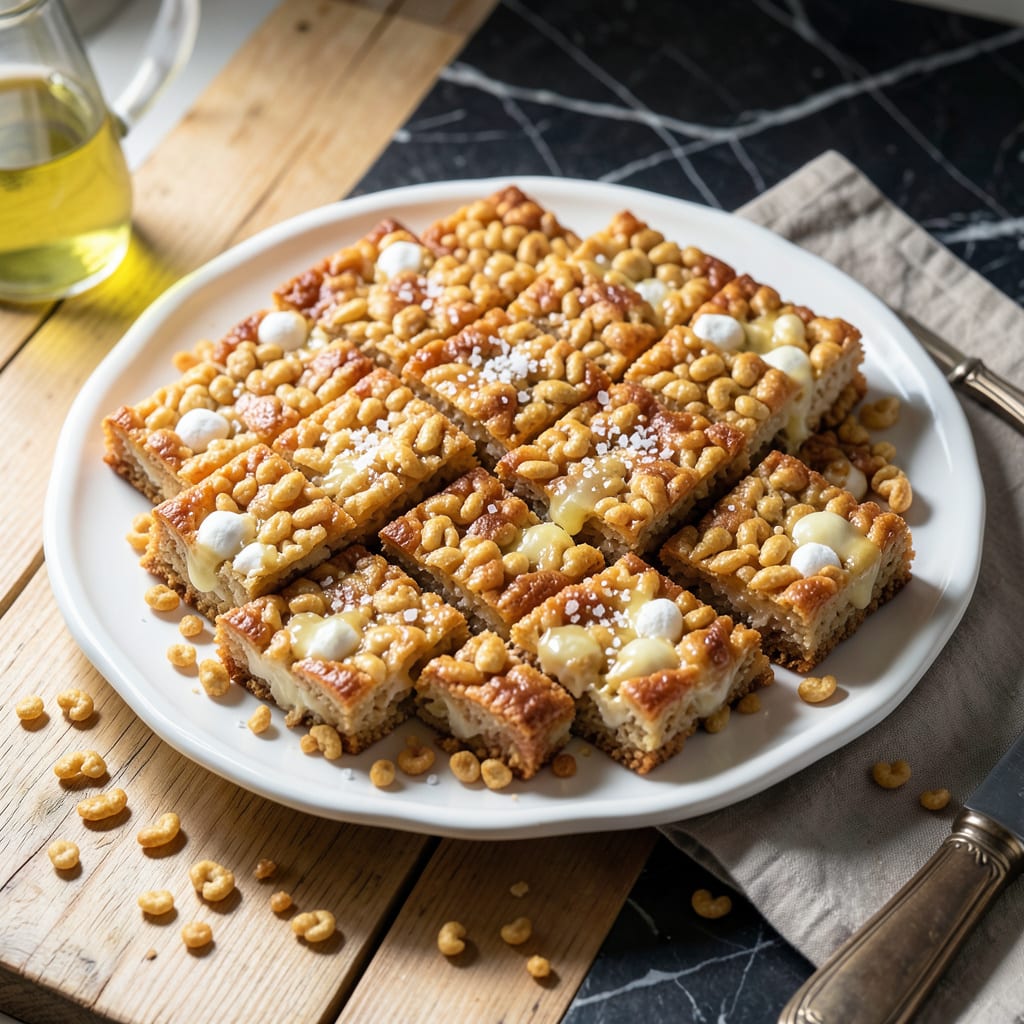
This classic treat delivers perfectly crispy texture with minimal effort. A simple combination of melted marshmallows and butter coats the cereal, creating that signature crunch everyone loves.
Ready in 15 minutes, this recipe requires no baking and just one pot. The result is a batch of gooey, golden squares that set quickly and satisfy every sweet tooth.
Ingredients for Rice Keispie Treat
Six ingredients transform into that nostalgic, gooey, crunchy classic everyone adores.
| Ingredient | Amount | Notes |
|---|---|---|
| Rice Krispies Cereal 🥣 | 6 cups | Standard variety preferred |
| Mini Marshmallows 🍬 | 10 oz | Or 40 regular marshmallows |
| Unsalted Butter 🧈 | 3 tbsp | For rich, smooth texture |
| Vanilla Extract 🌿 | 1 tsp | Pure extract recommended |
| Salt 🧂 | ¼ tsp | Fine grain for even distribution |
| Light Corn Syrup 💧 | 2 tbsp | Optional for extra chewiness |
The cereal is the foundation—Kellogg’s Rice Krispies is the gold standard, but any crisp rice cereal works. Marshmallows are key for that perfect melt: Jet-Puffed or Kraft brands dissolve smoothly without graininess. Use fresh marshmallows (stale ones won’t melt evenly). For the butter, unsalted lets you control the salt content precisely, which matters in this simple recipe.
No mini marshmallows? Regular marshmallows cut in half melt just as well. Out of corn syrup? Honey or maple syrup can substitute, though the texture will differ slightly. Want to gild the lily? A pinch of cinnamon or almond extract adds depth. The vanilla extract should be pure, not imitation—it makes a noticeable difference in the final flavor profile.
These keep 2-3 days at room temperature in an airtight container (separate layers with parchment paper). For longer storage, freeze for up to 6 weeks. Slice when completely cool for clean edges. Pro tip: grease your knife with butter for effortless cutting.
Why You’ll Love This Recipe
- One Pot Wonder: I melt the butter and marshmallows in one saucepan, stir in the cereal, and we’re done—no fancy equipment, no mess.
- That Marshmallow Magic: Honestly, the mini marshmallows melt into this glossy, vanilla-kissed glue that coats every crispy bite.
- Party or Pajamas: I’ve served these at birthdays and also eaten the whole batch in my sweatpants—no judgment.
- Pennywise Crowd-Pleaser: A box of cereal and a bag of mallows feed a dozen for less than a fancy coffee, and leftovers keep for days.
Step-by-Step Instructions for Rice Krispie Treats
This method ensures perfectly crisp, chewy treats with minimal effort and maximum satisfaction.
Step 1: Melt and Combine the Binding Mixture
In a large saucepan over low heat, melt the 3 tbsp Unsalted Butter completely. The butter should melt slowly without browning—this prevents the finished treats from having a burnt flavor. Once melted, immediately add the 10 oz Mini Marshmallows.
Stir constantly with a wooden spoon or silicone spatula until the marshmallows are fully melted and smooth. This process takes about 5-7 minutes. Add the 2 tbsp Light Corn Syrup and 0.25 tsp Salt, stirring to combine. The corn syrup enhances the chewy texture, while the salt balances the sweetness.
Remove the saucepan from heat and stir in the 1 tsp Vanilla Extract. Be cautious of the hot mixture—it will be sticky and can cause burns. The vanilla adds depth of flavor that elevates the treats from simple to exceptional.
Step 2: Incorporate the Cereal
Working quickly, add all 6 cups Rice Krispies Cereal to the saucepan. Use a spatula to fold the cereal into the marshmallow mixture until every piece is evenly coated. The cereal should glisten with the marshmallow glaze, with no dry spots remaining.
This step requires immediate action because the mixture begins to set as it cools. If the mixture becomes too stiff to stir, return the saucepan to low heat for 30 seconds to soften it slightly. Avoid overmixing, which can crush the cereal and result in dense treats.
Step 3: Press into the Pan
Transfer the mixture to a greased or parchment-lined 9×13-inch baking pan. Use a spatula or your hands (lightly greased with butter or nonstick spray) to press the mixture evenly into the pan. Apply firm, even pressure to ensure the treats hold together when cut.
For uniform thickness, press down gently but firmly, focusing on the corners where the mixture tends to be less compact. The surface should be smooth and level. If the mixture sticks to your hands or spatula, dip them in cold water to make handling easier.
Step 4: Cool and Cut
Allow the treats to cool at room temperature for 30-45 minutes until completely set. Resist the urge to cut them too soon—premature cutting can result in crumbly, misshapen pieces. The treats are ready when the top is firm to the touch and no longer sticky.
Once cooled, use a sharp knife to cut into 12-16 squares, depending on your preferred size. For clean cuts, dip the knife in hot water and wipe it between each slice. Store the treats in an airtight container at room temperature for up to 3 days.
Pro Tips For Making Rice Keispie Treat
- Melt Slowly: Keep the heat low when melting the butter and marshmallows—I learned this the hard way after scorching two batches. Medium-low heat guarantees a smooth, creamy base without burning.
- Use Fresh Marshmallows: Skip the stale mini marshmallows; they harden the treats and taste grainy. Fresh ones melt evenly and give that perfect gooey texture.
- Press Lightly: Resist the urge to pack the mixture too tightly into the pan. A gentle press keeps the treats soft and chewy instead of dense and hard.
- Butter Your Hands: Rub a little butter on your hands before shaping the treats—sounds weird, but it works. No more sticky fingers and the mixture won’t cling as you press it down.
Serving Suggestions for Leftovers
Party Platter Display
Arrange squares on a large wooden board for rustic appeal. Stack 3-4 treats at varying angles, interspersed with fresh berries for color contrast. I love using raspberries and blueberries for their vibrant pop against the golden treats. 💛
Individual Portions
Wrap each treat in clear cellophane and tie with colorful ribbons for party favors. Add a small tag with the date—these make perfect classroom treats or office snacks. Mini cupcake liners also work well for portion control.
Dessert Bar Setup
Create a DIY topping station with chocolate chips, sprinkles, and caramel drizzle. Let guests customize their treats while the marshmallow is still slightly warm. This works especially well for kids’ birthdays or casual gatherings.
Holiday Themes
Use cookie cutters to shape treats into hearts for Valentine’s Day or pumpkins for Halloween. For Christmas, add green and red food coloring to the marshmallow mixture before mixing with cereal. The shapes hold best when cut immediately after pressing. ✨
Beverage Pairings
Serve with cold milk or chocolate milk for the classic combination. For adults, a glass of cold brew coffee or vanilla chai complements the sweetness perfectly. I always have a pitcher of milk ready when serving these.
Storage Display
Stack cooled treats in a glass jar with a tight lid for kitchen counter display. Layer with parchment paper between rows to prevent sticking. These look beautiful in Mason jars and stay fresh for 2-3 days at room temperature.
Nutrition Facts
Frequently Asked Questions
Can I use regular marshmallows instead of mini?
Yes! Use 40 regular marshmallows (about 10 oz) cut in half for even melting. They work just as well as mini ones.
How do I make them extra chewy?
Add 2 tbsp of light corn syrup to the melted marshmallow mixture. This creates a softer, stickier texture that holds together beautifully.
How long do they last?
Store in an airtight container at room temperature for 2-3 days. For longer storage, freeze for up to 6 weeks.
Why are my treats crumbly?
This usually means the marshmallow mixture wasn’t hot enough when mixed with cereal. Return to low heat for 30 seconds to soften before pressing.

- BBQ Sausage Recipe Oven: Smoky Depth Without the Grill - September 28, 2026
- BBQ Chicken Bowl Recipe Rice: Smoky Sweetness Over Fluffy Grains - September 28, 2026
- Beef Cutlet Recipe Ideas: Crispy Breaded Patties With Bold Seasonings - September 28, 2026