
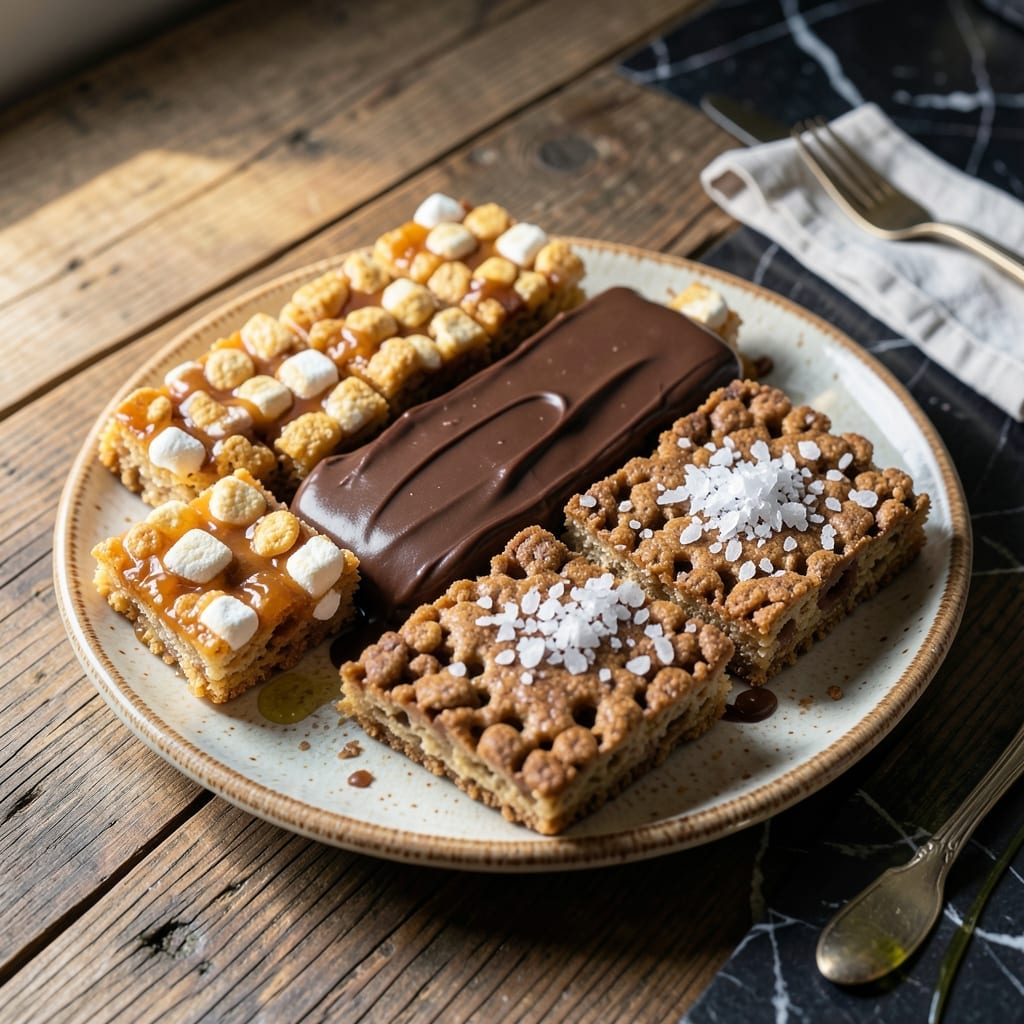
This no-bake classic gets a creative upgrade with simple yet brilliant twists that elevate the original.
From chocolate-dipped to fruity mix-ins, these variations transform a childhood favorite into something new while keeping the easy, no-fuss preparation you love.
Ingredients for Rice Krispie Treats Recipe Variations
Pantry staples and a few mix-ins create these fun twists on a classic treat.
| Ingredient | Amount | Notes |
|---|---|---|
| Rice Krispies Cereal 🥣 | 6 cups | Classic or generic brand |
| Mini Marshmallows 🍬 | 10 oz | Fresh for best melt |
| Unsalted Butter 🧈 | ½ cup | Melted for binding |
| Vanilla Extract 🌿 | 1 tsp | Pure extract preferred |
| Sea Salt 🧂 | ¼ tsp | Fine grain for balance |
| Semi-Sweet Chocolate Chips 🍫 | 1 cup | For chocolate-dipped variation |
| Dried Cranberries 🍒 | ½ cup | Chopped for fruity twist |
| Peanut Butter 🥜 | ½ cup | Creamy for mixing in |
| Shredded Coconut 🥥 | ½ cup | Toasted for extra flavor |
| Sprinkles 🎉 | ¼ cup | Colorful for fun topping |
| Cocoa Powder 🌶️ | 2 tbsp | Unsweetened for chocolatey depth |
| Almond Extract 🌰 | ½ tsp | Optional for nutty flavor |
The marshmallows are key here—Kraft Jet-Puffed or store brand both melt beautifully. Kellogg’s Rice Krispies are the standard, but any crispy rice cereal works (even the off-brand stuff from Walmart or Aldi). I always buy the butter in bulk at Costco—unsalted gives you control over the salt content. For chocolate chips, Ghirardelli or Guittard are my go-tos for smooth melting.
Out of mini marshmallows? Regular marshmallows chopped small work in a pinch. No peanut butter? Almond or cashew butter substitutes easily. Want less sweetness? Swap half the cereal for toasted oats. The vanilla extract can be swapped for maple syrup at half the amount, but pure extract gives the cleanest flavor. Cocoa powder haters can skip it, but it deepens the chocolate flavor.
Store these in an airtight container—they’ll keep for 3 days at room temperature. If it’s humid, they might get sticky faster. Freezing works for up to 2 months (wrap tightly in plastic first). Best eaten fresh, though—nothing beats that first-day crunch.
Why You’ll Love This Recipe
- One-Bowl Wonder: I melt the butter and marshmallows in the same pot I mix everything in—no extra dishes, just easy cleanup.
- Buttery Vanilla Magic: That hint of vanilla extract with the sea salt makes them taste way more gourmet than the classic version.
- Endless Customizations: I’ve stirred in everything from crushed Oreos to sprinkles, and they turn out perfect every time.
- Budget-Friendly Batch: A box of cereal and a bag of marshmallows makes 24 treats for under $5—honestly, it’s my go-to for school bake sales.
Step-by-Step Instructions for Rice Krispie Treats Variations
These creative twists on the classic no-bake treat come together quickly and easily.
Step 1: Melt Butter and Marshmallows
In a large saucepan over low heat, melt the 0.5 cup Unsalted Butter completely. Once melted, add all 10 oz Mini Marshmallows and stir continuously with a silicone spatula. The mixture will be thick at first—keep stirring until it becomes smooth and creamy.
This process takes about 5-7 minutes. You’ll notice the marshmallows start to collapse and melt into the butter. Remove from heat immediately once melted to prevent scorching. Stir in the 1 tsp Vanilla Extract and 0.25 tsp Sea Salt until fully incorporated.
Step 2: Combine with Rice Krispies Cereal
Add all 6 cups Rice Krispies Cereal to the marshmallow mixture. Use a spatula to fold everything together gently but thoroughly. The cereal will start to soften slightly as it absorbs the warm marshmallow mixture.
You’ll know it’s ready when every piece of cereal is evenly coated and the mixture starts to pull away from the sides of the pan. This should take 30-60 seconds of folding. Avoid pressing too hard—you want to maintain the cereal’s crisp texture.
Step 3: Press into Pan and Add Mix-Ins
Transfer the mixture to a greased 9×13-inch baking dish or line your pan with parchment paper for easy removal. Press the mixture evenly into the pan using the back of your spatula or lightly buttered hands. For a classic base, press firmly to create an even layer.
At this stage, you can divide the mixture to create variations. For chocolate lovers, gently fold in the 1 cup Semi-Sweet Chocolate Chips and 2 tbsp Cocoa Powder into half the mixture before pressing. For fruity flavor, mix in the 0.5 cup Dried Cranberries into another portion. The heat from the mixture will slightly soften the chocolate chips.
Step 4: Create Flavor Variations
For a nutty twist, warm the 0.5 cup Peanut Butter slightly and swirl it into a portion of the pressed mixture using a knife. For tropical flavor, sprinkle the 0.5 cup Shredded Coconut evenly over the top and press lightly so it adheres. For a festive look, press the 0.25 cup Sprinkles into the surface before it sets completely.
For an almond-infused variation, stir the 0.5 tsp Almond Extract into the marshmallow mixture along with the vanilla. This adds a subtle nutty depth that pairs beautifully with the chocolate or coconut variations. Let your creativity guide you—mix and match these add-ins for your perfect combination.
Step 5: Cool and Cut
Allow the treats to cool at room temperature for at least 30 minutes before cutting. This gives them time to set properly so they hold their shape. You’ll know they’re ready when the top is firm to the touch and no longer sticky.
Use a sharp knife to cut into squares. For cleaner cuts, dip the knife in hot water between slices. Store in an airtight container at room temperature for up to 3 days. These variations maintain their texture best when stored separately from each other.
Pro Tips For Making Rice Krispie Treats Recipe Variations
- Melt Butter Low: Use medium-low heat when melting the butter and marshmallows—I learned this the hard way after scorching two batches. It takes about 5-7 minutes for everything to melt smoothly.
- Press While Warm: Spread the mixture into the pan while it’s still warm and sticky, using a buttered spatula or your hands (lightly greased). Waiting too long makes it crumbly and hard to shape.
- Skip Old Cereal: Fresh Rice Krispies make a real difference—they snap better and hold shape. If your box has been open for weeks, the treats won’t have that crisp texture.
- Add Salt Last: Sprinkle the sea salt over the top right after pressing into the pan, not during melting. This keeps the sweet-salty balance sharp and prevents bitterness.
Best Sauces and Condiments for This rice krispie treats recipe variations
Chocolate Drizzle
Melt ½ cup Semi-Sweet Chocolate Chips with 1 tsp coconut oil in the microwave in 20-second intervals, stirring between each. Drizzle over cooled treats using a fork for thin lines or a spoon for thicker ribbons. The coconut oil keeps the chocolate glossy and prevents seizing.
Peanut Butter Swirl
Warm ¼ cup Peanut Butter until slightly runny, then drizzle over the treats before the chocolate sets. Use a toothpick to create marbled patterns. I love the salty-sweet contrast this adds to the classic recipe.
Caramel Sauce
Store-bought caramel sauce works perfectly, but I recommend Smucker’s for its thick consistency. Drizzle lightly over the top just before serving. For extra flair, sprinkle with flaky sea salt to balance the sweetness. 💛
White Chocolate Glaze
Mix ½ cup white chocolate chips with 2 tbsp heavy cream, melted together. This creates a smooth, creamy topping that pairs beautifully with the crunchy base. Add ½ tsp Almond Extract for a nutty depth.
Fruit Compote
Simmer 1 cup Dried Cranberries with ¼ cup orange juice and 1 tbsp sugar until thickened. Cool completely before spooning over treats. The tartness cuts through the sweetness perfectly.
Sweetened Condensed Milk
Drizzle 2 tbsp sweetened condensed milk in a zigzag pattern over the top. It adds a creamy, rich element that complements the crispy texture. I find this works especially well with the coconut variation.
Frequently Asked Questions
Can I use regular marshmallows instead of mini?
Yes, just chop 10 oz of regular marshmallows into smaller pieces before melting. They’ll melt evenly with the butter.
How do I prevent the treats from being too sticky?
Let them cool completely for at least 30 minutes before cutting. Lightly butter your hands when pressing the mixture into the pan to avoid sticking.
Can I make these gluten-free?
Use a gluten-free crispy rice cereal in place of regular Rice Krispies. Check labels to ensure all mix-ins are also gluten-free.
What’s the best way to store these?
Keep in an airtight container at room temperature for up to 3 days. For longer storage, freeze for up to 2 months.
Nutrition Facts

- BBQ Sausage Recipe Oven: Smoky Depth Without the Grill - September 28, 2026
- BBQ Chicken Bowl Recipe Rice: Smoky Sweetness Over Fluffy Grains - September 28, 2026
- Beef Cutlet Recipe Ideas: Crispy Breaded Patties With Bold Seasonings - September 28, 2026