
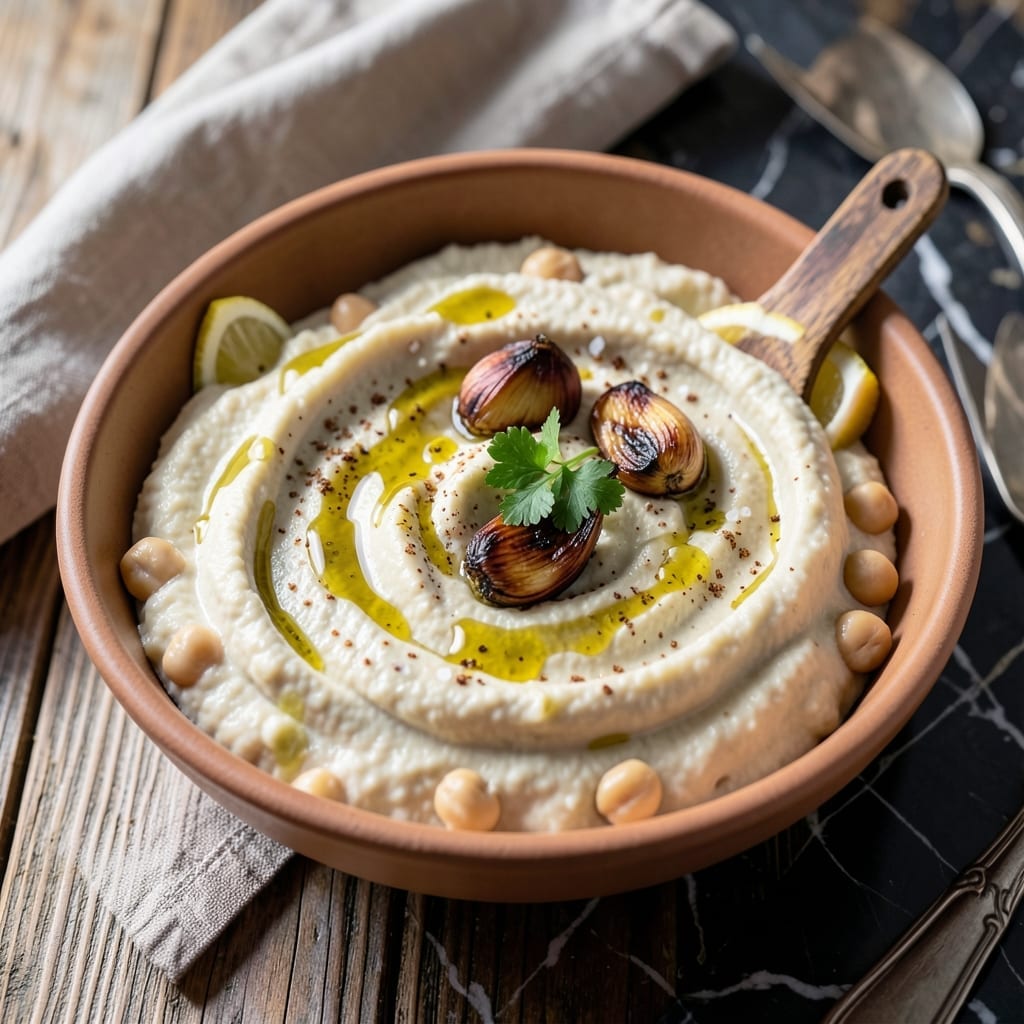
This tahini-free hummus delivers creamy texture and deep flavor through carefully roasted garlic. The process transforms simple chickpeas into a rich, velvety spread that stands out.
Roasting the garlic first brings out its natural sweetness and mellows the sharpness, creating a bold base for this dip. A touch of lemon juice balances the richness while keeping the blend smooth and consistent.
What results is a thick, luscious hummus perfect for dipping or spreading. Its versatility makes it ideal for snack platters, sandwiches, or as a flavorful addition to wraps.
Store in an airtight container in the refrigerator for up to five days. The flavors continue to develop over time, making it even better the next day.
Ingredients for Roasted Garlic Hummus Recipe Without Tahini
Simple ingredients transform into a bold, creamy dip with roasted garlic as the star.
| Ingredient | Amount | Notes |
|---|---|---|
| Canned Chickpeas 🥫 | 2 cans | 15 oz each, drained and rinsed |
| Garlic Heads 🧄 | 2 whole | For roasting, peeled |
| Extra-Virgin Olive Oil 🫒 | ½ cup | Divided for roasting and blending |
| Lemon Juice 🍋 | 3 tbsp | Freshly squeezed preferred |
| Ground Cumin 🌿 | 1 tsp | Toasted for depth of flavor |
| Sea Salt 🧂 | 1 tsp | Adjust to taste after blending |
| Ice Water 💧 | ¼ cup | For achieving creamy texture |
| Smoked Paprika 🌶️ | ½ tsp | Adds subtle smoky depth |
The garlic is everything here. Roast whole heads until golden and caramelized—this brings out the natural sweetness that replaces tahini’s depth. I use California-grown garlic from the grocery store, but any fresh variety works. For chickpeas, Goya or Eden Organic brands hold their shape well. Don’t skip draining and rinsing them—removes that metallic canned taste (worth the extra minute).
No cumin? Coriander or a pinch of curry powder can stand in, but the flavor shifts slightly. Out of fresh lemons? Bottled lemon juice at half the amount works in a pinch (fresh is always better though). For extra richness, add a spoonful of white miso paste. The olive oil should be good quality—California Olive Ranch is a solid choice at most supermarkets.
Hummus thickens as it chills. Store in an airtight container with a thin olive oil layer on top to prevent browning. Keeps for 5-7 days in the fridge. For longer storage, freeze in portions for up to 3 months—just stir well after thawing.
Why You’ll Love This Recipe
- No Fuss Blending: I dump canned chickpeas, roasted garlic, olive oil, lemon, and cumin in the blender—no peeling, no fuss, just creamy hummus in minutes.
- Deep, Mellow Garlic: Roasting transforms sharp garlic into sweet, nutty perfection that blends into the chickpeas for a rich, velvety flavor.
- Party or Packed Lunch: It’s my go-to for game day spreads or weekday lunches—equally at home with pita chips or tucked in a sandwich.
- Pantry Stretch: Here’s what sold me—canned chickpeas and a few staples make a luxurious dip that costs pennies and keeps for days.
Step-by-Step Instructions for Roasted Garlic Hummus Without Tahini
This method ensures a silky texture and deep garlic flavor with every batch.
Step 1: Roast the Garlic Heads
Preheat your oven to 400°F. Slice the 2 whole Garlic Heads in half horizontally, exposing the cloves. Drizzle each half with 1 tablespoon of the 0.5 cup Extra-Virgin Olive Oil, ensuring all cloves are coated. Wrap each half tightly in aluminum foil.
Place the wrapped garlic on a baking sheet and roast for 35-40 minutes until the cloves are soft, golden brown and smell sweet and nutty. Remove from the oven and let cool slightly. Real talk: this step transforms sharp raw garlic into mellow, caramelized perfection that defines the hummus flavor.
Step 2: Prepare the Chickpeas
Drain and rinse the 2 cans Canned Chickpeas thoroughly under cold water to remove any excess sodium. Shake them dry in a colander, then transfer to a food processor. Add the roasted garlic cloves, squeezing them out of their skins directly into the processor.
Pulse the mixture a few times to break up the chickpeas and garlic into a coarse texture. This creates the base for your creamy blend. I’ve found that processing the solids first helps achieve a smoother final consistency without overworking the mixture.
Step 3: Blend in Wet Ingredients and Spices
With the food processor running, slowly drizzle in the remaining 0.5 cup Extra-Virgin Olive Oil through the feed tube. Add the 3 tbsp Lemon Juice, 1 tsp Ground Cumin, 1 tsp Sea Salt, and 0.5 tsp Smoked Paprika. Blend for 2-3 minutes, stopping to scrape down the sides as needed.
The mixture will start to look thick and slightly grainy. Here’s the thing—this is where the ice water comes in to save the day. Don’t add it yet; first, let the processor work the ingredients into a paste.
Step 4: Achieve the Perfect Creamy Texture
With the processor still running, slowly pour in the 0.25 cup Ice Water through the feed tube. This step is critical for achieving that ultra-smooth, creamy texture. The cold water helps emulsify the mixture, turning it from a thick paste into a silky, Spreadable hummus.
Blend for an additional 1-2 minutes until the hummus is completely smooth and fluffy. Taste and adjust seasoning if needed, though the roasted garlic and spices should provide a balanced, bold flavor. The hummus should be light and airy, not dense or heavy.
Pro Tips For Making Roasted Garlic Hummus Recipe Without Tahini
- Roast Garlic Low and Slow: Cut the tops off garlic heads, drizzle with olive oil, wrap in foil, and roast at 400°F for 40-45 minutes—any hotter and you’ll get bitter cloves instead of sweet, caramelized ones.
- Drain and Rinse Well: I learned this the hard way—skip rinsing the canned chickpeas and your hummus will taste like tin; a good rinse removes the metallic tang.
- Warm the Olive Oil: Sounds weird, but it works: lightly warm the olive oil before blending—about 30 seconds in the microwave—so it emulsifies better with the lemon juice.
- Skip the Ice Bath: Resist the urge to peel the roasted garlic immediately; let it cool for 10 minutes first, or you’ll burn your fingers and lose half the cloves to the floor.
Make-Ahead Tips for This Dish
Overnight Flavor Boost
I always make this dip the day before serving. The flavors meld beautifully after 12-24 hours in the fridge, with the roasted garlic notes deepening significantly. This waiting period transforms good hummus into something extraordinary.
Batch Prep Strategy
Double the recipe and store in 4-ounce mason jars. These portion perfectly for individual servings or small gatherings. I use Ball brand jars—they’re durable and seal tightly. The hummus stays fresh for 5-7 days when properly refrigerated.
Freezing for Later
Transfer to freezer-safe containers with ½ inch headspace, leaving room for expansion. Label with the date and freeze for up to 3 months. Thaw overnight in the fridge, then stir in 1-2 tsp ice water to restore creaminess. ❄️
Storage Pro Tips
Always cover the surface with a thin layer of extra-virgin olive oil before sealing. This creates a barrier that prevents oxidation and keeps the hummus from drying out. I use about 1 tbsp per cup of dip.
Reviving Thick Hummus
If it thickens too much after refrigeration, blend in 1-2 tbsp ice water until smooth. Avoid warm water—it can make the hummus grainy. The cold water maintains the silky texture you worked hard to achieve.
Make-Ahead Garnishes
Prepare toppings separately and store in small containers. Drizzle with olive oil and sprinkle with smoked paprika just before serving. This keeps the presentation fresh and vibrant for your guests. 💫
Nutrition Facts
Frequently Asked Questions
What can I use instead of tahini?
Roasted garlic provides the primary flavor, but for extra creaminess try adding 2 tbsp Greek yogurt or 1 tbsp white miso paste. Both enhance texture without overpowering the garlic.
How do I make it smoother?
Blend longer and add ice water slowly. If it’s still grainy, peel the chickpeas before blending or process for 3-4 minutes total. The cold water is key for emulsification.
Can I use raw garlic?
Not recommended. Raw garlic has a harsh, bitter taste that dominates. Roasting for 35-40 minutes at 400°F transforms it into sweet, mellow perfection that defines this dip.
How long does it keep?
Store in an airtight container with olive oil on top. It stays fresh for 5-7 days in the fridge or 3 months frozen. Stir well after thawing.

- BBQ Sausage Recipe Oven: Smoky Depth Without the Grill - September 28, 2026
- BBQ Chicken Bowl Recipe Rice: Smoky Sweetness Over Fluffy Grains - September 28, 2026
- Beef Cutlet Recipe Ideas: Crispy Breaded Patties With Bold Seasonings - September 28, 2026