
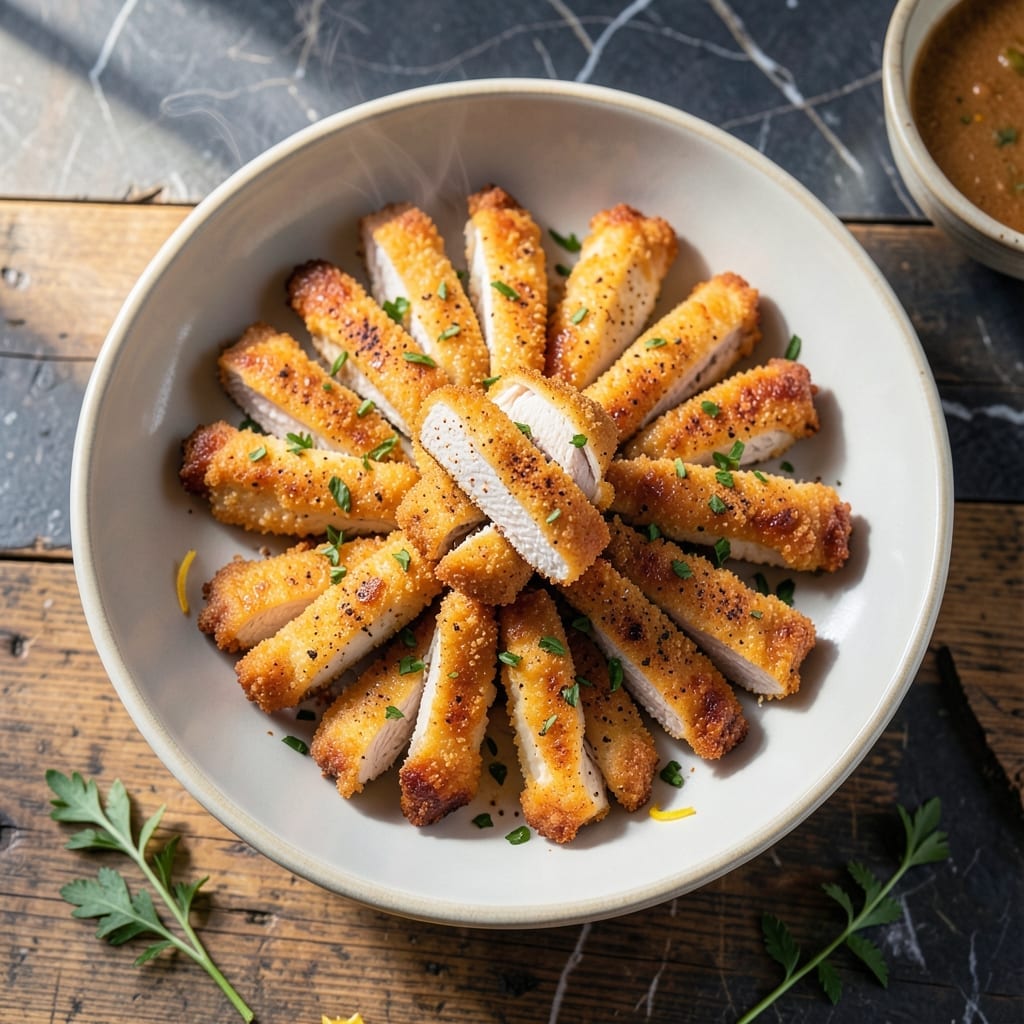
This recipe delivers the signature crispy coating and bold flavor that made Royal Farms famous. The secret lies in a well-seasoned flour blend and precise frying technique that creates that unmistakable crunch.
Each piece emerges golden and shatteringly crispy on the outside, with juicy, tender meat inside. The spice blend adds just enough heat to keep things interesting without overwhelming the chicken.
What sets this version apart is the perfect balance between the coating’s texture and the meat’s moisture. The result is a dish that satisfies that craving for restaurant-quality fried chicken at home.
Serve hot with your favorite dipping sauce for the full experience. This method ensures consistent results every time.
Ingredients for Royal Farms Chicken
This is the ingredient list for that restaurant-quality crispy, spicy chicken you crave.
| Ingredient | Amount | Notes |
|---|---|---|
| Chicken Thighs 🍗 | 2 lb | Boneless, skinless, cut into strips |
| Buttermilk 🥛 | 2 cups | Full-fat for best results |
| All-Purpose Flour 🌾 | 2 cups | For crispy coating |
| Cornstarch 🌽 | ½ cup | Adds extra crunch |
| Paprika 🌶️ | 2 tbsp | Sweet or smoked variety |
| Garlic Powder 🧄 | 1 tbsp | Fresh ground preferred |
| Onion Powder 🧅 | 1 tbsp | Fine texture for even coating |
| Cayenne Pepper 🔥 | 1 tsp | Adjust for spice preference |
| Salt 🧂 | 1 tbsp | Diamond Crystal kosher preferred |
| Black Pepper 🌶️ | 1 tsp | Freshly ground for best flavor |
| Vegetable Oil 🫒 | 4 cups | For deep frying |
| Large Egg 🥚 | 1 whole | Helps coating adhere |
The chicken matters most here. Thighs give you that juicy tenderness—breasts dry out too fast. Most grocery stores carry boneless, skinless for convenience, but bone-in works if you prefer. The buttermilk needs to be full-fat (trust me on this) for the right tang and moisture. For the flour, King Arthur or Gold Medal are reliable brands with consistent results.
No buttermilk? Whole milk plus a tablespoon of vinegar gets you close. Short on paprika? Substitute with extra garlic powder and a pinch of smoked paprika if you have it. The cayenne is flexible—use half the amount for milder heat or double it if you like things spicy. Cornstarch can be swapped for arrowroot powder at a 1:1 ratio.
Fry in batches to avoid crowding the pan. Leftovers keep in the fridge for 3-4 days but are best eaten fresh. Reheat in the oven at 375°F for about 10 minutes to restore some crispiness. Freezing isn’t ideal but works for up to 1 month.
Why You’ll Love This Recipe
- One Bowl Magic: I mix everything right in the same bowl—no fancy prep, just buttermilk-soaked thighs tossed in flour and spices.
- Crispy Paprika Crunch: That paprika in the cornstarch coating gives it this warm, slightly smoky crunch you can’t stop sneaking bites of.
- Weeknight Hero: I make a double batch on Sunday and we’re set for quick dinners all week—hot or cold, it’s good.
- Budget Stretcher: Chicken thighs stay cheap, and a little buttermilk goes a long way for maximum flavor without breaking the bank.
Step-by-Step Instructions for Crispy Coated Chicken With Spicy Kick
Master this method for restaurant-quality crispy chicken with a perfectly seasoned, crunchy coating.
Step 1: Marinate the Chicken in Buttermilk
Begin by cutting the 2 lb Chicken Thighs into uniform strips, about 1-inch thick. This ensures even cooking and consistent texture throughout each piece. Pat them dry with paper towels to remove excess moisture, which helps the coating adhere better.
In a large bowl, whisk together the 2 cups Buttermilk and the 1 whole Large Egg until fully combined. Submerge the chicken strips in the mixture, ensuring they are completely coated. Cover the bowl and refrigerate for at least 4 hours, or ideally overnight. This step tenderizes the meat and infuses it with flavor while preparing the surface for the dry coating.
Step 2: Prepare the Seasoned Flour Mixture
In a shallow dish or large bowl, combine the 2 cups All-Purpose Flour, 0.5 cup Cornstarch, 2 tbsp Paprika, 1 tbsp Garlic Powder, 1 tbsp Onion Powder, 1 tsp Cayenne Pepper, 1 tbsp Salt, and 1 tsp Black Pepper. Whisk until the mixture is uniform and free of lumps.
The cornstarch is critical here—it enhances the crunch of the coating, while the paprika and cayenne provide that signature spicy kick. The fine texture of the onion powder and garlic powder ensures even distribution of flavor in every bite.
Step 3: Coat and Rest the Chicken
Remove the chicken strips from the buttermilk mixture, allowing any excess to drip off. Dredge each piece in the seasoned flour mixture, pressing gently to ensure a thick, even coating. Place the coated strips on a wire rack set over a baking sheet to allow airflow on all sides.
Let the chicken rest for 15-20 minutes. This step is essential—it allows the coating to hydrate slightly and adhere firmly to the meat, preventing it from falling off during frying. You’ll notice the flour mixture will look slightly tacky, which is exactly what you want.
Step 4: Deep Fry to Golden Perfection
In a deep, heavy-bottomed pot or Dutch oven, heat the 4 cups Vegetable Oil to 350°F. Use a deep-fry thermometer to monitor the temperature—maintaining this heat is key to achieving a crispy exterior without undercooking the interior.
Carefully lower the chicken strips into the hot oil in batches, avoiding overcrowding. Fry for 6-8 minutes, turning occasionally, until the coating is deep golden brown and the internal temperature reaches 165°F. The oil should bubble steadily around the chicken, indicating active cooking.
Transfer the fried chicken to a wire rack or paper towels to drain excess oil. The coating should be audibly crisp when tapped and maintain its crunch even after cooling slightly.
Pro Tips For Making Royal Farms Chicken
- Soak Overnight: Let the chicken thighs sit in buttermilk for at least 8 hours—I learned this the hard way after my first batch came out dry and bland. The longer soak makes the meat tender and infuses flavor deep into the thighs. —
- Double Dredge: Coat the thighs in flour once, dip back in buttermilk, then dredge again in flour mixed with cornstarch. Sounds tedious, but it’s what gives that extra-crispy, golden crust Royal Farms is known for. —
- Hot Oil Test: Drop a pinch of flour into the oil before frying—if it sizzles immediately, it’s ready. I burned my first few batches by guessing, and now I never skip this quick check. —
- Rest on Rack: After frying, place the chicken on a wire rack, not paper towels. This keeps the bottom from getting soggy, and the crust stays crispy all the way around. My grandmother swore by this, and she was right.
Best Sauces and Condiments for This Recipe
Classic Dipping Sauces
You can’t go wrong with ranch dressing—I love the creamy tang it adds to the spicy coating. Hidden Valley is my go-to brand for that perfect balance of herbs and buttermilk flavor. For a lighter option, try bolthouse farms ranch with its yogurt base. 💛
Spicy Complements
The heat in this chicken pairs beautifully with honey mustard. Mix 3 tbsp yellow mustard with 2 tbsp honey and a splash of apple cider vinegar for that sweet-spicy kick. Sriracha mayo is another favorite—just combine ½ cup mayo with 2 tbsp sriracha.
Southern Favorites
For an authentic touch, serve with come-back sauce, a Mississippi specialty. Blend 1 cup mayo, ¼ cup ketchup, 2 tbsp Worcestershire, and 1 tsp hot sauce. Alabama white sauce also works surprisingly well with its vinegar and horseradish zing.
Sweet and Tangy
BBQ sauce adds a smoky dimension—Sweet Baby Ray’s original complements the spice without overpowering. For a fruity twist, try peach preserves mixed with a bit of Dijon mustard. The sweetness balances the cayenne beautifully.
I always keep Texas Pete hot sauce on hand for those who want to turn up the heat even more.
Nutrition Facts
Frequently Asked Questions
Can I use chicken breasts instead of thighs?
You can, but thighs stay juicier. Breasts dry out faster, so reduce frying time to 5-6 minutes. For best results, brine them first in saltwater for 30 minutes to retain moisture.
What if I don’t have buttermilk?
Mix 2 cups milk with 2 tbsp vinegar or lemon juice. Let it sit for 5 minutes to thicken. This works just as well for tenderizing and flavor.
How do I keep the coating crispy longer?
Drain on a wire rack, not paper towels. Place in a 200°F oven on a rack until serving. Avoid stacking pieces to prevent steam from softening the crust.
Can I bake instead of fry?
Yes, but texture differs. Bake at 400°F for 20-25 minutes on a wire rack. Use cooking spray for crispiness, but frying gives the best crunch.

- BBQ Sausage Recipe Oven: Smoky Depth Without the Grill - September 28, 2026
- BBQ Chicken Bowl Recipe Rice: Smoky Sweetness Over Fluffy Grains - September 28, 2026
- Beef Cutlet Recipe Ideas: Crispy Breaded Patties With Bold Seasonings - September 28, 2026