
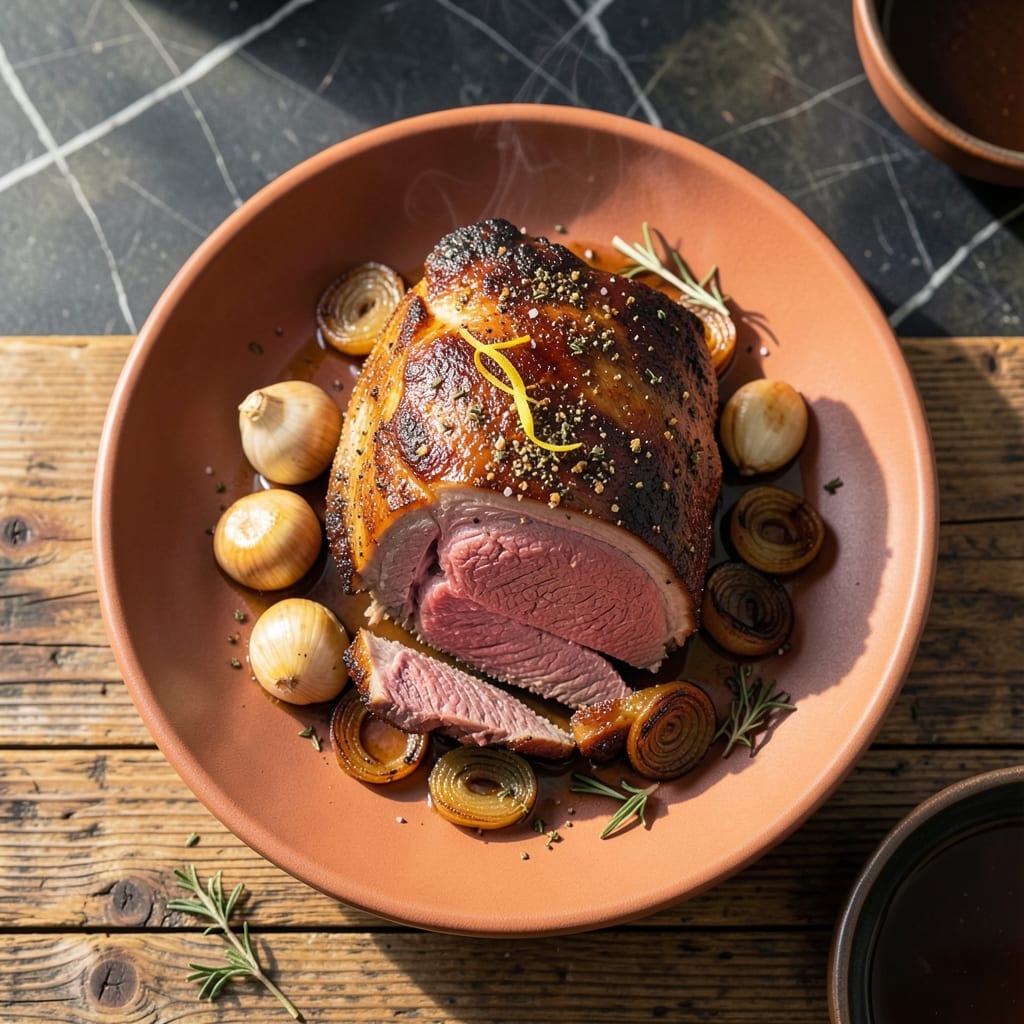
I’ve spent years perfecting this oven method for rump roast, and the secret is low and slow cooking. This approach transforms a tough cut into melt-in-your-mouth tenderness that falls apart at the touch of a fork.
With just a few simple seasonings and a 3-hour oven session, you’ll have a main dish that tastes like it took all day. No fancy techniques—just patience and the right temperature.
Ingredients for Rump Roast Recipe Oven
A few simple ingredients and time turn this affordable cut into something extraordinary.
| Ingredient | Amount | Notes |
|---|---|---|
| Beef Rump Roast 🥩 | 3 lb | Well-marbled, trimmed of excess fat |
| Kosher Salt 🧂 | 2 tsp | Diamond Crystal preferred |
| Black Pepper 🌶️ | 1 ½ tsp | Freshly ground for best flavor |
| Garlic Powder 🧄 | 1 tbsp | Not garlic salt |
| Onion Powder 🧅 | 1 tbsp | Fresh ground preferred |
| Dried Thyme 🌿 | 1 tsp | Crushed between fingers |
| Dried Rosemary 🍃 | 1 tsp | Crushed for better release of oils |
| Olive Oil 🫒 | 2 tbsp | Extra-virgin for richness |
| Beef Broth 🍲 | 1 cup | Low-sodium preferred |
| Carrots 🥕 | 3 whole | Peeled and cut into chunks |
| Yellow Onion 🧅 | 1 whole | Peeled and quartered |
| Russet Potatoes 🥔 | 2 whole | Peeled and cut into large pieces |
| Worcestershire Sauce 💧 | 2 tbsp | Anchovy-free if preferred |
The beef is everything here. Rump roast (sometimes called bottom round) needs that marbling for tenderness—look for pieces with visible fat streaks. Costco has great quality at a good price, but any grocery store butcher can cut you a nice piece. Don’t skip the trimming (the good stuff, not the pre-trimmed kind). A 3 lb roast feeds four with leftovers for sandwiches.
No garlic powder? Fresh minced garlic at double the amount works, but powder distributes better. Swap onion powder for fresh diced onion if you prefer texture. Thyme and rosemary can be fresh at one-third the amount. For the broth, mushroom or vegetable works if you’re avoiding beef. The potatoes? Yukon Golds hold shape better but Russets soak up flavor like a sponge.
Leftovers keep 4-5 days in the fridge, and the flavor deepens overnight. Freezes beautifully for 3 months (slice before freezing for easy portions). The veggies soak up the juices—perfect for a next-day hash or stew.
Why You’ll Love This Recipe
- Set It and Forget: I toss the rump roast with salt, pepper, garlic and onion powder, pop it in the oven, and let the heat do the work—no babysitting required.
- Rich and Simple: The dry rub of garlic and onion powder builds a deep, savory crust that makes every bite ridiculously satisfying.
- Feeds the Week: One roast yields multiple dinners: sandwiches tonight, tacos tomorrow, and a hearty stew the next day.
- Budget Hero: A rump roast is affordable, and with just four pantry staples, I stretch it into meals that feel way fancier than the cost.
Step-by-Step Instructions for Rump Roast Oven
Here’s the straightforward method that guarantees fall-apart tenderness every time.
Step 1: Season and Sear the Beef Rump Roast
Pat the 3 lb Beef Rump Roast dry with paper towels. This is crucial for a good sear. In a small bowl, mix the 2 tsp Kosher Salt, 1.5 tsp Black Pepper, 1 tbsp Garlic Powder, 1 tbsp Onion Powder, 1 tsp Dried Thyme, and 1 tsp Dried Rosemary. Rub this mixture all over the roast, pressing it into the meat.
Heat the 2 tbsp Olive Oil in a large Dutch oven over medium-high heat. When the oil shimmers, add the roast and sear on all sides for 2-3 minutes per side until deeply browned. This creates a flavorful crust that locks in juices during roasting.
Step 2: Prepare Vegetables and Deglaze
While the roast sears, arrange the 3 whole Carrots, 1 whole Yellow Onion, and 2 whole Russet Potatoes around the bottom of the Dutch oven. These will cook alongside the roast, soaking up all the delicious flavors.
Once the roast is browned on all sides, place it on top of the vegetables. Pour in the 1 cup Beef Broth and 2 tbsp Worcestershire Sauce. The liquid should come about halfway up the roast. Use a wooden spoon to scrape up any browned bits from the bottom of the pot—this adds incredible depth to your cooking liquid.
Step 3: Slow Roast to Perfection
Cover the Dutch oven with its lid and transfer it to a preheated 325°F oven. Roast for 2.5 to 3 hours, or until the meat is fork-tender. I check it after 2 hours and then every 30 minutes after that.
You’ll know it’s done when a fork slides in and out with almost no resistance. The internal temperature should read 195-200°F on a meat thermometer. The vegetables should be tender and golden, having absorbed all the rich, beefy flavors from the cooking liquid.
Step 4: Rest and Serve
Carefully transfer the roast to a cutting board and tent it loosely with foil. Let it rest for 15-20 minutes before slicing. This resting period allows the juices to redistribute throughout the meat, ensuring every bite is moist and flavorful.
Serve the sliced roast with the cooked vegetables and some of the cooking liquid spooned over the top. The broth will have reduced slightly into a light, flavorful au jus that perfectly complements the tender beef and hearty vegetables.
Pro Tips For Making Rump Roast Recipe Oven
- Preheat the Oven: I learned this the hard way—always preheat to 450°F before putting the rump roast in, or you’ll lose that crucial sear and end up with a gray, sad exterior.
- Pat It Dry: Blot the roast with paper towels before seasoning—moisture is the enemy of a good crust, and kosher salt sticks better to dry meat.
- Don’t Crowd the Pan: Use a roasting rack or elevate the meat on veggies so hot air circulates; otherwise, the bottom steams instead of browns.
- Rest Before Slicing: Give it a solid 15 minutes under foil after roasting—skip this and all the juices will end up on your cutting board, not in the meat.
Common Mistakes When Making This Recipe
Skipping the Sear
Don’t be tempted to skip searing the roast first. That 2-3 minutes per side at high heat creates a flavorful crust through the Maillard reaction. I’ve tried skipping it to save time, and the result was noticeably less flavorful. 🔥
Wrong Oven Temperature
Cooking at too high a temperature will toughen the meat. Stick to 325°F—any hotter and the exterior dries out before the interior becomes tender. Low and slow is the only way to guarantee that fall-apart texture.
Not Enough Liquid
If your Dutch oven looks dry, add more beef broth during cooking. The liquid should come about halfway up the roast. Without enough, the vegetables won’t steam properly and the meat can dry out.
Opening the Oven
Every time you open the oven, you lose 50-75°F of heat, extending your cook time. Resist the urge to check too often. I set a timer and only open it after 2 hours, then every 30 minutes after that.
Cutting Too Soon
Slicing immediately after removing from the oven causes all those precious juices to spill out. Let it rest for 15-20 minutes tented with foil. This step makes the difference between dry and moist meat. 💡
Using the Wrong Cut
Not all roasts are created equal. Look for a well-marbled rump roast—lean cuts won’t break down properly. I learned this the hard way with a top round that stayed tough despite hours in the oven.
Frequently Asked Questions
What’s the ideal internal temperature?
For fall-apart tenderness, aim for 195-200°F on a meat thermometer. This ensures the connective tissue has fully broken down.
Can I use a different cooking vessel?
Yes, any heavy pot with a lid works. A roasting pan with foil is a good alternative, but a Dutch oven distributes heat most evenly.
How do I prevent dry meat?
Don’t skip the sear or resting time. Sear for 2-3 minutes per side and always rest for 15-20 minutes before slicing.
What if my roast is smaller?
For a 2 lb roast, reduce cooking time to 2-2.5 hours. Start checking at 2 hours and use the fork test.
Nutrition Facts

- BBQ Sausage Recipe Oven: Smoky Depth Without the Grill - September 28, 2026
- BBQ Chicken Bowl Recipe Rice: Smoky Sweetness Over Fluffy Grains - September 28, 2026
- Beef Cutlet Recipe Ideas: Crispy Breaded Patties With Bold Seasonings - September 28, 2026