
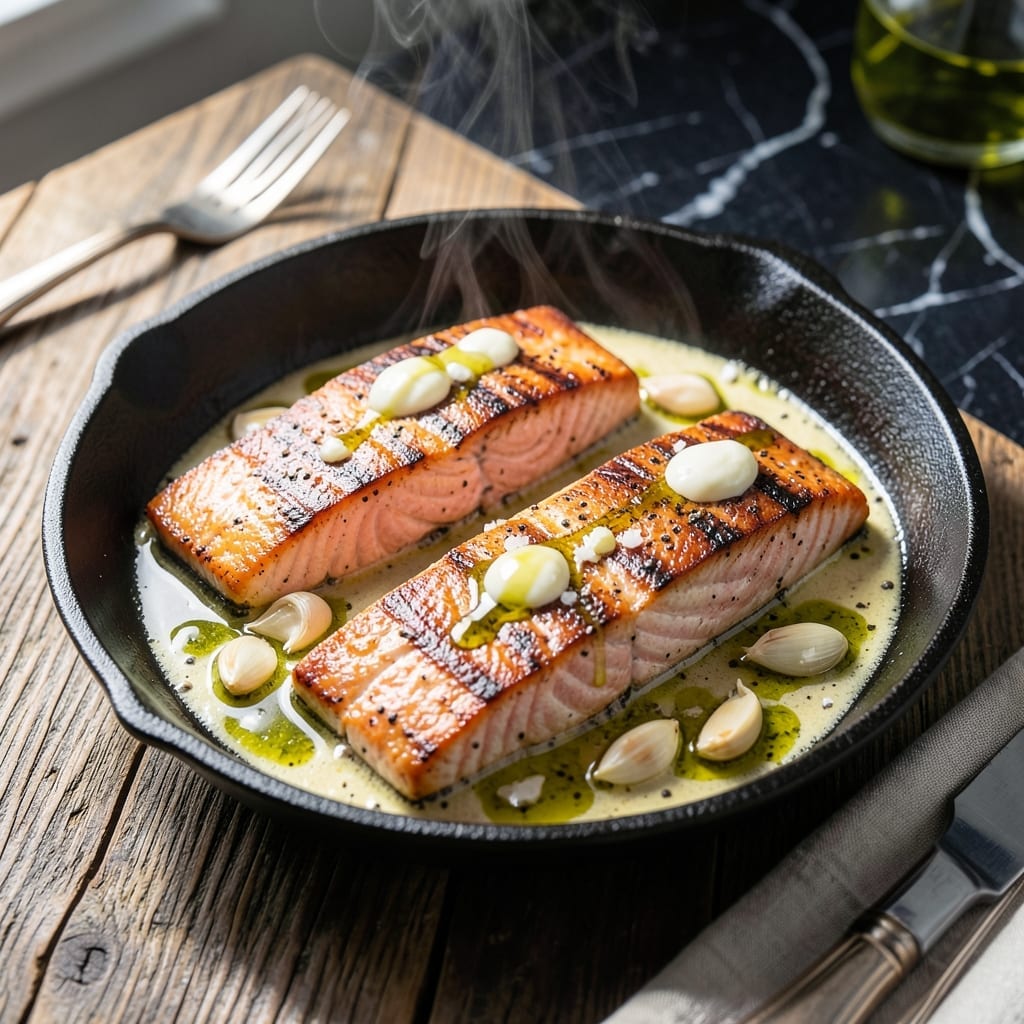
Mastering pan-seared salmon is simpler than you think with the right technique. This method guarantees crispy skin and flaky flesh every time, using just one skillet and a few key steps.
The secret lies in patience and precision. Start with a cold pan to render the fat slowly, then finish with high heat for that perfect golden crust. The flesh stays tender and moist, never dry or overcooked.
You’ll achieve restaurant-quality results with minimal effort. The skin crisps to a shatter, while the inside remains buttery and delicate. It’s a foolproof approach that works with any salmon fillet.
Serve immediately with your favorite sides. This technique transforms an ordinary dinner into something extraordinary.
Ingredients for Salmon Recipe Pan
These nine ingredients transform into that perfect pan-seared salmon with crispy skin and flaky flesh.
| Ingredient | Amount | Notes |
|---|---|---|
| Salmon Fillets 🐟 | 4 whole | Skin-on, 6 oz each, patted dry |
| Kosher Salt 🧂 | 1 ½ tsp | Diamond Crystal preferred for even seasoning |
| Freshly Ground Black Pepper 🌶️ | 1 tsp | Coarse grind for texture |
| Olive Oil 🫒 | 3 tbsp | High smoke point, neutral flavor |
| Unsalted Butter 🧈 | 2 tbsp | For basting, chilled and cubed |
| Garlic Cloves 🧄 | 3 cloves | Thinly sliced for aromatic flavor |
| Fresh Thyme Sprigs 🌿 | 4 whole | Optional, for garnish and aromatics |
| Lemon 🍋 | 1 whole | Zested and juiced, for brightness |
| Fresh Dill 🌿 | ¼ cup | Chopped, for finishing |
| Capers 🫒 | 2 tbsp | Drained, for briny contrast |
The salmon is non-negotiable here—wild-caught if possible, but farmed Atlantic works too (just check the color is vibrant). Whole Foods or Costco have great skin-on fillets. Look for even thickness so everything cooks at the same rate. Pat them bone-dry before seasoning—this is what gets that skin shatteringly crisp. The butter should be high-quality (I like Kerrygold), and don’t skip chilling it before cubing.
No fresh thyme? Dried at one-third the amount works, but honestly it’s fine to skip. Short on dill? Fresh parsley or chives add that green freshness. No capers? A splash of brine from good olives gives a similar hit. The lemon can be swapped for lime for a different vibe. The key is that neutral oil—avocado oil is a great sub if you’ve got it (higher smoke point).
Seasoned salmon keeps in the fridge for 1-2 days max before cooking. Leftovers? Good for 2-3 days (reheat gently in a pan, not microwave). The butter and herbs can be prepped a day ahead—keep the butter chilled until ready to use.
Why You’ll Love This Recipe
- One Pan Magic: I love that this comes together with just five ingredients and zero extra bowls.
- Buttery Perfection: That rich, golden butter crust on the salmon is honestly the best part.
- Weeknight Hero: It’s my go-to for busy evenings when I need something fast but impressive.
- Leftovers Rock: The salmon tastes even better the next day in salads or wraps.
Step-by-Step Instructions for Salmon Recipe Pan
Here’s how I get that perfect crispy skin and tender flakes every single time.
Step 1: Season and Prep the Salmon Fillets
Pat the 4 whole Salmon Fillets completely dry with paper towels—this is non-negotiable for crispy skin. I like to press firmly to remove every bit of moisture from both sides.
Season the flesh side evenly with the 1.5 tsp Kosher Salt and 1 tsp Freshly Ground Black Pepper. The coarse grind gives just the right texture contrast against the delicate fish. Let them sit at room temperature for 10 minutes while you prep the rest.
Step 2: Sear the Salmon Skin-Side Down
Heat 2 tbsp of the 3 tbsp Olive Oil in a large skillet over medium-high heat until it shimmers but doesn’t smoke. Carefully place the salmon fillets skin-side down in the pan. Press gently with a fish spatula for the first 30 seconds to prevent curling.
Cook undisturbed for 4-5 minutes until the skin is deep golden brown and crisp. You’ll see the edges of the fillets turn opaque and rise up the sides—that’s your visual cue. Don’t be tempted to peek or move them early.
Step 3: Flip and Baste with Aromatics
Flip the fillets and immediately add the remaining 1 tbsp Olive Oil, 2 tbsp Unsalted Butter, 3 cloves Garlic Cloves (thinly sliced), and 4 whole Fresh Thyme Sprigs to the pan. Tilt the skillet slightly and baste the salmon with the foaming butter for 1-2 minutes.
The butter will turn a nutty brown and the garlic will become fragrant—this is where the magic happens. The aromatics infuse into the fish while the residual heat finishes cooking the fillets through. They’re done when the flesh flakes easily with a gentle press.
Step 4: Finish with Bright Acids and Herbs
Transfer the salmon to a serving platter. Squeeze the juice from the 1 whole Lemon over the fillets and scatter the 2 tbsp Capers and 0.25 cup Fresh Dill on top. The acid from the lemon cuts through the richness while the capers add a briny pop.
Let it rest for 2 minutes before serving. This brief rest allows the juices to redistribute, ensuring every bite is moist and flavorful. The skin should stay crispy, the flesh should pull apart in perfect flakes, and the aromatics should make your kitchen smell incredible.
Pro Tips For Making Salmon Recipe Pan
- Pat It Dry: Use paper towels to thoroughly dry the salmon fillets before seasoning—this guarantees a better sear and prevents steaming in the pan.
- Hot Pan First: Heat the pan until it’s almost smoking before adding the oil, then the salmon. I learned this the hard way after too many pale, soggy fillets.
- Skin Side Down: Always start with the skin side down in the hot pan for 4-5 minutes to get it crispy before flipping—this keeps it from sticking.
- Baste With Butter: In the last 2 minutes, add butter, garlic, and herbs to the pan and spoon it over the salmon repeatedly. Sounds fussy, but it actually changes the outcome.
Serving Suggestions for This Dish
Plating Like a Pro
Transfer each fillet to a warm plate, skin-side down, to preserve that crispy texture. I use white plates to make the salmon’s golden color pop. Arrange them slightly off-center for a restaurant-style presentation. 💛
Garnish for Impact
Sprinkle fresh dill and capers directly over the fillets, then add a few lemon wedges on the side. A drizzle of the pan’s browned butter sauce ties everything together beautifully.
Starch Sides
Creamy mashed potatoes or roasted fingerlings soak up the butter sauce perfectly. For a lighter option, try couscous with lemon zest and parsley—it complements the salmon’s richness.
Veggie Companions
Steamed asparagus or sautéed green beans add color and crunch. Toss them with a bit of the pan drippings for extra flavor. A simple arugula salad with lemon vinaigrette also works wonderfully.
Wine Pairing
A crisp Sauvignon Blanc or Pinot Noir enhances the dish without overpowering it. The acidity in whites cuts through the butter, while a light red brings out the salmon’s natural sweetness. 🍷
Nutrition Facts
Frequently Asked Questions
Should I leave the skin on?
Yes, keeping the skin on helps hold the fillet together and creates that coveted crispy texture. Just pat it completely dry before cooking for maximum crispness.
How do I prevent the salmon from sticking?
Use a hot pan with enough oil and avoid moving the fillets for the first 4-5 minutes. A well-seasoned cast iron or stainless steel skillet works best for this method.
Can I use frozen salmon?
Yes, but thaw it completely in the fridge overnight first. Pat it extra dry since frozen fish releases more moisture. Never cook from frozen in a pan.
What’s the best way to check doneness?
The flesh should flake easily with a fork and reach an internal temperature of 145°F. The color will change from translucent to opaque when fully cooked.

- Pea Shoots Recipe Salad: Fresh Greens With Asian-Inspired Dressing - October 9, 2026
- Peanut Butter Bark Recipe With Pretzels: Sweet and Salty Holiday Treat - October 9, 2026
- Peach Crisp Recipe With Fresh Peaches: Buttery Oat Topping Over Juicy Summer Fruit - October 9, 2026