
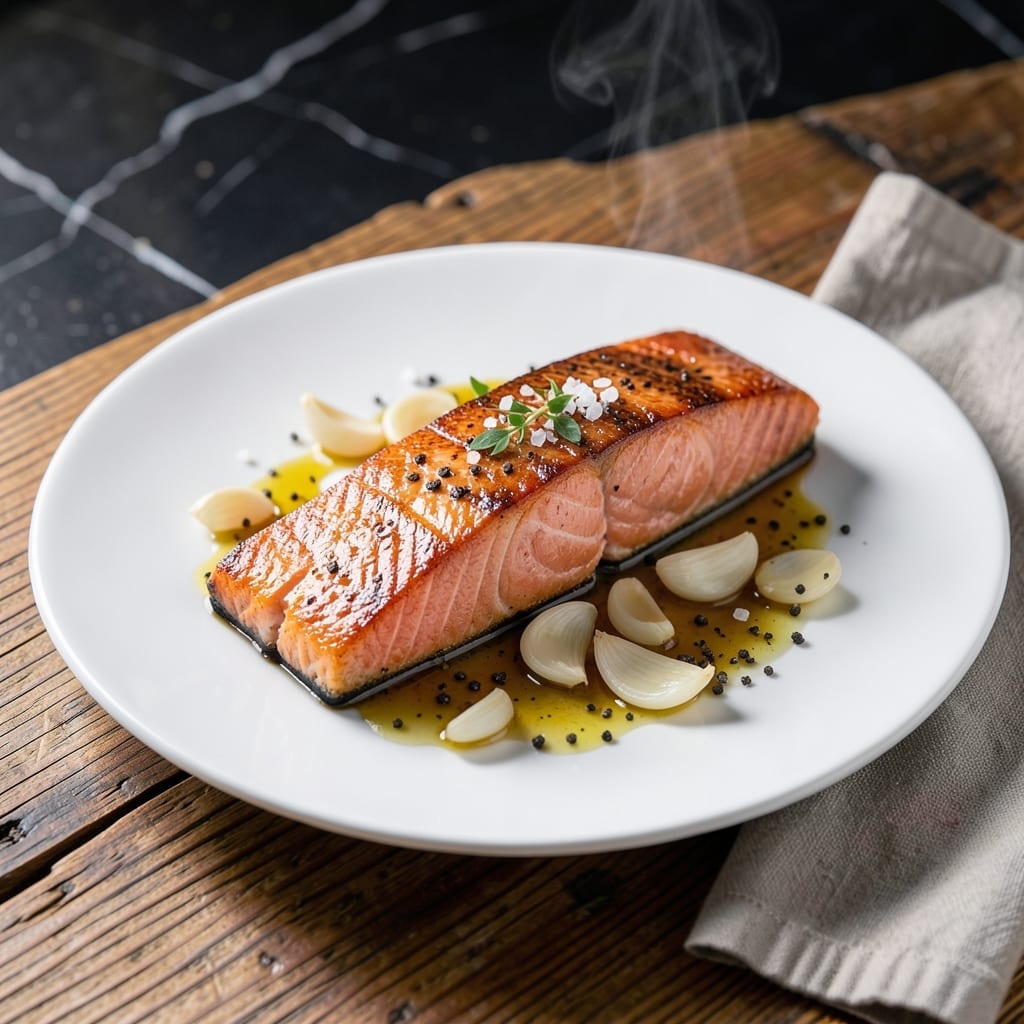
Mastering perfectly seared salmon at home requires just one key technique: patience. I developed this method after years of overcooking fish, and it never fails to deliver.
The secret is starting with a cold pan and letting the salmon skin render slowly. This creates shatteringly crispy skin while keeping the center perfectly flaky and moist.
What you’ll achieve is restaurant-quality salmon with golden edges and tender flesh that melts on your tongue. The method works with any cut, from fillets to steaks.
This approach transforms a simple piece of fish into an elegant meal ready in under 15 minutes.
Ingredients for Salmon Recipe Seared
High-quality salmon plus a few pantry staples create this elegant dish in minutes.
| Ingredient | Amount | Notes |
|---|---|---|
| Salmon Fillets 🐟 | 1 ½ lb | Skin-on, center-cut preferred |
| Kosher Salt 🧂 | 1 ½ tsp | Diamond Crystal preferred |
| Ground Black Pepper 🌶️ | ½ tsp | Freshly cracked for best flavor |
| Olive Oil 🫒 | 2 tbsp | High smoke point variety |
| Unsalted Butter 🧈 | 2 tbsp | Cold, cubed for basting |
| Garlic Cloves 🧄 | 3 cloves | Lightly crushed, peeled |
| Fresh Thyme Sprigs 🌿 | 4 sprigs | Or 1 tsp dried thyme |
| Fresh Lemon 🍋 | 1 whole | For serving, cut into wedges |
| Fresh Dill 🌿 | ¼ cup | Chopped, for garnish |
| Dijon Mustard 🟡 | 1 tbsp | For optional glaze |
| Honey 🍯 | 1 tsp | Optional for glaze |
The salmon must be skin-on and fresh—look for vibrant color and a clean, ocean-like scent. Whole Foods and Trader Joe’s carry reliable options, but your local fishmonger is ideal. Ask for center-cut fillets (they cook more evenly). Pat the skin thoroughly dry before cooking—this is critical for crispiness. The butter should be European-style for richer flavor (I prefer Plugrá).
No fresh thyme? Dried works at one-third the amount. Out of dill? Fresh parsley or tarragon make fine substitutes. The Dijon can be swapped for whole-grain mustard (more texture) or omitted entirely. For a simpler version, skip the glaze and just use salt, pepper, and lemon. The honey is optional—maple syrup works too, but use sparingly to avoid overpowering the fish.
Cooked salmon keeps 2-3 days in the fridge (store it gently wrapped). It doesn’t freeze well—texture suffers. Best served immediately, though leftovers make a great salad topping. The fresh herbs are best added right before serving to preserve their brightness.
Why You’ll Love This Recipe
- One Pan Wonder: I just heat oil, season the salmon, and sear—no fancy equipment or long prep.
- Buttery Crisp: That golden crust from butter and pepper? Ridiculously good with every bite.
- Dinner to Lunch: Leftovers taste even better cold the next day in salads or wraps.
- Weeknight Hero: Honestly, it’s ready faster than waiting for delivery, and way more satisfying.
Step-by-Step Instructions for Seared Salmon
Here’s the method. Straightforward, tested, works every time.
Step 1: Prep and Season the Salmon Fillets
Pat the 1.5 lb Salmon Fillets completely dry with paper towels—this is non-negotiable for achieving crispy skin. I press firmly to remove all surface moisture, especially on the skin side where water tends to collect.
Season both sides evenly with the 1.5 tsp Kosher Salt and 0.5 tsp Ground Black Pepper. I use my fingers to gently press the seasoning into the flesh, ensuring good adhesion. Let the seasoned fillets sit at room temperature for 10-15 minutes while you prep the remaining ingredients—this takes the chill off and promotes even cooking.
Step 2: Sear the Skin Side to Golden Perfection
Heat the 2 tbsp Olive Oil in a large skillet over medium-high heat until it shimmers but doesn’t smoke. Place the fillets skin-side down in the pan, pressing down gently with a fish spatula for the first 10 seconds to prevent curling and ensure full contact with the pan.
Cook undisturbed for 4-5 minutes until the skin develops a deep golden crust and the edges appear opaque about ¼ inch up the sides. Resist the urge to peek or move the fillets—this is how you get that coveted crispy skin. The skin should release easily from the pan when it’s ready to flip.
Step 3: Baste with Aromatics and Finish Cooking
Flip the fillets and immediately add the 2 tbsp Unsalted Butter, 3 cloves Garlic Cloves, and 4 sprigs Fresh Thyme Sprigs to the pan. Tilt the skillet slightly and use a spoon to baste the fillets with the foaming butter continuously for 2-3 minutes.
The butter will turn a light hazelnut brown and develop a nutty aroma as it cooks. This basting technique adds incredible flavor while gently finishing the cooking process. The salmon is done when it reaches an internal temperature of 125-130°F and flakes easily with a fork.
Step 4: Optional Glaze and Garnish
For an extra layer of flavor, whisk together the 1 tbsp Dijon Mustard and 1 tsp Honey in a small bowl. Brush this glaze lightly over the cooked fillets during the last 30 seconds of cooking, allowing it to caramelize slightly.
Transfer the salmon to a serving platter and garnish with the 0.25 cup Fresh Dill. Serve immediately with wedges of the 1 whole Fresh Lemon on the side. The skin should be crisp enough to crackle slightly when cut, while the interior remains tender and flaky.
Pro Tips For Making Salmon Recipe Seared
- Dry the Fillets: Pat the salmon dry with paper towels before seasoning—water is the enemy of a good sear. I learned this the hard way after wondering why my salmon steamed instead of crisped.
- Hot Pan, Cold Fish: Heat the olive oil in the pan until it shimmers, then add the salmon. If the oil isn’t sizzling the second the fillet hits, it’s not hot enough.
- Skin Side Down First: Start with the skin side down on medium-high heat for 4-5 minutes to render the fat and get it crispy. Flip only once—resist the urge to peek.
- Butter at the End: Add the butter in the last 2 minutes and baste the salmon with it. This prevents burning and gives it that glossy, restaurant-quality finish.
Troubleshooting salmon recipe seared
Skin Sticking to Pan
This usually happens when the pan isn’t hot enough or the skin isn’t dry. I always pat my 1.5 lb Salmon Fillets completely dry and heat the 2 tbsp Olive Oil until it shimmers. If it sticks, don’t force it—let it cook another 30 seconds to release naturally.
Overcooked Centers
Salmon continues cooking after you remove it from heat. Pull it when the center reaches 125°F—it will rise to 130°F while resting. I use an instant-read thermometer for precision. Remember, 4-5 minutes per side is usually perfect for 1-inch thick fillets.
Skin Not Crispy
For shatteringly crisp skin, press the fillets down gently with a fish spatula for the first 10 seconds in the pan. Also, don’t move them! The skin needs undisturbed contact with the hot oil to crisp properly. 🔥
Butter Burning
If your 2 tbsp Unsalted Butter browns too quickly, lower the heat to medium when basting. I tilt the pan slightly to pool the butter, then spoon it over the fillets continuously. Remove from heat if it starts smoking.
Fish Curling
To prevent curling, make 1-2 shallow cuts in the skin side before cooking. This releases tension in the flesh. Also, press down gently with your spatula for the first 10 seconds to keep it flat against the pan.
Uneven Cooking
Center-cut fillets cook more evenly. If using tail pieces, they may finish faster. I check the thickest part with my thermometer. For consistent results, aim for fillets of similar thickness, about 1 inch. 💡
Nutrition Facts
Frequently Asked Questions
What’s the best pan for searing?
A heavy stainless steel or cast iron skillet works best. These retain heat evenly and develop a good sear. Avoid nonstick as it won’t get hot enough for crispy skin.
Can I use frozen salmon?
Yes, but thaw it completely first. Pat extra dry to remove moisture. Frozen fillets can release more liquid, making crispy skin trickier.
How do I know when it’s done?
The center should reach 125-130°F. Look for opaque flesh that flakes easily with a fork. The skin should release cleanly from the pan.
What if I don’t have a fish spatula?
A thin, flexible metal spatula works well. Avoid plastic as it can melt. The key is getting under the skin without breaking it.

- BBQ Sausage Recipe Oven: Smoky Depth Without the Grill - September 28, 2026
- BBQ Chicken Bowl Recipe Rice: Smoky Sweetness Over Fluffy Grains - September 28, 2026
- Beef Cutlet Recipe Ideas: Crispy Breaded Patties With Bold Seasonings - September 28, 2026