
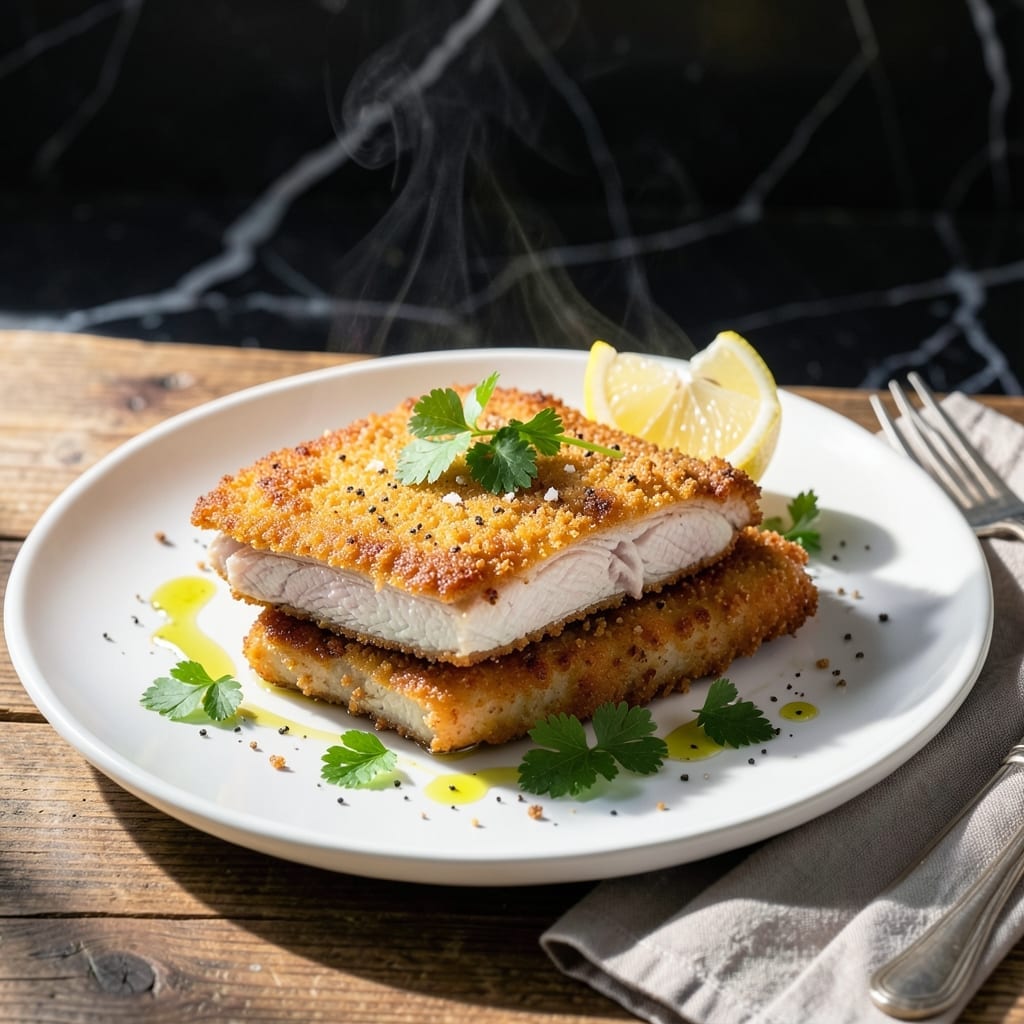
This German schnitzel delivers crispy, golden cutlets with a tender interior that’s pure comfort food. After years of testing, I’ve perfected the technique for achieving that signature shatteringly thin, even breading.
The secret lies in pounding the meat thin, using a three-step breading process, and frying at the right temperature. Each step ensures a crispy exterior while keeping the meat juicy and flavorful. Lemon wedges add the perfect bright finish.
Traditional sides like warm potato salad or a simple green salad complement the richness. This dish brings the heart of German home cooking to your table with minimal effort and maximum satisfaction.
Ready in under an hour, it’s ideal for weeknight dinners or Sunday family meals.
Ingredients for Schnitzel Recipe German
Pantry raid plus a quick butcher stop. Nothing exotic, just crispy perfection.
| Ingredient | Amount | Notes |
|---|---|---|
| Pork Cutlets 🥩 | 4 whole | Thin-cut, about 1/4 inch thick |
| All-Purpose Flour 🌾 | ½ cup | For initial dredging step |
| Large Eggs 🥚 | 2 whole | Beaten for breading adhesion |
| Fine Dry Breadcrumbs 🍞 | 1 ½ cups | Panko for extra crispiness |
| Kosher Salt 🧂 | 1 tsp | Plus more to taste |
| Freshly Ground Black Pepper 🌶️ | ½ tsp | Coarse grind preferred |
| Sweet Paprika 🌶️ | 1 tsp | For color and mild flavor |
| Vegetable Oil 🫒 | 1 cup | For frying, high smoke point |
| Unsalted Butter 🧈 | 2 tbsp | Optional for added richness |
| Fresh Lemon 🍋 | 1 whole | Cut into wedges for serving |
| Fresh Parsley 🌿 | ¼ cup | Chopped, for garnish |
The pork cutlets are everything—look for thin-cut, boneless chops at the meat counter. Most butchers will slice them for you if you ask (or do it yourself at home). I get mine from Whole Foods when I want guaranteed quality, but the regular grocery store works too. The key is even thickness—pound them yourself if they’re uneven. Panko breadcrumbs give that signature crunch, but regular fine breadcrumbs work in a pinch.
No pork? Chicken cutlets or thin veal are traditional swaps. Egg substitute works too if needed. The paprika adds color more than heat—skip it if you don’t have it. For gluten-free, crushed cornflakes or gluten-free breadcrumbs do the trick. The oil amount seems like a lot, but you’ll need it for proper frying. Just save the leftover for another use.
Leftovers keep surprisingly well—store in the fridge for 3-4 days and reheat in the oven to keep them crispy. Freeze uncooked breaded cutlets on a tray first, then bag for up to 3 months (don’t freeze after frying). Always serve with those lemon wedges—it’s non-negotiable.
Why You’ll Love This Recipe
- Ready in 20: That’s all it takes—dredge, dip, bread, fry. I’ve timed it.
- Crispy Perfection: The breadcrumbs toast to a golden crunch while the pork stays juicy. Honestly, it’s hard to stop at one.
- Feeds a Hungry Table: Whether it’s a weeknight or a Sunday dinner with the in-laws, this dish never fails to disappear fast.
- Budget Stretcher: Pork cutlets are affordable, and a little goes a long way. Between us, leftovers make killer sandwiches the next day.
Step-by-Step Instructions for German Schnitzel
Here’s how I get that perfect golden crust every time without fail.
Step 1: Pound and Season the Cutlets
Place each pork cutlet between two sheets of plastic wrap and pound to an even ¼-inch thickness using a meat mallet. This ensures even cooking and maximum crispiness. I focus on the thicker edges, working outward to avoid tearing the meat.
Season both sides lightly with kosher salt, freshly ground black pepper, and sweet paprika. The paprika adds a subtle sweetness and that classic golden hue to the breading. Don’t oversalt here—the breadcrumbs will add more flavor.
Step 2: Set Up the Breading Station
Arrange three shallow dishes in a row. Place the all-purpose flour in the first, beat the large eggs in the second, and spread the fine dry breadcrumbs in the third. I like to add a pinch of kosher salt to the flour for extra seasoning.
Dredge each cutlet in the flour, shaking off any excess, then dip into the beaten eggs, letting the excess drip off. Finally, press into the breadcrumbs, turning to coat completely. Press firmly so the crumbs adhere well—this is key for that shatteringly crisp texture.
Step 3: Pan-Fry to Golden Perfection
Heat the vegetable oil in a large skillet over medium-high heat until shimmering but not smoking. For extra richness, add the unsalted butter and let it melt. The oil-butter combo gives the best color and flavor.
Fry the breaded cutlets for 3-4 minutes per side until golden brown and crispy. Don’t crowd the pan—work in batches if needed to maintain the oil temperature. Transfer to a paper towel-lined plate to drain excess oil.
Step 4: Rest Briefly and Serve
Let the schnitzel rest for 2-3 minutes before serving. This allows the crust to set and the juices to redistribute. I tent them loosely with foil to keep them warm, but don’t cover completely or the crust will lose its crispness.
Serve immediately with wedges of fresh lemon for squeezing over the top and a sprinkle of chopped fresh parsley for a pop of color. The acid from the lemon cuts through the richness beautifully, so don’t skip it.
Pro Tips For Making Schnitzel Recipe German
- Pound the Cutlets: Use the flat side of a meat mallet to pound the pork cutlets to an even 1/4-inch thickness—this guarantees even cooking and prevents chewy spots.
- Season Every Layer: Salt the flour, eggs, and breadcrumbs separately before dredging; I learned this the hard way after wondering why my schnitzel tasted bland.
- Skip the Overcrowding: Fry one or two cutlets at a time in hot oil—crowding the pan drops the temperature and turns your crispy coating into a soggy mess.
- Rest Before Frying: Let the breaded cutlets rest for 5-10 minutes on a wire rack before frying; it helps the coating adhere and actually changes the outcome.
Essential Equipment for Perfect Results
Meat Pounder
A meat mallet with a flat side is essential for pounding cutlets to an even ¼-inch thickness. I use an OXO Good Grips model—it has a comfortable grip and dual surfaces. Look for one with a smooth side for flattening and a textured side for tenderizing. 💪
Breading Station
Three shallow dishes are critical for the breading process. I prefer stainless steel or glass pie plates—they’re easy to clean and the right depth for dredging. The first holds all-purpose flour, the second beaten eggs, and the third panko breadcrumbs.
Frying Pan
A large, heavy-bottomed skillet is a must for even heat distribution. My go-to is a 12-inch cast iron from Lodge—it retains heat beautifully and gives that perfect golden crust. Avoid nonstick for this recipe as the high heat can damage the coating.
Thermometer
An instant-read candy thermometer ensures your oil stays at the right temperature. I clip a Taylor precision model to the side of my pan. Maintain 350-375°F for crispy results without burning. This small tool makes a huge difference in consistency. 🌡️
Paper Towels
Have plenty of paper towels on hand for draining excess oil. I line a baking sheet with a wire rack and paper towels underneath to keep the schnitzel crispy while draining. This setup prevents sogginess and makes cleanup easier.
Tongs
Use long-handled tongs for safely flipping hot cutlets. I recommend OXO or TongMaster brands—they have a good grip and won’t slip. Avoid forks or spatulas that can pierce the breading or scrape the pan.
Nutrition Facts
Frequently Asked Questions
Can I use chicken instead of pork?
Yes! Chicken cutlets work beautifully—just pound to ¼-inch thickness. The cooking time remains the same, about 3-4 minutes per side. Chicken schnitzel is a popular variation that’s just as crispy and delicious.
What oil is best for frying?
Use a neutral oil with a high smoke point, like vegetable or canola. Avoid olive oil as it can burn at frying temperatures. For extra flavor, add 2 tablespoons of butter to the oil.
How do I keep the breading from falling off?
Pat the meat dry before breading, and press firmly into each coating layer. Let the breaded cutlets rest for 5-10 minutes before frying to help the coating adhere. Don’t skip the flour step—it’s the foundation!
Can I bake it instead of frying?
For a lighter version, bake at 400°F for 15-20 minutes, flipping halfway. Spray with oil first for crispiness. The texture won’t be identical to frying, but it’s still tasty.

- BBQ Chicken Bowl Recipe Rice: Smoky Sweetness Over Fluffy Grains - September 28, 2026
- Beef Cutlet Recipe Ideas: Crispy Breaded Patties With Bold Seasonings - September 28, 2026
- Bluefin Tuna Recipe Ideas: Sushi-Grade Seared and Sesame-Crusted - September 28, 2026