
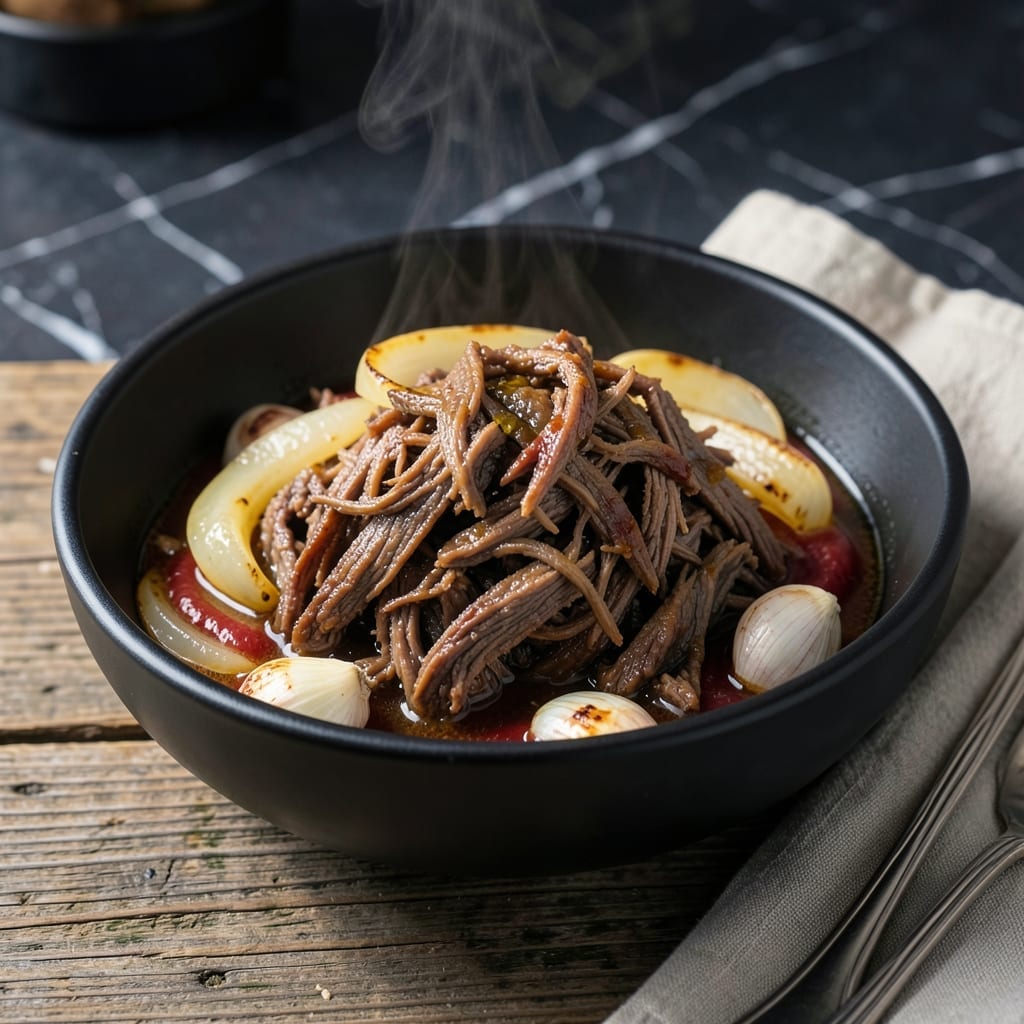
I burned more dinners than I care to admit before mastering the Instant Pot. This method turns tough beef into melt-in-your-mouth shreds without babysitting the stove.
After testing this with different cuts, I found chuck roast gives the best texture. The pressure cooker works its magic in under 90 minutes, turning out beef so tender it falls apart with a fork.
What you get is rich, flavorful shredded beef perfect for tacos, sandwiches, or rice bowls. The best part? Only one pot to clean when you’re done.
Between you and me, this is the kind of dish that makes weeknight cooking feel like a win. Here’s how to make it.
Ingredients for Shredded Beef Recipe Instant Pot
Pantry staples plus a well-chosen cut of beef. Nothing complicated, just big flavor.
| Ingredient | Amount | Notes |
|---|---|---|
| Chuck Roast 🥩 | 2 ½ lb | Well-marbled, cut into chunks |
| Beef Broth 🥣 | 1 ½ cups | Low-sodium preferred |
| Olive Oil 🫒 | 2 tbsp | For searing beef |
| Yellow Onion 🧅 | 1 whole | Diced into small pieces |
| Garlic Cloves 🧄 | 5 cloves | Minced for depth of flavor |
| Tomato Paste 🍅 | 2 tbsp | For richness and acidity |
| Apple Cider Vinegar 🍏 | 1 tbsp | Balances the richness |
| Dried Oregano 🌿 | 1 tsp | Mediterranean flavor boost |
| Ground Cumin 🌶️ | 1 tsp | Earthy warmth essential |
| Bay Leaves 🍃 | 2 whole | Remove before serving |
| Kosher Salt 🧂 | 1 ½ tsp | Adjust to taste |
| Black Pepper 🌶️ | 1 tsp | Freshly ground preferred |
| Lime Juice 🍈 | 2 tbsp | Freshly squeezed for brightness |
The beef is everything here. Chuck roast with good marbling breaks down into those melt-in-your-mouth shreds. Look for pieces with white fat streaks throughout—this is what gives you that buttery texture. I grab mine from Costco for big batches, but any grocery store with a decent meat counter will work. Don’t trim the fat off before cooking—it adds flavor and moisture.
No beef broth? Water plus a bouillon cube works in a pinch. Swap red wine vinegar for the apple cider if that’s what you’ve got. Dried oregano and cumin are non-negotiable for that classic flavor, but fresh cilantro stirred in at the end adds a bright note. If you’re short on time, pre-diced onions from the produce section save a few minutes (no judgment).
Leftovers taste even better after a night in the fridge—5 days max. Freeze for 3 months in airtight containers. The fat will solidify, so thaw overnight before reheating. Perfect for meal prep or last-minute dinners.
Why You’ll Love This Recipe
- Set It and Forget: I toss the chuck roast, broth, and garlic in the Instant Pot, press a button, and walk away—no babysitting required.
- Melt-in-Your-Mouth Good: The onion and garlic infuse the beef with a deep, savory richness that makes every shred absolutely irresistible.
- Meal Prep Magic: I make a big batch on Sunday and use it for tacos, sandwiches, or rice bowls all week long.
- Budget Stretcher: A cheap chuck roast turns into a showstopper that feeds my family for days. Honestly, it’s my wallet’s best friend.
Step-by-Step Instructions for Shredded Beef Instant Pot
Transform that chuck roast into tender, flavorful perfection with these simple, proven steps.
Step 1: Sear the Chuck Roast for Maximum Flavor
Set your Instant Pot to the Sauté function and add the 2 tbsp olive oil. While it heats, pat the 2.5 lb chuck roast dry with paper towels and season generously with the 1.5 tsp kosher salt and 1 tsp black pepper. This step is non-negotiable—it creates a flavorful crust that will deepen the taste of your dish.
Once the oil shimmers, add the chuck roast in batches if needed to avoid overcrowding. Sear for 4-5 minutes per side until deeply browned. You’ll know it’s ready to flip when it releases easily from the pot. Transfer the seared meat to a plate and set aside.
Step 2: Build the Flavor Base with Aromatics
In the same pot, add the diced yellow onion and cook for 3-4 minutes, stirring occasionally, until softened and just starting to brown. Add the 5 cloves minced garlic and cook for 30 seconds until fragrant—don’t let it burn, or it will turn bitter.
Stir in the 2 tbsp tomato paste, 1 tbsp apple cider vinegar, 1 tsp dried oregano, and 1 tsp ground cumin. Cook for 1-2 minutes, stirring constantly, until the tomato paste darkens slightly. This builds a rich, complex foundation for your beef.
Step 3: Pressure Cook to Tender Perfection
Return the seared chuck roast to the pot and pour in the 1.5 cups beef broth. Add the 2 whole bay leaves. Secure the lid, set the valve to Sealing, and cook on High Pressure for 60 minutes. The magic happens here—under pressure, the connective tissue in the beef breaks down, transforming it into melt-in-your-mouth goodness.
Once the cooking time is complete, allow the pressure to release naturally for 15 minutes, then quick-release any remaining pressure. This gradual release prevents the beef from drying out.
Step 4: Shred and Finish with Brightness
Remove the chuck roast from the pot and place it on a cutting board. Using two forks, shred the beef into bite-sized pieces. It should fall apart effortlessly—this is how you know it’s done just right.
Return the shredded beef to the pot and stir in the 2 tbsp lime juice. This final touch adds a bright, tangy contrast to the rich, savory flavors. Discard the bay leaves before serving. The beef is now ready to use in tacos, sandwiches, or bowls—whatever your heart desires!
Pro Tips For Making Shredded Beef Recipe Instant Pot
- Sear the Chuck First: I learned this the hard way—skipping the sear leaves the beef bland. Brown the chuck roast in olive oil for 3-4 minutes per side before pressure cooking for deeper flavor.
- Cut Against the Grain: After cooking, shred the beef by slicing perpendicular to the grain. It makes a real difference in tenderness, especially with chuck roast.
- Deglaze the Pot: After searing, pour in a splash of beef broth and scrape the bottom. Sounds weird, but it works to prevent the “burn” notice and adds flavor to the sauce.
- Use Enough Liquid: My first batch dried out because I used only ½ cup broth. Stick to at least 1 cup for a 3-pound chuck roast to guarantee proper pressure and juicy meat.
Make-Ahead Tips for Leftovers
Prep Ahead Strategy
I love prepping the aromatics the night before—dice the yellow onion and mince the 5 garlic cloves, then store in separate containers. This saves 10 minutes on cooking day. The flavors actually deepen overnight as the alliums mingle. 💡
Batch Cooking
Double the recipe without changing cook time—just increase the beef to 5 lbs and broth to 3 cups. Your Instant Pot can handle it. I do this every other Sunday for easy weeknight meals.
Storage Containers
Portion the cooked beef into 16-oz mason jars with some cooking liquid. They stack neatly in the fridge for up to 5 days. I use wide-mouth jars for easy access.
Freezing Method
For longer storage, spread shredded beef on a tray to cool completely before portioning. This prevents ice crystals. Freeze in quart-sized bags flattened for space efficiency. Thaws beautifully in 24 hours in the fridge. ❄️
Reheating Hacks
Add a splash of broth or water when reheating to prevent drying. Microwave covered for 2-3 minutes, stirring halfway. For stovetop, simmer gently for 5-7 minutes until hot.
Last-Minute Flavor Boost
Stir in the 2 tbsp lime juice right before serving, not during storage. The acidity stays brighter this way. Fresh cilantro added at the end makes it taste freshly made.
Nutrition Facts
Frequently Asked Questions
What’s the best cut for tender shreds?
Chuck roast is ideal for its marbling and connective tissue that breaks down into melt-in-your-mouth shreds under pressure. Brisket or short ribs also work well.
Can I skip the searing step?
No, searing creates a flavorful crust and deepens the overall taste. It only takes 4-5 minutes per side and is worth the effort for rich, complex flavor.
How do I know when it’s done?
The beef should fall apart easily with a fork after 60 minutes of pressure cooking. If it resists, cook for an additional 10-15 minutes.
Can I use a different cooking liquid?
Yes, swap beef broth for water plus a bouillon cube or even red wine for extra depth. Just maintain the 1.5 cup liquid measurement.

- BBQ Sausage Recipe Oven: Smoky Depth Without the Grill - September 28, 2026
- BBQ Chicken Bowl Recipe Rice: Smoky Sweetness Over Fluffy Grains - September 28, 2026
- Beef Cutlet Recipe Ideas: Crispy Breaded Patties With Bold Seasonings - September 28, 2026