
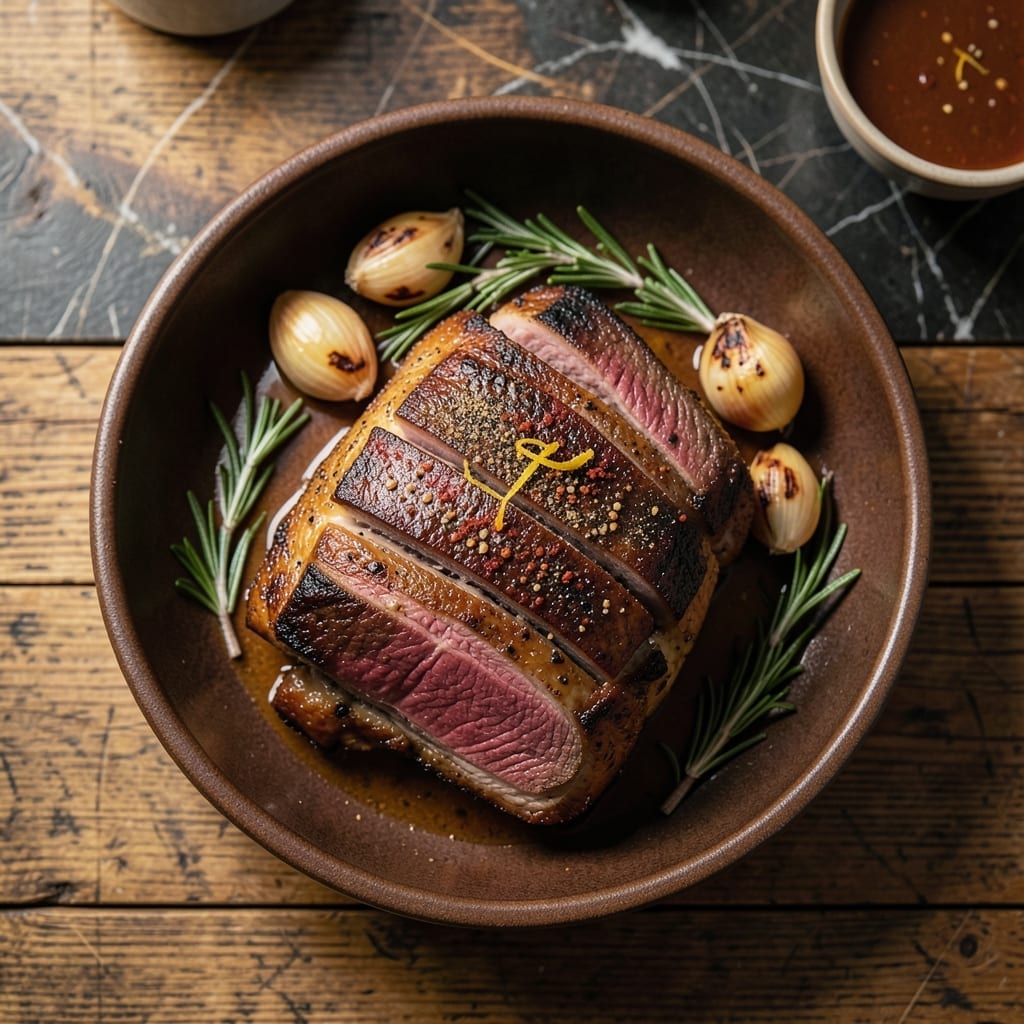
This sirloin cap roast delivers an unforgettable dining experience with its rich, beefy flavor and tender texture.
I’ve refined this method to ensure a perfect medium-rare finish every time, with a crisp, caramelized crust that seals in the juices. The key lies in proper seasoning and precise oven temperatures.
What sets this dish apart is the natural marbling of the cut, which bastes the meat from within as it roasts. A simple dry rub enhances the bold taste without overpowering it.
After resting, you’ll have a succulent roast that carves into beautiful, flavorful slices. Serve with roasted vegetables for a complete meal.
Ingredients for Sirloin Cap Roast
A well-marbled roast plus a bold dry rub creates this unforgettable centerpiece.
| Ingredient | Amount | Notes |
|---|---|---|
| Sirloin Cap Roast 🥩 | 3 lb | Well-marbled, bone-in preferred |
| Kosher Salt 🧂 | 2 tbsp | Diamond Crystal preferred for even coating |
| Coarse Black Pepper 🌶️ | 1 tbsp | Freshly ground for best flavor |
| Garlic Powder 🧄 | 1 tbsp | Not garlic salt |
| Onion Powder 🧅 | 1 tbsp | Balances the dry rub |
| Smoked Paprika 🌶️ | 1 tsp | Adds depth to crust |
| Dried Rosemary 🌿 | 1 tsp | Crushed between fingers |
| Dried Thyme 🍃 | 1 tsp | Complements beef’s richness |
| Olive Oil 🫒 | 2 tbsp | High smoke point for searing |
| Red Wine 🍷 | ½ cup | Dry variety for deglazing |
| Beef Stock 🥩 | 1 cup | Low-sodium preferred |
| Unsalted Butter 🧈 | 2 tbsp | For basting during roasting |
| Fresh Rosemary Sprigs 🌿 | 2 whole | Optional for garnish |
The quality of the sirloin cap is non-negotiable. Whole Foods or a trusted butcher will have the best cuts with ample marbling. Look for a roast with the fat cap intact—this is what creates that self-basting effect. If buying pre-cut, ensure it’s at least 1.5 inches thick for even cooking. The dry rub spices should be freshly opened for maximum potency.
No red wine? Substitute beef stock with 1 tbsp balsamic vinegar for acidity. Out of fresh rosemary? Double the dried in the rub. If you lack a meat thermometer, use the finger test—medium-rare feels like the base of your thumb. The olive oil can be swapped for avocado oil, which has an even higher smoke point. Do not use extra-virgin for searing—it burns easily.
The roast can rest at room temperature for 1 hour before carving. Leftovers keep in the fridge for 4 days or freeze for 3 months. Slice against the grain for maximum tenderness. Reheat gently in a warm oven with a splash of beef stock to prevent drying out.
Why You’ll Love This Recipe
- Five Minute Prep: I just rub the sirloin cap with salt, pepper, garlic and onion powder—no marinating, no fuss.
- Crispy Garlic Crust: That combo of coarse salt and garlic powder forms the best crust I’ve ever tasted on beef.
- Feeds My Crowd: One roast serves my whole family plus leftovers for sandwiches the next day.
- Low Cost Luxury: Sirloin cap gives me steakhouse flavor without the steakhouse price tag.
Step-by-Step Instructions for Sirloin Cap Roast
Achieve a perfectly seared crust and tender interior with this straightforward, proven method.
Step 1: Season the Roast Thoroughly
Pat the 3 lb Sirloin Cap Roast dry with paper towels to ensure optimal browning. In a small bowl, combine the 2 tbsp Kosher Salt, 1 tbsp Coarse Black Pepper, 1 tbsp Garlic Powder, 1 tbsp Onion Powder, 1 tsp Smoked Paprika, 1 tsp Dried Rosemary, and 1 tsp Dried Thyme.
Rub the mixture evenly over all surfaces of the roast, pressing firmly to adhere. I crush the dried herbs between my fingers as I sprinkle them to release their full aroma. Let the seasoned roast sit at room temperature for 30-45 minutes—this ensures even cooking from edge to center.
Step 2: Sear the Roast for Maximum Flavor
Preheat your oven to 425°F to create the intense heat needed for a perfect sear. Heat the 2 tbsp Olive Oil in a large oven-safe skillet or Dutch oven over medium-high heat until it shimmers. Carefully place the roast in the hot oil, fat-side down.
Sear undisturbed for 4-5 minutes until a deep brown crust forms. Turn the roast and sear the remaining sides for 2-3 minutes each. This aggressive browning develops a rich, savory crust that locks in juices. The roast is ready for the oven when all sides are deeply caramelized.
Step 3: Roast and Baste for Even Cooking
Transfer the skillet with the roast to the preheated oven. Roast for 20 minutes, then reduce the oven temperature to 325°F. Add the 2 tbsp Unsalted Butter to the skillet and baste the roast with the melted butter and pan juices every 10-15 minutes.
Continue roasting until the internal temperature reaches 130-135°F for medium-rare, which should take about 45-60 minutes total, depending on your oven. The roast is done when a meat thermometer inserted into the thickest part shows the target temperature. The juices should run slightly pink when pierced with a knife.
Step 4: Rest and Prepare the Pan Sauce
Transfer the roast to a cutting board, tent loosely with foil, and let it rest for 15-20 minutes. This resting period allows the juices to redistribute, ensuring every slice is moist and flavorful. While the roast rests, place the skillet over medium heat on the stovetop.
Add the 0.5 cup Red Wine to the skillet and scrape up all the browned bits from the bottom with a wooden spoon. Let the wine reduce by half, then add the 1 cup Beef Stock. Simmer for 5-7 minutes until the sauce thickens slightly. Strain the sauce if desired, then serve it alongside the sliced roast.
Step 5: Slice and Serve
Slice the roast against the grain into ½-inch thick pieces. The grain typically runs lengthwise along the roast, so cut perpendicular to these lines. Arrange the slices on a platter and drizzle with some of the pan sauce. Garnish with the 2 whole Fresh Rosemary Sprigs if desired.
Serve immediately while the meat is still warm. Each slice should have a well-browned crust and a tender, juicy interior. The pan sauce adds an extra layer of rich, beefy flavor that complements the roast perfectly.
Pro Tips For Making Sirloin Cap Roast
- Salt Overnight: I learned this the hard way—dry-brining the sirloin cap with kosher salt 12-24 hours ahead makes a real difference in both flavor and tenderness. Just pat it dry before cooking.
- Room Temp First: After pulling a cold roast straight from the fridge and getting tough results, I now let the sirloin cap sit out for 1-2 hours before cooking. Even color and consistent doneness every time.
- Skip the Overcrowding: Resist the urge to cram the roast into a small pan—use a rack or elevated surface so hot air circulates underneath. No soggy bottoms, just perfect crust.
- Rest Under Foil: Sounds weird, but tenting the finished roast with foil for 15-20 minutes before slicing guarantees the juices redistribute. My grandmother swore by this, and she was right.
Common Mistakes When Making Perfect Results
Skipping the Rest
I’ve ruined too many roasts by slicing too soon. The juices need 15-20 minutes to redistribute after cooking—cutting earlier means dry meat. Tent with foil to keep it warm while you make the pan sauce.
Uneven Seasoning
Don’t just sprinkle the dry rub on top. Press it firmly into every surface of the 3 lb roast, including the sides. I crush the dried herbs between my fingers as I go to release their full flavor. 🌿
Cold Meat in the Pan
Always let the roast sit at room temperature for 30-45 minutes before searing. Cold meat seizes up in the hot pan, creating uneven cooking. This step ensures a perfect crust and even doneness throughout.
Neglecting the Thermometer
Guessing doneness leads to overcooked meat. Use a meat thermometer and pull the roast at 130-135°F for medium-rare. The temperature will rise another 5-10°F during resting, so don’t wait for it to hit 145°F in the oven.
Overcrowding the Pan
If your skillet is too small, the roast will steam instead of sear. Use a large, heavy-bottomed oven-safe skillet or Dutch oven. I recommend Lodge cast iron for even heat distribution and a superior crust. 🔥
Forgetting to Baste
Basting with the melted 2 tbsp butter and pan juices every 10-15 minutes keeps the roast moist and builds layers of flavor. Skip this step, and you’ll miss out on that rich, caramelized exterior we all love.
Nutrition Facts
Frequently Asked Questions
What’s the ideal internal temperature for medium-rare?
Pull it at 130-135°F—the temp will rise to 140-145°F while resting. This ensures a juicy, pink center every time.
Can I use a different cut of beef?
Ribeye or strip roast work well, but they lack the cap’s signature marbling. Adjust cooking time since these cuts may finish faster.
How do I know when it’s done without a thermometer?
Press the meat—it should feel like the base of your thumb when relaxed. For medium-rare, it’ll be slightly firm with some give.
What if I don’t have red wine for the sauce?
Substitute 1 cup beef stock with 1 tbsp balsamic vinegar for acidity. The sauce will still be rich and flavorful.

- BBQ Sausage Recipe Oven: Smoky Depth Without the Grill - September 28, 2026
- BBQ Chicken Bowl Recipe Rice: Smoky Sweetness Over Fluffy Grains - September 28, 2026
- Beef Cutlet Recipe Ideas: Crispy Breaded Patties With Bold Seasonings - September 28, 2026