
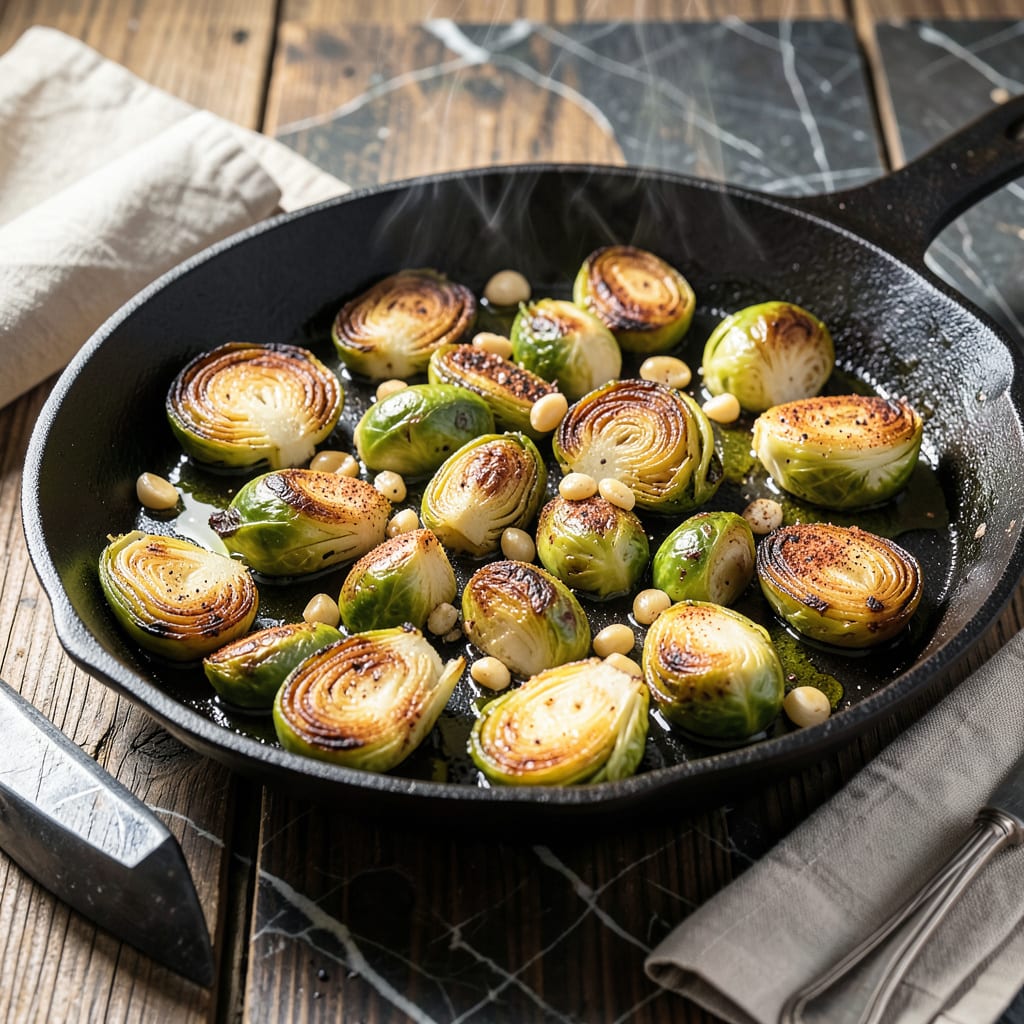
Achieving crispy edges on stovetop brussels sprouts requires patience and the right technique. This method delivers perfectly caramelized results without a single oven rack.
By controlling the heat and letting the sprouts sear undisturbed, you create a golden crust while maintaining tender centers. The garlic adds a punchy finish that ties everything together beautifully.
Ingredients for Stove Top Brussel Sprouts
Simple ingredients transform into crispy, caramelized perfection on your stovetop with minimal effort.
| Ingredient | Amount | Notes |
|---|---|---|
| Brussels Sprouts 🥬 | 1 ½ lb | Trimmed, halved, uniform size |
| Extra-Virgin Olive Oil 🫒 | 3 tbsp | Divided for searing and finishing |
| Garlic Cloves 🧄 | 6 cloves | Thinly sliced for even cooking |
| Sea Salt 🧂 | 1 tsp | Fine grain, Diamond Crystal preferred |
| Freshly Ground Black Pepper 🌶️ | ½ tsp | Coarse grind for texture |
| Smoked Paprika 🌶️ | ½ tsp | Adds depth to caramelization |
| Red Pepper Flakes 🌶️ | ¼ tsp | Optional for heat |
| Fresh Lemon Juice 🍋 | 1 tbsp | Brightens the dish |
| Maple Syrup 🍁 | 1 tbsp | Balances bitterness |
| Vegan Butter 🧈 | 1 tbsp | Optional for richness |
The Brussels sprouts are the foundation—select firm, bright green heads with tight leaves (avoid any with yellowing or looseness). Whole Foods or Trader Joe’s consistently carry high-quality organic options. Uniform sizing ensures even cooking; halve larger sprouts to match smaller ones. The olive oil should be high-quality extra-virgin, as its flavor shines through in this simple preparation.
No smoked paprika? Regular paprika with a pinch of cumin adds similar depth. Maple syrup can be swapped for agave nectar or date syrup—both work equally well. Vegan butter is optional but Miyoko’s or Earth Balance brands melt beautifully. If avoiding added sweetness, a splash of balsamic vinegar provides a tangy contrast instead.
Store unwashed Brussels sprouts in a perforated bag in the fridge for up to 1 week. Once trimmed, cook within 2-3 days for best texture. Leftovers keep 3-4 days refrigerated and reheat well in a dry skillet to revive crispness.
Why You’ll Love This Recipe
- One Pan Wonder: I toss the sprouts in olive oil, garlic, salt, and pepper, then let the stovetop do the work—no oven, no fuss.
- Garlic Lovers Dream: The sizzling garlic cloves caramelize into the sprouts, giving every bite that rich, savory depth.
- Weeknight Side: Honestly, it pairs just as well with steak as with pasta or a simple grain bowl.
- Budget Friendly: A pound of Brussels sprouts costs pennies and transforms into a dish that feels fancy.
Step-by-Step Instructions for Stove Top Brussels Sprouts
Here’s the method I use to achieve perfectly crispy edges and a garlicky depth that elevates this dish.
Step 1: Prep the Brussels Sprouts for Even Cooking
Trim the stem end from each of the 1.5 lb Brussels Sprouts and cut them in half through the core. For larger sprouts, quarter them to ensure uniform size—this guarantees even cooking and consistent texture. The goal is pieces that are roughly the same size so they all develop that coveted golden brown crust simultaneously.
Pat the cut sprouts thoroughly dry with a clean kitchen towel. Moisture is the enemy of crispiness; even a little water will cause the sprouts to steam rather than sear. I always take this extra step to ensure maximum caramelization.
Step 2: Sear the Sprouts Until Deeply Browned
Heat 2 tbsp of the Extra-Virgin Olive Oil in a large, heavy skillet (cast iron works best) over medium-high heat until it shimmers but doesn’t smoke. Add the Brussels sprouts in a single layer, cut-side down. Don’t overcrowd the pan—work in batches if necessary. You want each piece to have direct contact with the hot surface.
Let them sear undisturbed for 5-6 minutes until the cut sides develop a deep, dark brown crust. Resist the urge to stir too soon; this is how you achieve that restaurant-quality crispiness. When the edges look caramelized, flip them and cook for another 3-4 minutes until tender throughout.
Step 3: Infuse with Garlic and Spices
Reduce the heat to medium and push the sprouts to one side of the pan. Add the remaining 1 tbsp Extra-Virgin Olive Oil to the empty space, then add the 6 cloves Garlic Cloves (thinly sliced). Cook for 30-45 seconds, stirring constantly, until the garlic is light golden and fragrant. Be vigilant—garlic burns easily and bitter garlic will ruin the dish.
Sprinkle the 1 tsp Sea Salt, 0.5 tsp Freshly Ground Black Pepper, 0.5 tsp Smoked Paprika, and 0.25 tsp Red Pepper Flakes over the sprouts. Toss everything together to coat evenly. The smoked paprika adds a subtle depth that complements the natural nuttiness of the sprouts.
Step 4: Finish with Sweet and Bright Notes
Drizzle the 1 tbsp Maple Syrup over the sprouts and stir to glaze. The syrup will caramelize slightly, adding a touch of sweetness that balances the bitterness of the Brussels sprouts. Cook for an additional 1-2 minutes until the syrup has thickened and coated the sprouts evenly.
Remove the skillet from heat and stir in the 1 tbsp Fresh Lemon Juice and 1 tbsp Vegan Butter, if using. The lemon juice brightens the dish, cutting through the richness, while the vegan butter adds a velvety finish. Taste and adjust seasoning if needed—though the measurement provided should yield perfect balance.
Pro Tips For Making Stove Top Brussel Sprouts
- Halve Them Evenly: Cut each sprout in half through the stem so the leaves stay intact—I learned this the hard way after ending up with burnt loose leaves and uneven cooking.
- Sear on High: Get your pan screaming hot before adding the sprouts, then resist the urge to stir for the first 2-3 minutes to guarantee a deep, caramelized crust.
- Skip the Crowding: Use a wide pan or cook in batches, because piling them in steams the sprouts instead of browning them—my first few attempts were sad, soggy messes.
- Toast the Garlic: Add the garlic only after the sprouts start browning, about 4-5 minutes in, so it perfumes the oil without burning to a bitter crisp.
Pro Cooking Tips for Perfect Results
Pan Selection Matters
Use a heavy-bottomed skillet—cast iron is my go-to for even heat distribution. A 12-inch pan gives sprouts room to sear, not steam. Avoid nonstick; it doesn’t get hot enough for proper caramelization.
Heat Control
Start at medium-high heat for searing, then reduce to medium when adding garlic to prevent burning. The oil should shimmer but never smoke. I test heat by flicking a sprout in—it should sizzle immediately. 🌡️
The Sear Secret
Let sprouts cook 5-6 minutes undisturbed—this builds the crispy crust. Only flip once they release easily from the pan. Patience here separates good from great results.
Garlic Timing
Add garlic only after sprouts are browned. Cook 30-45 seconds max—it burns fast. Thin slices ensure even cooking without overpowering the dish.
Don’t Overcrowd
Work in batches if needed. Overcrowding lowers pan temperature, causing sprouts to steam instead of sear. I’d rather dirty two pans than risk soggy results.
Finishing Touches
Add maple syrup and lemon juice off-heat to preserve their fresh flavors. The acidity brightens the dish, while the syrup balances bitterness. 💫
Nutrition Facts
Frequently Asked Questions
How do I get them extra crispy?
Pat sprouts completely dry and don’t overcrowd the pan. Sear undisturbed on medium-high heat for 5-6 minutes before flipping.
Can I use frozen sprouts?
Thaw and pat very dry first. Frozen sprouts release more moisture, so expect slightly less crispiness. Cook 1-2 minutes longer to compensate.
Why are my sprouts bitter?
Bitterness comes from undercooking or uneven sizes. Ensure all pieces are similar in size and cook until deeply browned. The maple syrup in the recipe helps balance this.
What’s the best pan for this?
A cast iron skillet works best for even heat. A heavy stainless steel pan is second choice. Avoid nonstick for proper searing.

- BBQ Sausage Recipe Oven: Smoky Depth Without the Grill - September 28, 2026
- BBQ Chicken Bowl Recipe Rice: Smoky Sweetness Over Fluffy Grains - September 28, 2026
- Beef Cutlet Recipe Ideas: Crispy Breaded Patties With Bold Seasonings - September 28, 2026