
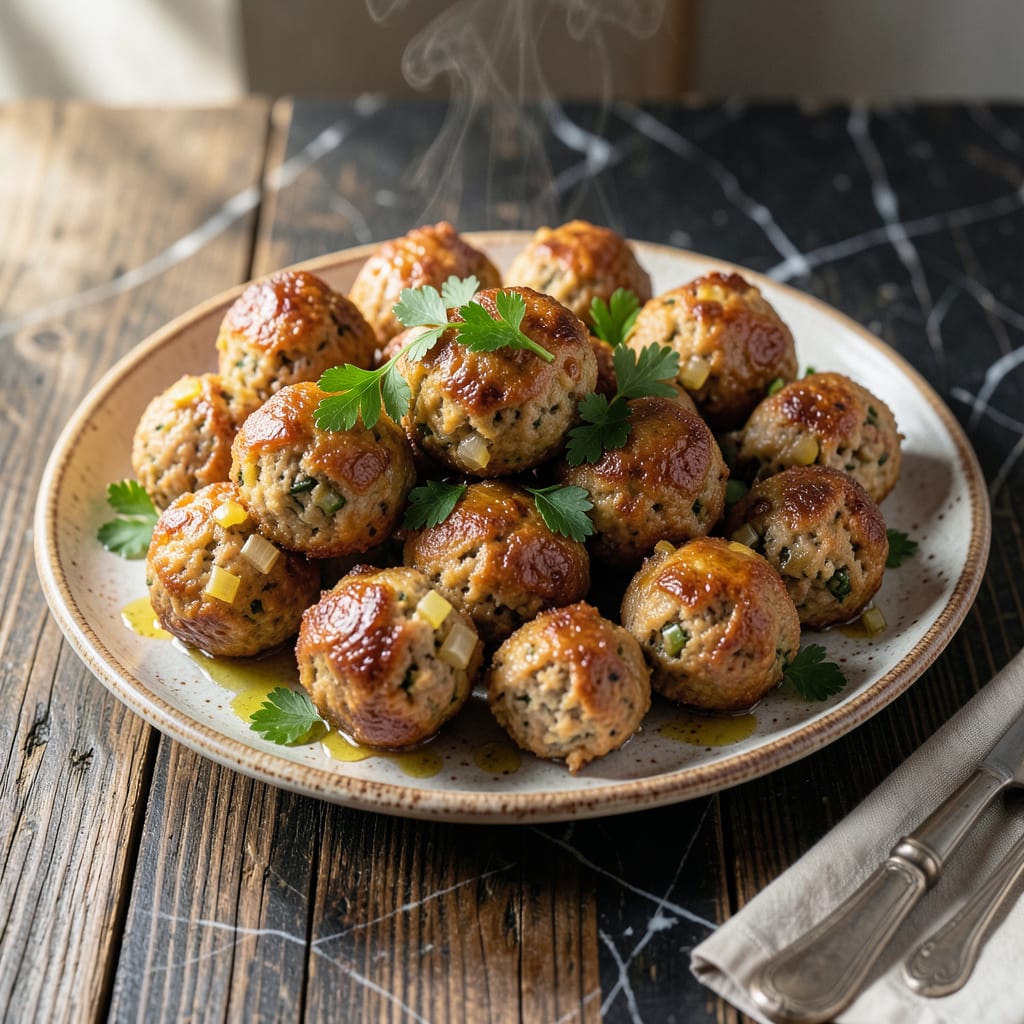
These stuffing balls deliver the perfect contrast of textures—crispy golden outsides with light, fluffy centers that soak up gravy beautifully. I developed this method to recreate the magic of oven-baked stuffing on the stovetop.
Using simple ingredients and a two-step cooking process, you achieve professional results without turning on the oven. The key is patience: letting them brown properly creates that irresistible crunch before finishing with a brief steam.
Ingredients for Stove Top Stuffing Balls
Simple ingredients transform into golden, crispy bites with tender centers ready to soak up gravy.
| Ingredient | Amount | Notes |
|---|---|---|
| Dried Bread Cubes 🍞 | 6 cups | Day-old or stale preferred |
| Unsalted Butter 🧈 | ½ cup | Melted for binding |
| Yellow Onion 🧅 | 1 whole | Finely diced for even texture |
| Celery Stalks 🥬 | 2 whole | Finely chopped for crunch |
| Fresh Parsley 🌿 | ¼ cup | Chopped, stems removed |
| Fresh Sage Leaves 🍃 | 2 tbsp | Finely minced for aroma |
| Dried Thyme 🌿 | 1 tsp | Rubbed between fingers to release oils |
| Garlic Cloves 🧄 | 3 cloves | Minced for depth of flavor |
| Chicken Stock 💧 | 1 ½ cups | Low-sodium preferred for control |
| Large Eggs 🥚 | 2 whole | Beaten to bind mixture |
| Kosher Salt 🧂 | 1 ½ tsp | Diamond Crystal preferred for even seasoning |
| Freshly Ground Black Pepper 🌶️ | 1 tsp | Coarse grind for texture |
| All-Purpose Flour 🌾 | ¼ cup | For crispy exterior coating |
The bread is the foundation—day-old sourdough or French bread from a local bakery gives the best texture. Whole Foods or Trader Joe’s have great pre-cubed options if you’re short on time. Avoid fresh bread; it won’t crisp properly. For the herbs, fresh sage and parsley are non-negotiable for that authentic stuffing flavor. The butter should be unsalted so you control the seasoning—Kerrygold or Plugrá are reliable brands.
No fresh herbs? Dried sage at one-third the amount works, but fresh is ideal. Out of celery? Add extra onion for crunch. Chicken stock can be swapped for vegetable stock if needed. For a gluten-free version, use gluten-free bread cubes and swap the flour for cornstarch. The eggs bind everything—no substitute will work as well, but a flax egg in a pinch (though texture will differ).
Stuffing balls are best served fresh, but leftovers keep 3-4 days in the fridge. Reheat in a dry skillet to revive the crisp. Freeze uncooked balls on a tray first, then transfer to a bag—they’ll keep 2 months. Thaw before cooking for even browning.
Why You’ll Love This Recipe
- One Pot Wonder: I just dump the bread cubes in with the buttery onions and celery, stir, and they’re done—no oven, no fuss.
- Buttery Herb Delight: The butter soaks into every bite, and that fresh parsley at the end makes it taste like a holiday meal any night.
- Feeds a Crowd: I make a double batch for Thanksgiving prep, and they disappear faster than the turkey.
- Budget Stretch: Honestly, a bag of bread cubes and a few veggies turn into a filling side for pennies.
Step-by-Step Instructions for Stove Top Stuffing Balls
Master this technique to achieve a perfect balance of crisp exterior and tender interior every time.
Step 1: Sauté Aromatics and Prepare Bread Base
Melt the 0.5 cup unsalted butter in a large skillet over medium heat. Add the finely diced yellow onion and chopped celery stalks, cooking for 5-7 minutes until softened and translucent. The mixture should release a sweet, savory aroma while developing a slight golden hue at the edges.
Stir in the minced garlic cloves, fresh sage leaves, and dried thyme, cooking for an additional 1 minute until fragrant. Remove from heat and transfer to a large mixing bowl with the 6 cups dried bread cubes. This ensures even distribution of flavors throughout the mixture.
Step 2: Bind with Eggs and Seasoning
In a separate bowl, beat the 2 large eggs lightly with a fork. Pour this over the bread cube mixture, then add the 1.5 cups chicken stock, 1.5 tsp kosher salt, and 1 tsp freshly ground black pepper. The bread should absorb the liquid completely, resulting in a moist but not soggy consistency.
Add the chopped fresh parsley and fold everything together gently. I use my hands for this step—it gives better control over the texture. The mixture should hold together when pressed but not be overly dense. Let it rest for 10 minutes to allow the bread to fully hydrate.
Step 3: Form and Coat for Crispiness
Place the 0.25 cup all-purpose flour in a shallow dish. Using your hands, form the stuffing mixture into 1.5-inch balls—about the size of a golf ball. Roll each ball gently in the flour to create a light, even coating. This exterior layer is crucial for achieving that promised crispy texture.
For consistent sizing, I use a small ice cream scoop to portion the mixture before rolling. The balls should hold their shape without crumbling. If the mixture feels too loose, add a few more dried bread cubes to absorb excess moisture.
Step 4: Cook to Golden Perfection
Return the skillet to medium heat and add a thin layer of oil if needed. Arrange the coated balls in the skillet in a single layer, leaving space between each. Cook for 3-4 minutes per side, turning gently with a spatula, until they develop a deep golden-brown crust on all sides.
The stuffing balls are ready when the exterior is crisp and the interior reaches 165°F when tested with an instant-read thermometer. Transfer to a paper towel-lined plate to drain any excess oil. The contrast between the crisp coating and fluffy center should be immediately apparent.
Pro Tips For Making Stove Top Stuffing Balls
- Sauté Veggies First: Cook your onion and celery in butter until soft before adding bread cubes—raw celery bits ruin the texture. I learned this the hard way after crunching into undercooked pieces.
- Use Stale Bread: If your dried bread cubes seem too fresh, spread them on a baking sheet and toast at 300°F for 10 minutes. Sounds weird, but it works: saggy stuffing balls hold their shape better with properly dried bread.
- Don’t Overmix: Stir just until the bread cubes are coated—overworking turns them into dense, gummy lumps. My grandmother swore by this, and she was right: light hands make fluffy stuffing balls.
- Chill Before Rolling: Pop the mixture in the fridge for 15 minutes before forming balls. It’s the thing that matters most to keep them from falling apart while cooking, especially with warm butter in the mix.
Creative Variations of This Recipe
Sausage and Herb
Add ½ lb crumbled Italian sausage to the skillet when cooking the aromatics. The fat renders out, adding richness. Mix in 1 tsp rubbed sage and ½ tsp fennel seeds for an authentic sausage stuffing flavor. The meat should be fully cooked before combining with bread cubes. 🔥
Apple and Walnut
Fold in 1 cup diced Granny Smith apple and ½ cup chopped walnuts to the bread mixture. The apple adds sweetness and moisture, while walnuts provide a satisfying crunch. Toast the nuts in a dry skillet for 3-4 minutes first to enhance their flavor.
Cheesy Garlic Bread
Stir 1 cup shredded sharp cheddar and ½ cup grated Parmesan into the mixture. Add 1 extra minced garlic clove for a bold, cheesy twist. The cheese melts beautifully, creating gooey pockets inside each ball. Use Cabot or Tillamook for best melt.
Mushroom and Thyme
Sauté 1 cup finely chopped cremini mushrooms with the onions and celery. Add 1 extra tsp fresh thyme leaves for earthy depth. The mushrooms soak up the butter and herbs, adding umami richness to every bite.
Cranberry Pecan
Gently fold in ½ cup dried cranberries and ½ cup toasted pecans after the mixture rests. The cranberries add tartness, while pecans bring buttery crunch. This variation is perfect for holiday meals and pairs wonderfully with turkey gravy. ✨
Spicy Cajun Kick
Mix 1 tbsp Cajun seasoning (I like Tony Chachere’s) and ½ tsp cayenne pepper into the bread cube mixture. Add ¼ cup diced bell peppers for color and crunch. This brings a Louisiana-inspired heat to your stuffing balls.
Nutrition Facts
Frequently Asked Questions
Can I use fresh bread instead of dried?
Fresh bread will make the balls soggy rather than crispy. Always use day-old or stale bread cubes to achieve the right texture.
How do I keep them from falling apart while cooking?
Ensure the mixture rests for 10 minutes before forming. If too loose, add more dried bread cubes to absorb excess moisture. Turn gently with a spatula.
What oil should I use for frying?
Any neutral oil with a high smoke point works well. I recommend vegetable or canola oil for even browning. Avoid olive oil as it can burn at medium heat.
Can I bake these instead of pan-frying?
Yes! Bake at 375°F for 20-25 minutes, turning halfway. They won’t be as crispy but will still be delicious.

- BBQ Sausage Recipe Oven: Smoky Depth Without the Grill - September 28, 2026
- BBQ Chicken Bowl Recipe Rice: Smoky Sweetness Over Fluffy Grains - September 28, 2026
- Beef Cutlet Recipe Ideas: Crispy Breaded Patties With Bold Seasonings - September 28, 2026