
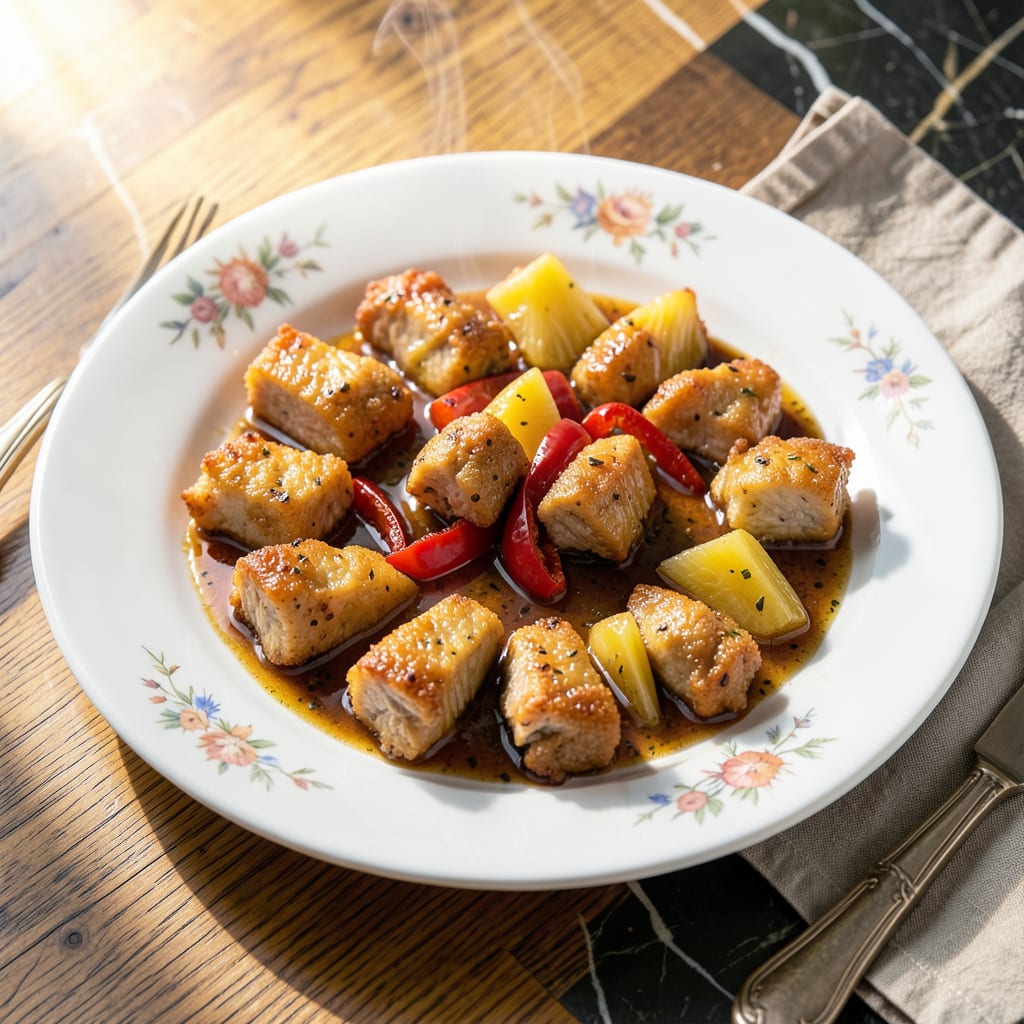
This recipe delivers crispy pork pieces coated in a tangy-sweet sauce with vibrant pineapple chunks. The secret lies in double-frying the pork to maintain its crunch even after tossing in the glossy sauce.
Each bite offers a perfect balance of textures and flavors—tender meat, crispy batter, and juicy pineapple. The dish comes together quickly once the prep work is done, making it ideal for weeknight dinners.
Ingredients for Sweet and Sour Pork
Pantry staples and fresh produce create this vibrant, crispy dish with tangy-sweet sauce.
| Ingredient | Amount | Notes |
|---|---|---|
| Pork Shoulder 🥩 | 1 ½ lb | Cut into 1-inch cubes |
| Soy Sauce 🫒 | 3 tbsp | Low-sodium preferred |
| Rice Vinegar 💧 | ½ cup | For tangy acidity |
| Brown Sugar 🍚 | ½ cup | Light or dark variety |
| Ketchup 🍅 | ½ cup | For sweetness and color |
| Pineapple Chunks 🍍 | 2 cups | Fresh or canned, drained |
| Green Bell Pepper 🌶️ | 1 whole | Diced into 1-inch pieces |
| Red Bell Pepper 🌶️ | 1 whole | Diced into 1-inch pieces |
| Onion 🧅 | 1 whole | Cut into chunks |
| Garlic Cloves 🧄 | 3 cloves | Minced for sauce |
| Cornstarch 🌾 | ½ cup | For crispy coating |
| Large Egg 🥚 | 1 whole | Beaten for batter |
| All-Purpose Flour 🌾 | ½ cup | For dredging pork |
| Vegetable Oil 🫒 | 3 cups | For double-frying pork |
| Salt 🧂 | 1 tsp | Kosher or sea salt |
The pork is the foundation here. Pork shoulder offers the right fat-to-lean ratio for juicy, crispy pieces. Costco sells it in bulk at great prices, or ask your butcher for a well-marbled cut. The pineapple should be bright yellow with a sweet aroma (the canned variety from Dole works in a pinch). For the bell peppers, look for firm, vibrant color—red and green give both sweetness and crunch.
No rice vinegar? Apple cider vinegar at the same amount works well. Swap brown sugar for white if that’s what you have, though the molasses notes add depth. Fresh pineapple can be replaced with frozen (thaw and drain well), but canned is the easiest. For a gluten-free version, use cornstarch instead of flour for dredging. The egg can be omitted if needed, but the coating won’t adhere as well.
The sauce keeps beautifully in the fridge for up to 5 days. The pork is best eaten fresh but can be reheated in the oven to maintain crispiness. Store leftover oil in a cool, dark place—it can be reused once or twice for frying.
Why You’ll Love This Recipe
- One Pan Magic: I love that I only need one bowl to whisk together the soy sauce, vinegar, and brown sugar before coating the pork.
- Tangy Sweet Balance: The ketchup adds just the right tangy sweetness that pairs perfectly with the tender pork shoulder.
- Weeknight Hero: Honestly, it’s my go-to for busy evenings when I need something quick yet satisfying for the family.
- Stretches Far: Leftovers taste even better the next day, and the recipe easily doubles for feeding a crowd.
Step-by-Step Instructions for Sweet and Sour Pork
Here’s the method to achieve perfectly crispy pork with that signature sweet-tangy sauce.
Step 1: Prepare and Coat the Pork
Cut the 1.5 lb Pork Shoulder into 1-inch cubes. I pat them dry with paper towels first—this ensures the coating adheres properly and creates that essential crispy texture.
In a bowl, beat the 1 whole Large Egg with a fork until uniform. Add the 0.5 cup Cornstarch and 0.5 cup All-Purpose Flour to the egg, stirring until smooth. Toss the pork cubes in this batter, ensuring each piece is fully coated. The cornstarch is key for that extra-crispy finish that holds up to the sauce.
Step 2: Double-Fry for Maximum Crispiness
Heat the 3 cups Vegetable Oil in a deep pot to 350°F. Fry the pork in batches for 4-5 minutes until light golden brown. Don’t overcrowd the pot—this lowers the oil temperature and results in greasy pork.
Remove the pork with a slotted spoon and drain on a wire rack. Increase the oil temperature to 375°F and fry again for 2-3 minutes until deep golden brown and ultra-crispy. This double-frying technique is what gives the pork that satisfying crunch that contrasts perfectly with the tender meat inside.
Step 3: Sauté Vegetables and Build the Sauce
In a separate pan, combine the diced 1 whole Green Bell Pepper, diced 1 whole Red Bell Pepper, and chunked 1 whole Onion. Sauté over medium-high heat for 3-4 minutes until just softened but still vibrant in color.
Add the minced 3 cloves Garlic Cloves and cook for 30 seconds until fragrant. Pour in the 3 tbsp Soy Sauce, 0.5 cup Rice Vinegar, 0.5 cup Brown Sugar, and 0.5 cup Ketchup. Stir well and simmer for 2-3 minutes until the sugar dissolves and the sauce thickens slightly. The vinegar provides the tang while the ketchup adds depth and color.
Step 4: Combine and Finish
Add the 2 cups Pineapple Chunks to the sauce and stir to combine. Return the crispy pork to the pan and toss gently to coat each piece evenly. Cook for an additional 1-2 minutes to allow the flavors to meld together.
Taste and adjust seasoning with 1 tsp Salt if needed. The sauce should be glossy, thick enough to cling to the pork, and balanced between sweet and sour. Serve immediately while the pork is still crispy—the contrast between the crunchy exterior and the juicy meat is what makes this dish irresistible.
Pro Tips For Making Sweet And Sour Pork
- Velvet the Pork: Marinate the pork shoulder with a teaspoon of soy sauce and cornstarch for 15 minutes before frying—this makes the meat impossibly tender. I learned this the hard way after serving chewy pork one too many times.
- Balance the Sauce: Taste as you go and adjust the sweet-sour ratio with a splash more rice vinegar if it’s too sweet, or a dash of brown sugar if it’s too sharp. Sounds obvious, but I used to dump everything in at once and regret it.
- Skip Soggy Coating: Fry the pork in batches so the pan stays hot—crowding it steams the pieces instead of crisping them. After ruining two batches, I finally started using a timer to space them out.
- Use Ketchup Wisely: Swap half the ketchup for tomato paste if you want deeper flavor without the watery texture. I was skeptical until I tried it, but now it’s my go-to move for a richer sauce.
Make-Ahead Tips for This Dish
Prep Ahead Strategy
I always prep the vegetables first—they can sit covered in the fridge for up to 24 hours without losing texture. Dice the green bell pepper, red bell pepper, and onion into uniform pieces and store them in airtight containers. This saves 10-15 minutes on cooking day. 💡
Batter Prep
The pork batter can be mixed the night before, but wait to coat the meat until you’re ready to fry. Combine the cornstarch, flour, and beaten egg in a bowl, cover, and refrigerate. The cold batter actually creates a crispier coating when fried.
Sauce Make-Ahead
Mix the soy sauce, rice vinegar, brown sugar, and ketchup up to 2 days ahead. Store in a sealed jar in the fridge. The flavors meld beautifully over time, and you’ll just need to warm it gently before adding to the vegetables.
Pork Prep
Cut the 1.5 lb pork shoulder into cubes and pat dry the morning of cooking. Keep it covered in the fridge until ready to use. For extra flavor, marinate the pork in 1 tbsp soy sauce for 30 minutes before coating—this step is optional but adds depth.
Day-Of Timeline
Start with frying the pork first, as it can be kept warm in a 200°F oven on a wire rack for up to 30 minutes while you prepare the sauce. This ensures everything comes together hot and crispy. ⏰
Storage Tips
If you must prep everything in advance, cook the pork but don’t toss it in sauce until reheating. Store fried pork and sauce separately in the fridge for up to 2 days. Reheat pork in the oven to maintain crispiness before combining with warmed sauce.
Nutrition Facts
Frequently Asked Questions
Can I use chicken instead of pork?
Yes, boneless chicken thighs work well. Cut into 1-inch pieces and follow the same method. Chicken cooks faster, so reduce frying time to 3-4 minutes per batch.
Why is my pork not crispy?
Likely the oil wasn’t hot enough or the pork was crowded. Maintain 350°F-375°F oil temperature and fry in small batches. Double-frying is essential for that perfect crunch.
How do I make the sauce thicker?
Mix 1 tbsp cornstarch with 2 tbsp cold water, then stir into simmering sauce. Cook for 1-2 minutes until it reaches your desired consistency.
Can I bake the pork instead of frying?
For a lighter version, bake at 400°F for 20-25 minutes, flipping halfway. It won’t be as crispy but still tastes great with the sauce.

- BBQ Sausage Recipe Oven: Smoky Depth Without the Grill - September 28, 2026
- BBQ Chicken Bowl Recipe Rice: Smoky Sweetness Over Fluffy Grains - September 28, 2026
- Beef Cutlet Recipe Ideas: Crispy Breaded Patties With Bold Seasonings - September 28, 2026