
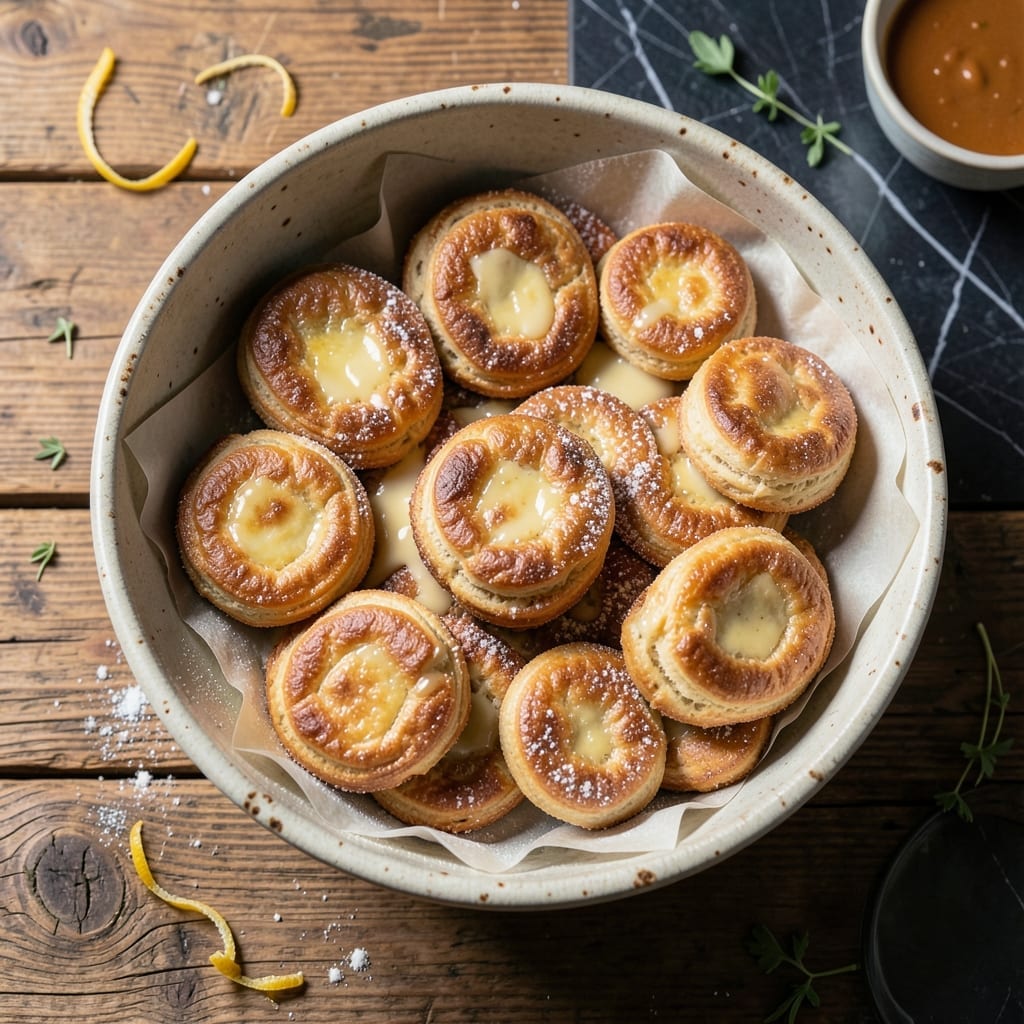
There’s a precision to crafting biscuits with perfect flaky layers that separates good from exceptional. This method delivers that distinction through cold butter and a gentle touch.
The technique relies on cutting butter into flour until pea-sized crumbs form, then folding the dough to create layers. Each fold multiplies the flakes, while cold butter ensures steam for lift during baking.
What emerges from the oven is tall, golden biscuits with distinct layers that separate effortlessly. The exterior offers a slight crunch, giving way to a tender, buttery interior that melts in your mouth.
Mastering this process means consistently achieving restaurant-quality results at home with basic ingredients and simple tools.
Ingredients for Tudor’s Biscuit
Cold butter and a gentle touch create those flaky layers you’re after.
| Ingredient | Amount | Notes |
|---|---|---|
| All-Purpose Flour 🌾 | 2 cups | Plus extra for dusting work surface |
| Baking Powder 🧂 | 1 tbsp | Aluminum-free for best flavor |
| Granulated Sugar 🍚 | 1 tsp | Balances the richness of butter |
| Salt 🧂 | 1 tsp | Fine sea salt preferred |
| Unsalted Butter 🧈 | ½ cup | Cold, cubed into 1/4-inch pieces |
| Buttermilk 🥛 | ¾ cup | Cold, full-fat for richness |
| Baking Soda 🧂 | ¼ tsp | Helps with rise and browning |
| Cream of Tartar 🧂 | ¼ tsp | Stabilizes the layers (optional) |
The butter is non-negotiable here. European-style unsalted butter (like Plugrá or Kerrigold) has a higher fat content, which translates to more flakes and better flavor. Keep it ice cold—cut into cubes and pop back in the fridge until you’re ready. The flour should be all-purpose; avoid self-rising or cake flour. For buttermilk, full-fat is ideal (the extra richness shows in the final texture).
No buttermilk? Mix 1 tbsp lemon juice or vinegar with 1 cup whole milk and let it sit for 5 minutes. Swap the baking powder for homemade mix (2 parts cream of tartar to 1 part baking soda) if you’re out. The sugar can be omitted, but it adds a subtle depth. For extra flakiness, freeze the butter and grate it directly into the flour—this creates thinner, more distinct layers.
Dough keeps in the fridge for 24 hours (wrap tightly in plastic). Baked biscuits are best day-of but reheat well—wrap in foil and warm at 300°F for 10 minutes. Freeze baked biscuits for up to 1 month; thaw at room temperature before reheating.
Why You’ll Love This Recipe
- 5-Minute Mix: I toss the flour, baking powder, sugar, and salt in one bowl, cut in cold butter, and boom—dough’s ready.
- Buttery Clouds: That flaky, golden crust with a hint of sweetness? Pure comfort in every bite.
- Breakfast or Brunch: Honestly, these biscuits work with jam at dawn or gravy at noon—no fuss.
Step-by-Step Instructions for Tudor’s Biscuits
Master these precise techniques to achieve tall, flaky biscuits with distinct layers and rich buttery flavor.
Step 1: Combine Dry Ingredients for Optimal Rise
In a large mixing bowl, whisk together the 2 cups All-Purpose Flour, 1 tbsp Baking Powder, 1 tsp Granulated Sugar, 1 tsp Salt, 0.25 tsp Baking Soda, and 0.25 tsp Cream of Tartar. I always use aluminum-free baking powder for the cleanest flavor profile.
Whisk vigorously for 30 seconds to ensure even distribution of leavening agents. This step prevents pockets of concentrated baking powder that could leave a metallic aftertaste. The cream of tartar works synergistically with the baking soda to create those distinct flaky layers.
Make a well in the center of the dry mixture—this will help you incorporate the cold butter evenly without overworking the dough.
Step 2: Cut in Cold Butter for Flaky Texture
Add the 0.5 cup Unsalted Butter, cubed into ¼-inch pieces, directly to the well in the flour mixture. Using a pastry cutter or your fingertips, work the butter into the flour until the mixture resembles coarse crumbs with pea-sized butter pieces visible.
This is the most critical step for achieving flaky layers. The cold butter creates steam during baking, which separates the dough into distinct layers. If the butter melts or becomes greasy, the biscuits will be dense rather than flaky.
I recommend working quickly and using a light touch—overmixing at this stage will develop gluten, resulting in tough biscuits. The mixture should look shaggy with visible butter chunks.
Step 3: Incorporate Buttermilk for Rich, Tender Dough
Create a small well in the center of the butter-flour mixture and pour in the 0.75 cup Buttermilk. Using a fork, gently stir the mixture just until the dry ingredients are moistened and the dough begins to come together.
The buttermilk’s acidity reacts with the baking soda and cream of tartar to create lift, while its fat content ensures a rich, tender crumb. The dough will be slightly sticky—that’s normal and desirable for tall biscuits.
If there are dry spots at the bottom of the bowl, add a splash more buttermilk, but don’t exceed 1 cup total liquid. Overmixing at this stage will make the biscuits tough, so stop as soon as the dough forms a shaggy mass.
Step 4: Laminate and Fold for Distinct Layers
Turn the dough onto a lightly floured surface (use some of the extra all-purpose flour from the ingredients list) and gently pat it into a 1-inch thick rectangle. Fold the dough in thirds like a business letter, then rotate it 90 degrees and pat it out again.
Repeat this folding and turning process 2-3 times. Each fold creates additional layers in the biscuits. The key is to handle the dough gently—press it just enough to cohere, but don’t flatten it completely.
After the final fold, pat the dough to an even ¾-inch thickness. This height ensures the biscuits rise properly without becoming too tall and toppling over during baking.
Step 5: Cut and Bake to Golden Perfection
Using a 2½-inch biscuit cutter, press straight down into the dough without twisting—the twisting motion seals the edges, preventing the biscuits from rising fully. Place the biscuits on a parchment-lined baking sheet, touching each other lightly.
Bake in a preheated 450°F oven for 12-15 minutes until the tops are golden brown and the layers are visible. The high heat creates a quick rise, while the close placement helps the biscuits support each other as they climb.
Remove from the oven and brush the tops with melted butter while still hot. Let them cool for 2 minutes on the baking sheet before serving. The biscuits should pull apart easily, revealing distinct, flaky layers with a rich, buttery aroma.
Pro Tips For Making Tudor’S Biscuit
- Chill the Butter: Keep your unsalted butter ice cold until ready to cut it into the flour—this creates flaky layers instead of tough biscuits. I learned this the hard way after ending up with dense hockey pucks my first three tries.
- Don’t Overmix: Stir the dough just until it comes together, even if it looks shaggy. After overworking a batch once, I saw how quickly biscuits turn from tender to brick-like.
- Use Fresh Baking Powder: Test your baking powder by dropping a teaspoon in hot water—if it doesn’t bubble vigorously, replace it. Sounds weird, but old leavening is the silent killer of rise in these biscuits.
- Cut Straight Down: Press the biscuit cutter straight into the dough without twisting—this seals the edges for higher rise. My grandmother swore by this, and her biscuits were always the tallest at the table.
Serving Suggestions for tudors biscuit
Classic Breakfast Pairing
Serve these warm biscuits with scrambled eggs and crispy bacon for a traditional Southern breakfast. The buttery layers complement the savory eggs perfectly. I like to split them open and spoon the eggs right inside. 🌟
Gravy Essentials
For the ultimate comfort meal, smother these with country sausage gravy. The flaky texture soaks up the creamy gravy beautifully. Use 1 lb breakfast sausage and 2 cups whole milk for authentic flavor.
Sweet Applications
Drizzle with local honey or maple syrup for a simple sweet treat. Try making biscuit sandwiches with ham and apricot jam—the sweet-savory combo is addictive. I prefer Bonne Maman apricot preserves.
Soup Sidekick
These biscuits are perfect for dipping in creamy tomato soup or chicken noodle soup. Their sturdy structure holds up to soaking. Serve with a pat of salted butter on top for extra richness. ❄️
Special Occasions
For holidays, use them as the base for biscuit sliders with pulled pork or fried chicken. The layers make them ideal for mini sandwiches. Add a buttermilk glaze for a sweet version.
Storage Tip
Reheat leftovers wrapped in foil at 300°F for 10 minutes. The layers will re-crisp beautifully. I always make extra for this purpose.
Nutrition Facts
Frequently Asked Questions
Why is cold butter important?
Cold butter creates steam during baking, which separates the dough into distinct, flaky layers. If it melts prematurely, the biscuits will be dense.
Can I use regular milk instead of buttermilk?
Yes! Mix 1 tbsp lemon juice or vinegar with 1 cup whole milk and let sit for 5 minutes to mimic buttermilk’s acidity.
How do I prevent tough biscuits?
Avoid overmixing the dough—handle it gently and stop as soon as it comes together. Overworking develops gluten, making biscuits tough.
Can I make the dough ahead of time?
Yes! Wrap tightly and refrigerate for up to 24 hours. This can actually improve the flakiness as the butter chills further.

- BBQ Sausage Recipe Oven: Smoky Depth Without the Grill - September 28, 2026
- BBQ Chicken Bowl Recipe Rice: Smoky Sweetness Over Fluffy Grains - September 28, 2026
- Beef Cutlet Recipe Ideas: Crispy Breaded Patties With Bold Seasonings - September 28, 2026