
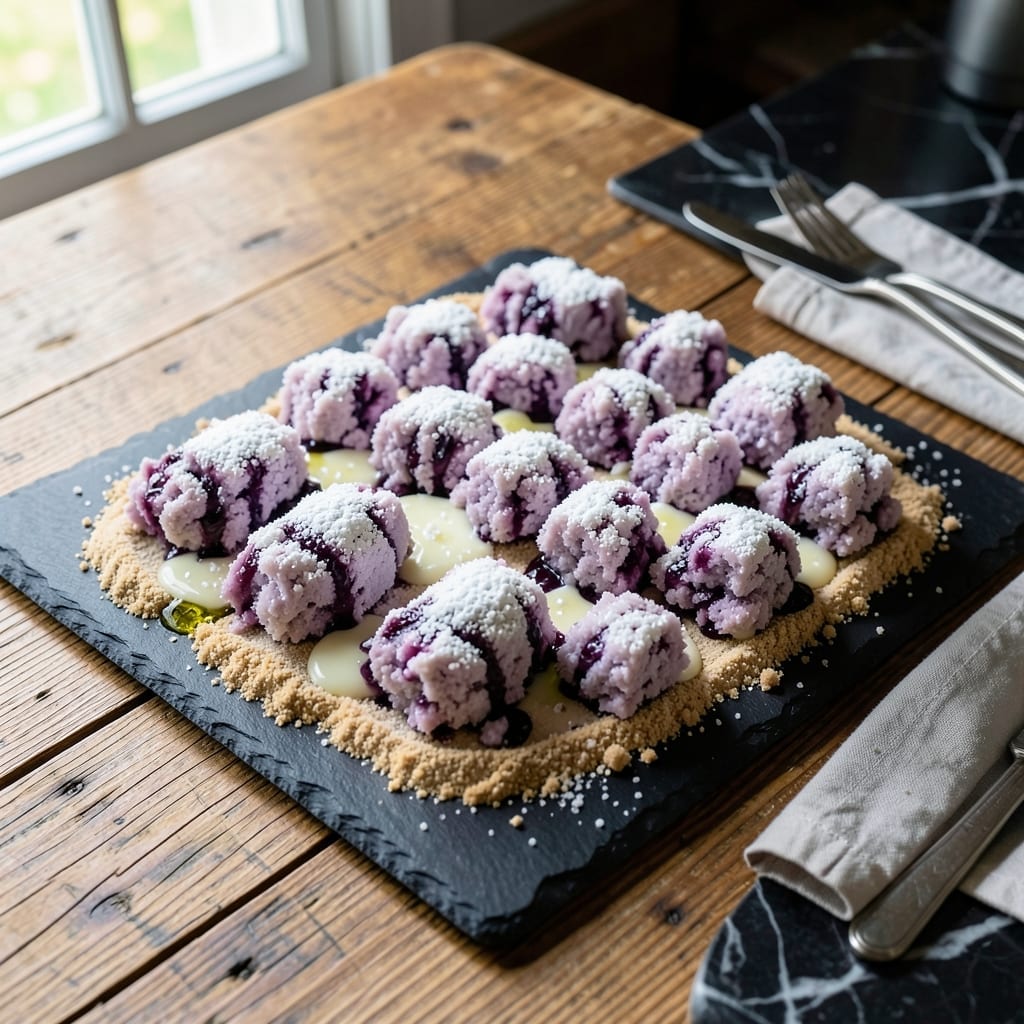
I’ve been obsessed with recreating the melt-in-your-mouth texture of traditional polvoron, and this ube version is my favorite twist yet.
What makes this special is the combination of toasted flour, rich butter, and vibrant ube halaya that gives it that signature purple hue and subtle sweetness. The key is getting the flour to that perfect golden toast.
You’ll end up with crumbly, buttery cookies that practically dissolve on your tongue, with a beautiful purple color that makes them impossible to resist.
Perfect for gift-giving or satisfying your sweet tooth. Here’s how to make them.
Ingredients for Ube Polvoron
Pantry staples plus a vibrant purple twist. Nothing complicated, just delicious.
| Ingredient | Amount | Notes |
|---|---|---|
| All-Purpose Flour 🌾 | 2 cups | Toasted to golden brown |
| Ube Halaya 🟣 | ¾ cup | Vibrant purple, store-bought or homemade |
| Unsalted Butter 🧈 | 1 cup | Room temperature, high-quality |
| Powdered Sugar 🍚 | ¾ cup | Sifted for smooth texture |
| Granulated Sugar 🍬 | ¼ cup | For balancing sweetness |
| Condensed Milk 🥛 | ½ cup | Full-fat for creaminess |
| Vanilla Extract 🌿 | 1 tsp | Pure extract preferred |
| Salt 🧂 | ¼ tsp | Fine grain, enhances flavor |
| Ube Extract 🟣 | 1 tsp | For intensified color and flavor |
| Cornstarch 🌽 | 2 tbsp | Helps with crumbly texture |
The ube halaya is the star here—Filipino markets carry the best quality, but Trader Joe’s also stocks it seasonally. Look for that deep purple color with no gray streaks. The flour needs toasting until it’s a light golden brown (don’t rush this step). For butter, Kerrygold or Plugrá give that rich, melt-in-your-mouth feel you can’t fake with margarine.
No ube halaya? Mashed purple sweet potatoes plus a drop of ube extract gets you close. Out of condensed milk? Evaporated milk with extra sugar works in a pinch. The vanilla extract can be swapped with ube flavoring if you want that color boost. Cornstarch is optional but helps with the crumble—if skipping, reduce butter slightly.
Store in an airtight container at room temperature for up to 2 weeks. These freeze beautifully for 3 months—just thaw before serving so the texture stays perfect. Great for gifting (wrap in wax paper for a cute presentation).
Why You’ll Love This Recipe
- No-Fuss Mixing: I just toss the flour, ube halaya, and butter together—no fancy techniques, no stand mixer, just my hands and a bowl.
- Vibrant Ube Sweetness: The ube halaya gives it that rich, purple-hued flavor that’s sweet but not overpowering, and the powdered sugar seals the deal.
- Party-Ready Treats: These little crumbly bites disappear fast at potlucks, and honestly, they’re just as good with my afternoon coffee.
- Budget Stretcher: A small batch uses pantry staples I already have, and between us, it makes more than enough to share—or not.
Step-by-Step Instructions for Ube Polvoron
Here’s my tested method for creating these melt-in-your-mouth purple treats with perfect texture every time.
Step 1: Toast the All-Purpose Flour
In a dry skillet over medium-low heat, add the 2 cups All-Purpose Flour. Stir constantly with a wooden spoon for 8-10 minutes until it turns a light golden color and develops a nutty aroma. This step is crucial—it removes the raw flour taste and gives your polvoron that signature toasted depth.
Watch carefully as flour can burn quickly. You’ll notice the color change from white to pale gold, and the kitchen will fill with a warm, toasty scent. Remove from heat immediately once it reaches the right color and transfer to a large mixing bowl to cool completely.
Step 2: Cream Butter and Sugars
In a separate bowl, beat the 1 cup Unsalted Butter with the 0.75 cup Powdered Sugar and 0.25 cup Granulated Sugar until light and fluffy. I use an electric mixer on medium speed for about 3-4 minutes—you’re looking for a pale, airy mixture that’s nearly doubled in volume.
This creaming process incorporates air, which helps create that delicate, crumbly texture we love in polvoron. The room temperature butter should blend smoothly without any visible lumps. Scrape down the sides of the bowl occasionally to ensure even mixing.
Step 3: Combine Wet and Dry Ingredients
To your cooled toasted flour, add the 0.75 cup Ube Halaya, 0.5 cup Condensed Milk, 1 tsp Vanilla Extract, 0.25 tsp Salt, 1 tsp Ube Extract, and 2 tbsp Cornstarch. Mix these dry ingredients together first—this ensures the ube halaya and cornstarch distribute evenly throughout the flour.
The mixture will look crumbly at this point, which is exactly what we want. The ube halaya adds that beautiful purple hue and natural sweetness, while the cornstarch helps achieve the perfect crumbly consistency. Make sure there are no large clumps of ube halaya remaining.
Step 4: Incorporate Butter Mixture and Shape
Add your creamed butter mixture to the dry ingredients. Use a spatula or your clean hands to combine everything until it forms a dough that holds together when pressed. The mixture should be slightly sticky but not wet—if it’s too dry, add a teaspoon more condensed milk.
Pinch off 1-tablespoon portions of dough and roll them between your palms into smooth balls. As you work, you’ll notice the vibrant purple color intensifying. Place each ball on a parchment-lined tray. For that classic polvoron look, you can also press them into small molds if you have them.
Step 5: Chill and Serve
Refrigerate the shaped polvoron for at least 30 minutes to firm up. This chilling step helps them hold their shape and enhances the texture. I like to let mine chill for 1 hour for the best results.
Serve these at room temperature for the ultimate melt-in-your-mouth experience. The outside should have a slight firmness that gives way to a creamy, crumbly interior with that distinctive ube flavor. Store any leftovers in an airtight container at room temperature for up to 5 days.
Pro Tips For Making Ube Polvoron
- Toast the Flour: Lightly toast the all-purpose flour in a dry pan for 2-3 minutes—it removes the raw taste and brings out a nuttier flavor that pairs perfectly with ube.
- Use Room-Temp Butter: Take the unsalted butter out 30 minutes before mixing; it blends evenly into the flour and ube halaya without leaving greasy streaks.
- Chill Before Shaping: Pop the mixture in the fridge for 15 minutes after combining—it firms up just enough so the polvoron doesn’t crumble when you press it into molds.
- Dust with Powdered Sugar: Roll the finished polvoron in powdered sugar right before serving, not earlier, so it stays vibrant and doesn’t turn into a gummy mess.
Troubleshooting This Dish
Too Dry Mixture
If your dough crumbles and won’t hold together, it likely needs more moisture. Add 1-2 teaspoons of condensed milk gradually until it reaches the right consistency. The butter should be at room temperature—cold butter won’t incorporate properly. 💡
Too Sticky Mixture
When the dough sticks to your hands, it means there’s too much moisture. Chill the mixture for 15-20 minutes to firm up, then try shaping again. If still sticky, add 1 tablespoon of toasted flour at a time until manageable.
Uneven Purple Color
For vibrant, consistent color, ensure your ube halaya is fully incorporated into the dry ingredients before adding butter. If streaks remain, knead the dough a bit longer. Adding extra ube extract (½ tsp) can intensify the hue.
Flour Not Toasting
If your flour isn’t turning golden, your heat might be too low. Increase to medium heat and stir more frequently. Avoid high heat—it can burn the flour quickly. Look for a light tan color, not brown.
Polvoron Crumbles After Chilling
This usually happens if the dough wasn’t mixed thoroughly. Re-knead with slightly warmer hands to bind the fats and flours better. If needed, add 1 tsp of melted butter to help it hold.
Flattening During Storage
To prevent flattening, ensure polvoron are fully chilled before storing. Use an airtight container with parchment between layers. Avoid stacking too high—keep it to 2 layers max. 💪
Nutrition Facts
Frequently Asked Questions
Can I use regular sweet potatoes instead of ube?
Yes, but the flavor and color won’t be the same. Use purple sweet potatoes plus ½ tsp ube extract for best results. The texture will be similar, though the vibrant purple hue may be less intense.
Why do I need to toast the flour?
Toasting removes the raw taste and adds a nutty depth. It also helps achieve that signature crumbly texture. Skip this step and your cookies may taste floury and lack complexity.
How do I store these to keep them fresh?
Keep in an airtight container at room temperature for up to 5 days. For longer storage, freeze for up to 3 months—thaw before serving to restore texture.
Can I make these without condensed milk?
Yes, substitute with evaporated milk plus 2 tbsp sugar. The texture may vary slightly but will still be delicious. Avoid using regular milk as it won’t provide enough richness.

- BBQ Sausage Recipe Oven: Smoky Depth Without the Grill - September 28, 2026
- BBQ Chicken Bowl Recipe Rice: Smoky Sweetness Over Fluffy Grains - September 28, 2026
- Beef Cutlet Recipe Ideas: Crispy Breaded Patties With Bold Seasonings - September 28, 2026