
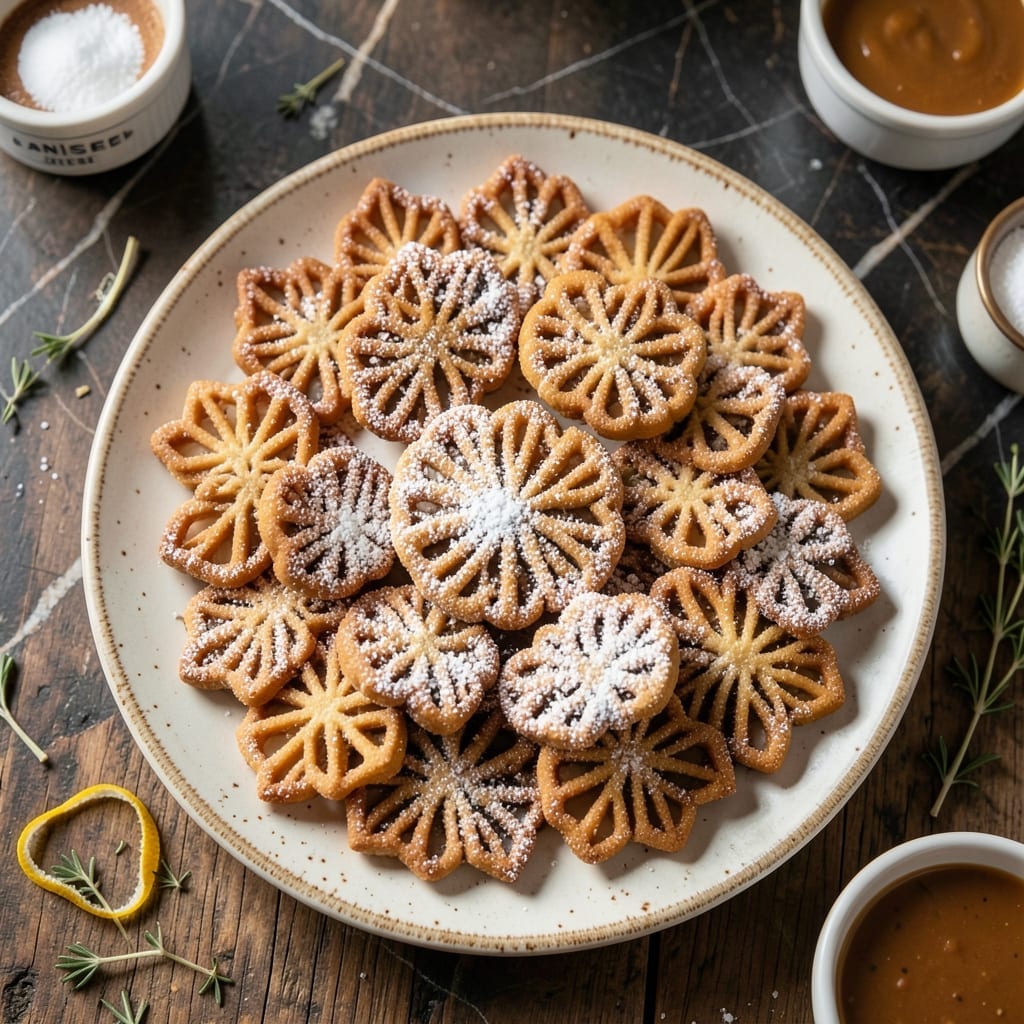
There’s something timeless about traditional Italian pizzelle—delicate, crisp wafers with intricate designs that bring generations together.
This recipe stays true to its roots, using a Villaware pizzelle iron to create those signature patterns. The batter comes together quickly with pantry staples, and the baking process is as much about tradition as it is about flavor.
You’ll end up with golden, lightly sweetened cookies that are perfect for holidays, gatherings, or a quiet afternoon with coffee. Their subtle anise or vanilla notes make them universally loved.
Follow the steps closely for consistent results every time. Here’s how to make them.
Ingredients for Villaware Pizzelle
Traditional Italian ingredients create these delicate, crisp wafers with signature designs.
| Ingredient | Amount | Notes |
|---|---|---|
| All-Purpose Flour 🌾 | 2 cups | Sifted for lighter texture |
| Granulated Sugar 🍚 | ¾ cup | Fine white sugar preferred |
| Large Eggs 🥚 | 3 whole | Room temperature for best results |
| Unsalted Butter 🧈 | ½ cup | Melted and cooled slightly |
| Pure Vanilla Extract 🌿 | 2 tsp | For classic vanilla flavor |
| Anise Extract 🌿 | 1 tsp | Traditional Italian flavoring |
| Baking Powder 🧂 | 1 ½ tsp | Ensures proper rise and crispness |
| Salt 🧂 | ¼ tsp | Balances sweetness |
| Whole Milk 🥛 | ¼ cup | Adds richness to batter |
| Powdered Sugar 🍚 | ¼ cup | For dusting finished cookies |
The flour is foundational here—King Arthur all-purpose is ideal for its consistent protein content. Plugra or European-style butter adds richness, but any unsalted variety works. For authentic flavor, pure anise extract (not imitation) is key. Villaware irons require precise batter consistency, so measure your flour by weight if possible (240g for 2 cups).
No anise extract? Substitute with 1 tbsp anise seeds steeped in the warm milk. For vanilla-only cookies, double the vanilla extract. The milk can be swapped for dairy-free alternatives with minimal impact. If your batter seems too thick, add milk 1 tbsp at a time until it reaches a smooth, pourable consistency.
Store cooled pizzelle in an airtight container at room temperature for up to 2 weeks. For longer storage, freeze between layers of parchment for 3 months. Dust with powdered sugar just before serving to maintain crispness.
Why You’ll Love This Recipe
- One-Bowl Wonder: I mix the flour, sugar, eggs, butter, and vanilla in a single bowl—no fancy tools, just a whisk and five minutes.
- Buttery Vanilla Magic: The melted butter and real vanilla make these pizzelle taste like a cozy Italian bakery in my kitchen.
- Holiday to Weeknight: I’ve served them at Christmas parties and packed them in lunchboxes. They fit everywhere.
- Freezer Friendly: A double batch means I stash extras in the freezer for surprise guests or midnight cravings.
Step-by-Step Instructions for Traditional Italian Wafer Cookies
Master the traditional technique that creates these delicate, crisp waffle cookies with authentic flavor.
Step 1: Prepare the Batter with Precision
In a large mixing bowl, whisk together the 2 cups All-Purpose Flour, 0.75 cup Granulated Sugar, 1.5 tsp Baking Powder, and 0.25 tsp Salt. I always sift the flour first to ensure a lighter texture in the final cookies.
Create a well in the center and add the 3 whole Large Eggs, 0.5 cup Unsalted Butter (melted and cooled), 2 tsp Pure Vanilla Extract, and 1 tsp Anise Extract. The anise is traditional and gives these cookies their characteristic Italian flavor profile.
Step 2: Achieve the Perfect Batter Consistency
Gradually incorporate the dry ingredients into the wet mixture, stirring just until combined. The batter will be thick at this stage—this is expected. Slowly pour in the 0.25 cup Whole Milk while stirring continuously until the batter becomes smooth and pourable.
Here’s the thing—the batter should be thick enough to coat the back of a spoon but still flow easily. If it seems too stiff, add a teaspoon more milk, but don’t over-thin it. Overmixing develops gluten, which makes the cookies tough rather than crisp.
Step 3: Cook in the Pizzelle Iron
Preheat your pizzelle iron according to manufacturer’s instructions. Lightly grease the plates with a small amount of butter or nonstick spray. For each cookie, drop 1 tablespoon of batter onto each pattern well—don’t overfill or the cookies will spread together.
Close the iron and cook for 30-45 seconds until the cookies are golden brown and the steam stops rising. The exact time depends on your iron’s temperature and the desired depth of color. I’ve found that 35 seconds gives the perfect balance of crispness and color.
Step 4: Cool and Shape Immediately
Using a fork, carefully remove each hot cookie from the iron and place it on a wire rack. Work quickly—these cool fast. For traditional presentation, you can roll each cookie into a cone shape while still warm, but I prefer to leave them flat to showcase the beautiful iron pattern.
The cookies will crisp up as they cool completely. Don’t stack them while warm or they’ll lose their signature crispness. This cooling process takes about 5 minutes per batch.
Step 5: Finish with Powdered Sugar
Once completely cooled, dust the cookies lightly with 0.25 cup Powdered Sugar using a fine-mesh sieve. The powdered sugar adds a delicate sweetness and highlights the intricate pattern from the iron.
Store in an airtight container at room temperature for up to 1 week, though they’re best enjoyed within the first few days when they’re at peak crispness. The anise flavor will mellow slightly over time, creating a more complex taste profile.
Pro Tips For Making Villaware Pizzelle
- Preheat the Iron: Make sure your Villaware pizzelle iron is fully preheated before adding batter—I learned this the hard way after my first few came out pale and doughy.
- Soften the Butter: Use room-temperature butter, about 65°F, so it creams smoothly with the sugar and eggs—cold butter leaves lumps that ruin the texture.
- Skip Overfilling: Resist the urge to heap the batter; a scant tablespoon per well is plenty, or it’ll spill over and make a mess (and uneven cookies).
- Use Real Vanilla: After burning three batches with imitation extract, I finally figured out that pure vanilla extract gives these pizzelle their deep, rich flavor worth the extra cost.
Dietary Considerations for This Recipe
Gluten-Free Option
For a gluten-free version, replace the 2 cups All-Purpose Flour with a 1:1 gluten-free baking flour like King Arthur Measure for Measure. The texture will be slightly different but still delicious. Add ½ tsp xanthan gum if your blend doesn’t include it. 💪
Dairy-Free Adaptation
Swap the 0.5 cup Unsalted Butter for coconut oil or dairy-free butter alternative like Miyoko’s. Use almond milk instead of whole milk. The flavor will have a subtle coconut note, which pairs well with the anise.
Egg-Free Version
Use flax eggs (1 tbsp ground flaxseed + 3 tbsp water per egg) to replace the 3 Large Eggs. The cookies may be slightly denser but will still crisp up nicely. I’ve had success using Aquafaba (3 tbsp per egg) as well.
Reduced Sugar
Cut the 0.75 cup Granulated Sugar in half and add 1 tsp cinnamon for depth. The anise and vanilla flavors will shine through more prominently. This version is perfect for those watching their sugar intake.
Vegan Pizzelle
Combine the gluten-free flour, dairy-free butter, and egg substitutes mentioned above. The cookies will have a slightly different texture but retain the traditional flavors. Dust with powdered sugar made from coconut sugar for a fully plant-based treat.
Allergen Note
This recipe contains eggs, dairy, and gluten. Always check labels on all ingredients to avoid cross-contamination. For nut allergies, ensure your dairy-free butter and flour substitutes are processed in nut-free facilities.
Nutrition Facts
Frequently Asked Questions
What’s the best way to prevent sticking?
Lightly grease the iron with butter or nonstick spray before each batch. Avoid overfilling the wells with batter. 1 tablespoon per pattern is ideal for even cooking without overflow.
Can I make these without anise extract?
Yes! Replace 1 tsp anise extract with 2 tsp vanilla extract or 1 tbsp lemon zest for a different flavor profile. The texture remains the same.
How do I know when they’re done?
Look for golden brown color and no steam rising from the iron. Most irons take 30-45 seconds per batch. Overcooking can make them bitter.
Why did my pizzelle turn out soft?
They likely needed more cooking time or the batter was too thick. Ensure the iron is fully preheated and use the exact 0.25 cup milk measurement for proper consistency.

- BBQ Sausage Recipe Oven: Smoky Depth Without the Grill - September 28, 2026
- BBQ Chicken Bowl Recipe Rice: Smoky Sweetness Over Fluffy Grains - September 28, 2026
- Beef Cutlet Recipe Ideas: Crispy Breaded Patties With Bold Seasonings - September 28, 2026