
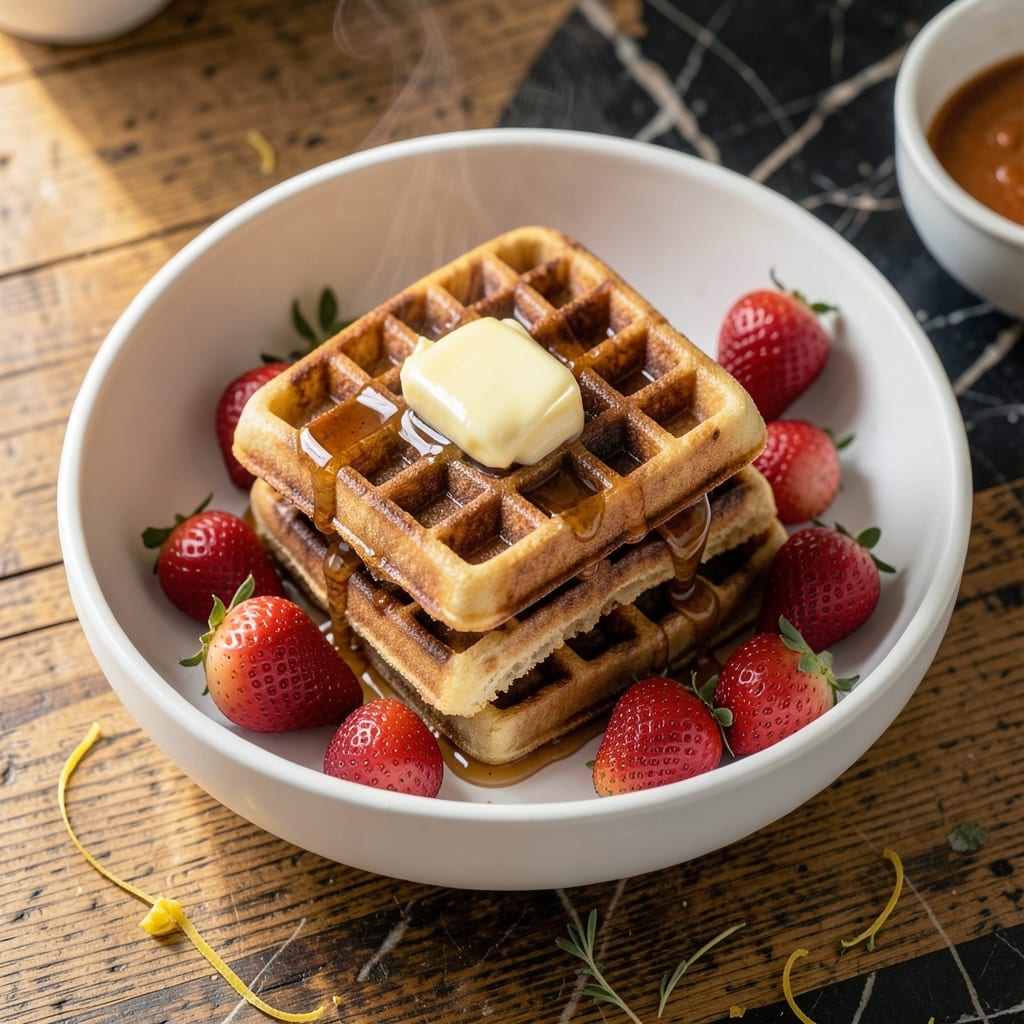
This dairy-free waffle recipe proves you don’t need milk for fluffy, golden results. Simple ingredients come together to create a batter that bakes into crisp edges and tender centers.
Using water and oil as substitutes ensures a light texture without compromising flavor. Perfect for a quick breakfast or weekend brunch, these waffles are ready in minutes.
Ingredients for Waffle Recipe No Milk
Simple pantry staples create light, golden waffles without a drop of dairy.
| Ingredient | Amount | Notes |
|---|---|---|
| All-Purpose Flour 🌾 | 2 cups | Sifted for lighter texture |
| Baking Powder 🧂 | 2 tbsp | For maximum rise |
| Granulated Sugar 🍚 | 2 tbsp | Adjust to taste preference |
| Salt 🧂 | ½ tsp | Balances sweetness |
| Large Eggs 🥚 | 2 whole | Room temperature preferred |
| Vegetable Oil 🫒 | ⅓ cup | Or melted coconut oil |
| Water 💧 | 1 ½ cups | Room temperature for even mixing |
| Vanilla Extract 🌿 | 2 tsp | Pure extract for best flavor |
| Ground Cinnamon 🌿 | ½ tsp | Optional for warmth |
| Cooking Spray 🫒 | 1 can | For greasing waffle iron |
The flour is the foundation here. King Arthur or Gold Medal all-purpose work perfectly—no need for specialty flours. Baking powder is what gives these their lift, so check the expiration date (old powder loses potency). For the oil, vegetable or canola have neutral flavors that let the vanilla shine. I always keep a bottle of pure vanilla extract on hand; imitation just doesn’t compare.
No baking powder? Baking soda plus cream of tartar can work in a pinch (1:2 ratio). Out of vanilla? A pinch of almond extract adds nice depth. The water can be swapped for dairy-free milk if you have it, but water actually gives the crispiest edges. Cinnamon is optional but adds warmth—pumpkin pie spice works too if you’re feeling festive.
Batter keeps 24 hours in the fridge, but it’s best used fresh. Leftover waffles freeze beautifully for 3 months—just toast straight from frozen. Store dry ingredients in airtight containers to keep them fresh longer.
Why You’ll Love This Recipe
- No-Fuss Mixing: I just dump the flour, baking powder, sugar, salt, and eggs together—no milk to measure, no fuss.
- Crispy Sweet Bites: The sugar caramelizes just right, giving those little waffle squares a satisfying crunch with every bite.
- Breakfast or Brunch: Honestly, these work for a quick weekday breakfast or a lazy Sunday brunch with fruit and syrup.
- Budget-Friendly Batch: Five simple pantry staples make a stack that feeds my family for pennies—leftovers reheat beautifully too.
Step-by-Step Instructions for Waffle Recipe No Milk
This method delivers crisp, fluffy waffles without dairy using simple, effective techniques.
Step 1: Combine Dry Ingredients
In a large mixing bowl, whisk together the 2 cups All-Purpose Flour, 2 tbsp Baking Powder, 2 tbsp Granulated Sugar, 0.5 tsp Salt, and 0.5 tsp Ground Cinnamon until fully incorporated. Sifting the flour first ensures a lighter texture, which is especially important for dairy-free batters.
This step aerates the dry ingredients and evenly distributes the leavening agent. The cinnamon adds subtle warmth that pairs beautifully with the vanilla. Make sure there are no visible streaks of flour or baking powder in the mixture.
Step 2: Whisk Wet Ingredients Separately
In a separate bowl, combine the 2 whole Large Eggs, 0.33 cup Vegetable Oil, 1.5 cups Water, and 2 tsp Vanilla Extract. Whisk vigorously for 30-45 seconds until the mixture is uniform and slightly frothy.
Room temperature eggs and water blend more smoothly into the batter. The oil replaces butter’s richness, while the water provides the necessary moisture for steam, which helps the waffles rise. The vanilla enhances the sweetness without needing milk.
Step 3: Create the Batter
Pour the wet ingredients into the dry ingredient bowl. Using a silicone spatula, gently fold the ingredients together until just combined. The batter will be slightly lumpy—that’s perfect. Overmixing develops gluten, which makes waffles tough instead of tender.
Let the batter rest for 5 minutes while you preheat your waffle iron. This brief rest allows the flour to hydrate fully and the baking powder to begin working, ensuring even texture and maximum rise.
Step 4: Cook the Waffles
Preheat your waffle iron to medium-high heat and lightly coat it with cooking spray. Pour about ½ cup of batter onto the center of each waffle iron section, spreading it slightly if needed. Close the lid and cook for 3-5 minutes or until the waffles are golden brown and crisp.
Check for doneness by lifting the lid slightly—when the waffle releases easily and the edges are crisp, it’s ready. Avoid opening the iron too soon, as this can tear the waffle and prevent even cooking. The steam should have mostly subsided when they’re done.
Step 5: Serve Immediately
Transfer cooked waffles to a wire rack set over a baking sheet to keep them crisp. If making a batch, place the rack in a 200°F oven to maintain warmth without losing texture. Serve immediately with your favorite toppings.
The waffles will be light and airy inside with a satisfying crunch on the outside. The absence of milk doesn’t compromise the texture—proper leavening and steam create the fluffiness, while the oil ensures richness. This recipe makes 4 generous servings.
Pro Tips For Making Waffle Recipe No Milk
- Preheat the Iron: I learned this the hard way—crank your waffle iron to medium-high heat for at least 10 minutes before adding batter. Cold irons make gummy waffles, no matter how good your egg and flour mix is.
- Whip the Eggs: Beat your large eggs until they’re frothy and pale, about 2-3 minutes. This adds air that makes up for the missing milk, giving you lighter waffles.
- Skip Overmixing: Stir your batter just until the flour disappears—small lumps are fine. Overmixing develops gluten, and you’ll end up with tough waffles instead of tender ones.
- Use Water Wisely: Replace milk with an equal amount of water, but add 1 tablespoon of melted butter or oil per cup. This keeps the waffles rich and crisp without the dairy.
Troubleshooting This Recipe
Batter Too Thick
If your batter seems too thick, add 1-2 tbsp more water at a time until it reaches the consistency of heavy cream. Dairy-free batters often need slightly more liquid since milk contains natural sugars that help with moisture retention. 💧
Waffles Not Crispy
For crispier edges, increase your waffle iron to high heat and cook for 1-2 extra minutes. Also, ensure your iron is fully preheated before adding batter. I find that vegetable oil in the batter helps achieve that perfect crunch.
Waffles Stick to Iron
Even with non-stick irons, dairy-free waffles can stick. Always use cooking spray before each batch, and avoid opening the iron too soon. If they stick, let them cook longer until they release naturally. A well-seasoned cast iron waffle maker works beautifully too.
Batter Too Thin
If your batter is runny, add 1-2 tbsp more flour to thicken it. The ideal consistency should coat the back of a spoon but still drizzle off. Remember that the batter will thicken slightly during the 5-minute rest.
Waffles Not Rising
Check your baking powder expiration date—old leavening agents lose potency. Also, avoid overmixing the batter, as this develops gluten and creates dense waffles. The 2 tbsp of baking powder in this recipe should provide plenty of lift. 💪
Uneven Cooking
For even cooking, always pour batter into the center of each waffle iron section and let it spread naturally. If your iron has hot spots, rotate the waffles halfway through cooking. I like to use a Belgian waffle maker for consistent results.
Frequently Asked Questions
What can I use instead of milk in waffle batter?
Water works perfectly, but you can also use dairy-free milk like almond or oat. The recipe calls for 1.5 cups of liquid.
Why are my dairy-free waffles dense?
Overmixing develops gluten. Fold batter just until combined, and ensure your baking powder is fresh for maximum rise.
How do I keep waffles crispy after cooking?
Place cooked waffles on a wire rack in a 200°F oven. Avoid stacking, as steam will make them soggy.
Can I make the batter ahead of time?
Yes, batter keeps in the fridge for 24 hours. Stir before using, as it may thicken slightly.
Nutrition Facts

- BBQ Sausage Recipe Oven: Smoky Depth Without the Grill - September 28, 2026
- BBQ Chicken Bowl Recipe Rice: Smoky Sweetness Over Fluffy Grains - September 28, 2026
- Beef Cutlet Recipe Ideas: Crispy Breaded Patties With Bold Seasonings - September 28, 2026