
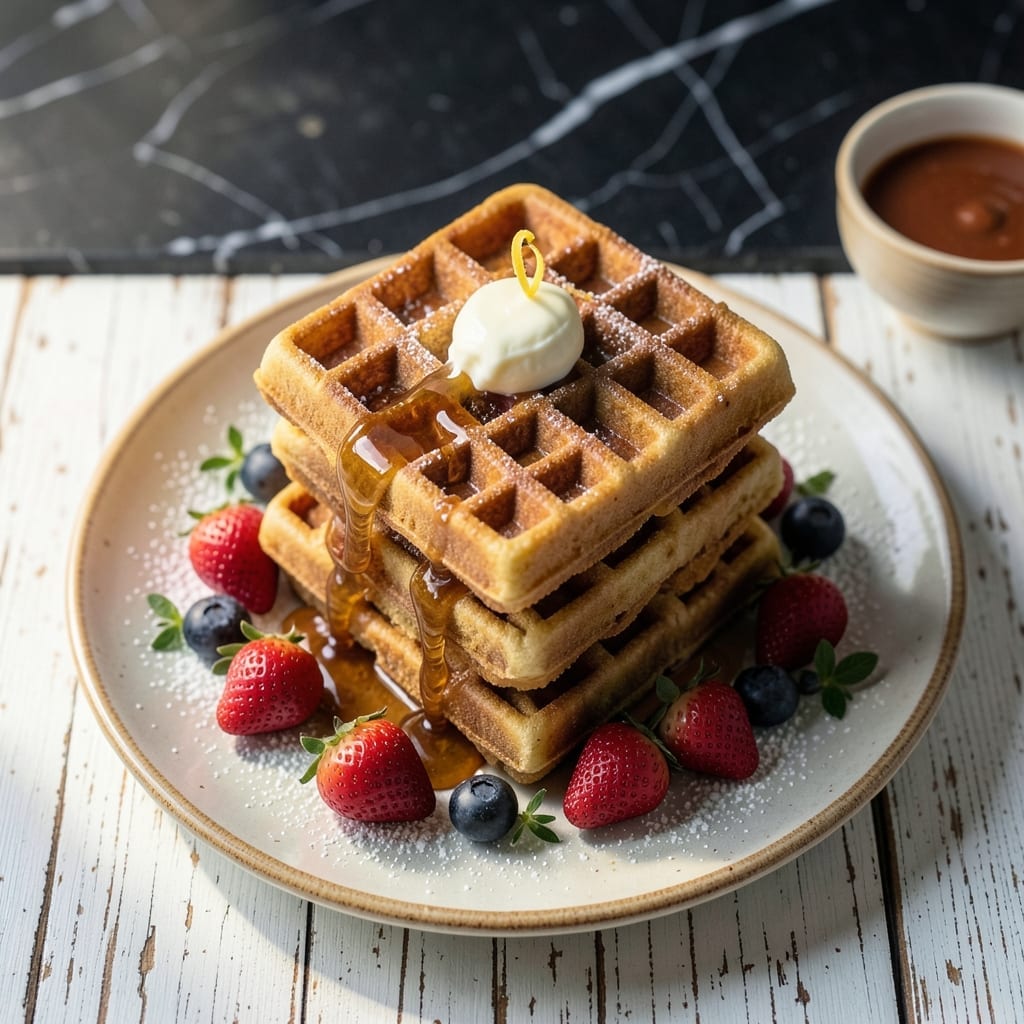
This milk-free waffle recipe delivers fluffy, golden results with simple ingredient swaps. I developed this method to accommodate dietary needs without sacrificing texture or flavor.
The batter comes together quickly using common pantry staples and a plant-based alternative. Cook in a preheated waffle iron for crispy edges and a tender interior every time.
Ingredients for Waffle Recipe Without Milk
Common pantry staples plus a plant-based swap deliver perfect texture and flavor.
| Ingredient | Amount | Notes |
|---|---|---|
| All-Purpose Flour 🌾 | 2 cups | Sifted for lighter texture |
| Baking Powder 🧂 | 2 tbsp | Ensures fluffy rise |
| Granulated Sugar 🍚 | 2 tbsp | Balances flavor, enhances browning |
| Salt 🧂 | ½ tsp | Fine grain preferred |
| Large Eggs 🥚 | 2 whole | Room temperature for best volume |
| Vegetable Oil 🫒 | ¼ cup | Or melted coconut oil |
| Almond Milk 🥛 | 1 ¾ cups | Unsweetened for neutral flavor |
| Vanilla Extract 🌿 | 1 tsp | Pure extract for best flavor |
| Ground Cinnamon 🌿 | ½ tsp | Optional, adds warmth |
| Apple Cider Vinegar 🍏 | 1 tbsp | Reactives with baking powder |
The flour is the foundation—King Arthur or Gold Medal all-purpose are reliable choices for consistent results. Baking powder freshness is critical; test it by dropping a spoonful in hot water—it should bubble vigorously. Almond milk works best here for its neutral flavor, but oat or soy milk are acceptable substitutes. Eggs at room temperature whip up fluffier, so pull them out 30 minutes before mixing.
No almond milk? Any unsweetened plant milk works at a 1:1 ratio. Swap vegetable oil for melted coconut oil (cool slightly before adding) or an equal amount of applesauce for a lower-fat option. Vanilla extract can be omitted in a pinch, but it adds depth. For extra richness, replace 2 tbsp milk with 2 tbsp Greek yogurt—still dairy-free if using coconut yogurt.
Store dry ingredients in airtight containers at room temperature for up to 6 months. The batter keeps in the fridge for 24 hours—stir before using. Cooked waffles freeze beautifully for up to 3 months; reheat in a toaster for crispiness.
Why You’ll Love This Recipe
- Five Minute Mix: I just dump the flour, baking powder, sugar, salt, and eggs in one bowl—no milk, no fuss.
- Crispy Golden Edges: The eggs give them that rich, slightly sweet flavor with a perfect crunch.
- Breakfast or Brunch: I’ve served these for lazy Sunday mornings and quick weekday breakfasts—same great result.
- Budget Friendly: No special ingredients, just pantry staples, and they still taste like a treat.
Step-by-Step Instructions for Waffles Without Milk
Here’s the method. Straightforward, tested, works every time.
Step 1: Combine Dry Ingredients for Even Distribution
In a large mixing bowl, whisk together the 2 cups All-Purpose Flour, 2 tbsp Baking Powder, 2 tbsp Granulated Sugar, and 0.5 tsp Salt until thoroughly combined. I sift the flour first to eliminate lumps and ensure a lighter texture in the finished waffles.
This step is crucial for activating the leavening agents evenly throughout the batter. The baking powder will react with the apple cider vinegar later to create that signature fluffy rise, so proper distribution at this stage guarantees consistent texture in every bite.
Step 2: Create the Wet Mixture with Flavor Enhancers
In a separate bowl, beat the 2 whole Large Eggs lightly before adding the 0.25 cup Vegetable Oil, 1.75 cups Almond Milk, 1 tsp Vanilla Extract, and 1 tbsp Apple Cider Vinegar. Whisk until fully emulsified—the mixture should appear smooth and slightly frothy.
The apple cider vinegar serves a dual purpose here: it reacts with the baking powder to create additional lift, and it adds a subtle tang that balances the sweetness. The vanilla extract and cinnamon, when added, will infuse the batter with warm, aromatic notes that complement the golden-brown finish.
Step 3: Marry Wet and Dry Components Gently
Pour the wet mixture into the bowl with the dry ingredients. Add the 0.5 tsp Ground Cinnamon if using. Using a silicone spatula, fold the ingredients together just until combined—small lumps are acceptable. Overmixing develops gluten, which would make the waffles tough rather than tender.
The batter should be thick but pourable. If it seems too dense, resist the urge to thin it with additional liquid. The consistency is designed to create waffles with crisp exteriors and airy interiors when cooked in a preheated waffle iron.
Step 4: Cook to Golden Perfection in Preheated Iron
Preheat your waffle iron to medium-high heat. Lightly grease the plates if your model requires it. Pour about ½ cup of batter onto the center of the lower plate, spreading slightly if needed. Close the lid and cook for 4-5 minutes until the waffles are golden brown and crisp.
Most waffle irons have indicator lights that signal when they’re ready. I recommend checking the first waffle after 4 minutes to gauge doneness. The waffles should release easily from the iron when fully cooked, with a deep golden hue and a crisp texture that holds up to toppings.
Pro Tips For Making Waffle Recipe Without Milk
- Preheat the Iron: Let your waffle iron heat fully for at least 5 minutes—sounds tedious, but I learned this the hard way after pulling half-baked waffles off a lukewarm iron.
- Whip the Eggs: Beat the eggs until they’re frothy, almost doubled in volume. My grandmother swore by this, and it actually changes the outcome for lighter waffles without milk.
- Skip Overmixing: Stir the batter just until the flour disappears—lumps are fine. After overmixing a few batches, I finally figured out why my waffles turned out tough.
- Use Water Wisely: Replace milk with an equal amount of water, but add 1 tablespoon of melted butter or oil for richness. I was skeptical until I tried it, and the texture stayed just as tender.
Pro Cooking Tips for Perfect Results
Iron Temperature Control
Preheat your waffle iron for at least 10 minutes before adding batter. I use a Cuisinart Round Classic set to medium-high heat for consistent results. The iron is ready when water droplets sizzle and evaporate immediately.
Batter Consistency Check
The ideal batter should be thick but pourable—like heavy cream. If it’s too thin, your waffles will be dense. If too thick, they won’t cook through. I’ve found that 1.75 cups almond milk gives the perfect consistency every time. 💡
Even Cooking Technique
Pour ½ cup batter per waffle in the center of the lower plate. Don’t spread it—let the iron do the work. For even browning, rotate the iron 180 degrees halfway through cooking if your model allows.
Doneness Testing
Check after 4 minutes. The waffle should be deep golden brown and release easily. If it sticks, cook for another 30-60 seconds. Steam should stop escaping from the iron when fully cooked.
Crisis Prevention
If your waffles aren’t crispy, the iron may not be hot enough. Increase the temperature and cook the next batch 30 seconds longer. For uneven cooking, ensure your iron is level on the counter. 🔥
Resting Period
Let cooked waffles rest on a wire rack for 1-2 minutes before serving. This prevents sogginess from trapped steam. Never stack them directly—this creates condensation and ruins the crisp texture.
Frequently Asked Questions
What can replace milk in waffles?
Any unsweetened plant milk works at a 1:1 ratio. Almond milk is best for neutral flavor, but oat or soy milk also work well. Each adds slightly different notes to the final taste.
Why add vinegar to the batter?
The 1 tbsp apple cider vinegar reacts with baking powder for extra lift. It also balances sweetness with a subtle tang that enhances flavor. Don’t skip it—it’s key for fluffy texture!
How do I make waffles crispier?
Preheat the iron for 10 minutes on medium-high heat. Cook until deep golden and steam stops escaping. Rest on a wire rack, not stacked, to maintain crispness.
Can I make these ahead of time?
Yes! Cooked waffles freeze for up to 3 months. Reheat in a toaster for 1-2 minutes to restore crispiness. Batter also keeps in the fridge for 24 hours.
Nutrition Facts

- BBQ Sausage Recipe Oven: Smoky Depth Without the Grill - September 28, 2026
- BBQ Chicken Bowl Recipe Rice: Smoky Sweetness Over Fluffy Grains - September 28, 2026
- Beef Cutlet Recipe Ideas: Crispy Breaded Patties With Bold Seasonings - September 28, 2026