
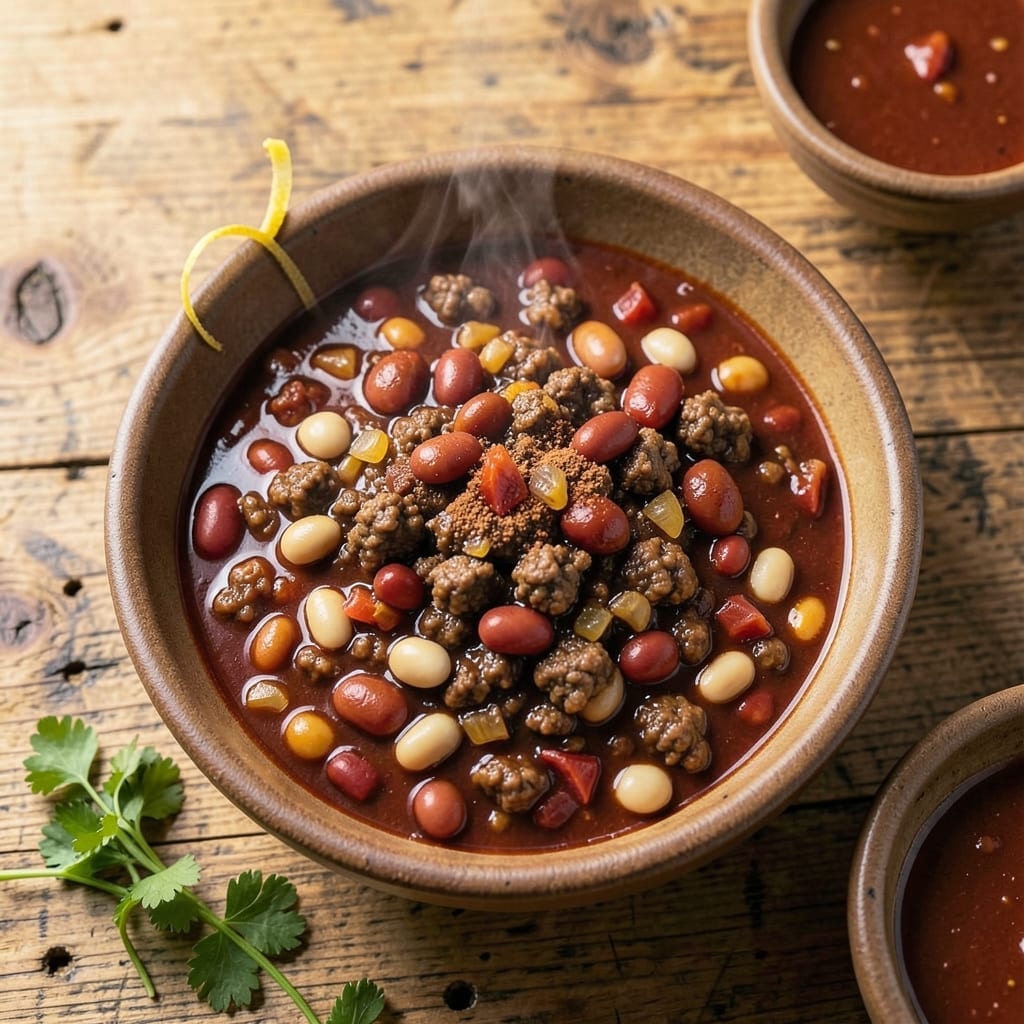
I’ve cracked the code to Wendy’s famous chili—right in your own kitchen. It’s faster than the drive-thru and tastes even better.
This copycat recipe delivers that bold, savory flavor you love with simple ingredients and no shortcuts.
Ingredients for Wendy’s Chili Recipe Top Secret
Simple ingredients, bold flavor—just like the drive-thru favorite you love.
| Ingredient | Amount | Notes |
|---|---|---|
| Ground Beef 🥩 | 2 lb | 80/20 lean-to-fat ratio preferred |
| Kidney Beans 🫘 | 2 cans | 15 oz each, drained and rinsed |
| Pinto Beans 🫘 | 2 cans | 15 oz each, drained and rinsed |
| Diced Tomatoes 🍅 | 2 cans | 14.5 oz each, undrained |
| Tomato Sauce 🍅 | 1 can | 15 oz, plain style |
| Yellow Onion 🧅 | 1 whole | Medium-sized, finely diced |
| Green Bell Pepper 🌶️ | 1 whole | Medium-sized, finely diced |
| Garlic Cloves 🧄 | 4 cloves | Fresh, minced |
| Chili Seasoning 🌶️ | 2 tbsp | Wendy's-style blend (or 1 packet) |
| Ground Cumin 🌿 | 1 tsp | Freshly toasted for depth |
| Salt 🧂 | 2 tsp | Kosher or sea salt preferred |
| Black Pepper 🌶️ | 1 tsp | Freshly ground |
| Beef Stock 💧 | 2 cups | Low-sodium preferred |
| Water 💧 | 1 cup | As needed for consistency |
The beef is key here. 80/20 ground chuck gives you that rich, meaty depth Wendy’s is famous for. Most grocery stores carry it—Costco’s bulk packs are perfect for chili night. The beans? Stick with kidney and pinto for authenticity. Canned is fine (drain and rinse well), but dried beans work too if you’ve got the time to soak and cook them yourself.
No chili seasoning packet? Make your own with 2 tbsp chili powder, 1 tsp cumin, 1 tsp garlic powder, 1 tsp onion powder. Want more heat? Add a pinch of cayenne. The tomatoes can be fresh if you’re feeling fancy, but canned is honestly easier and just as tasty. Swap bell pepper for jalapeño if you like a little kick (just remove the seeds first).
This chili tastes even better the next day once everything melds together. Keeps in the fridge for 4-5 days or freeze for up to 3 months. I like to portion mine into single-serving containers for quick lunches—just reheat and go.
Why You’ll Love This Recipe
- Dump and Go: Honestly, just brown the beef, dump everything else in one pot, and let it simmer—no fancy steps.
- Spot-On Wendy’s Taste: The combo of kidney and pinto beans with tomato sauce nails that familiar, hearty flavor I crave.
- Feeds the Freezer: I make a double batch and freeze half—perfect for those nights I just can’t even.
- Budget Hero: Ground beef and canned beans stretch far, and it’s way cheaper than takeout but just as satisfying.
Step-by-Step Instructions for Wendy’s-Style Chili
Here’s the method. Straightforward, tested, works every time.
Step 1: Brown the Ground Beef with Aromatics
Heat a large Dutch oven over medium-high heat. Add the 2 lb Ground Beef and cook, breaking it up with a wooden spoon, until it loses its pink color and begins to brown. This usually takes about 5-7 minutes.
Once the beef is browned, add the finely diced Yellow Onion, Green Bell Pepper, and minced 4 cloves Garlic Cloves. Cook for another 3-4 minutes until the vegetables soften and the onion becomes translucent. Drain any excess fat if needed, but leave about 1 tablespoon for flavor.
Step 2: Combine Beans, Tomatoes, and Seasonings
Add the drained and rinsed 2 cans Kidney Beans and 2 cans Pinto Beans, along with the undrained 2 cans Diced Tomatoes and 1 can Tomato Sauce. Stir well to combine all the ingredients evenly.
Next, sprinkle in the 2 tbsp Chili Seasoning, 1 tsp Ground Cumin, 2 tsp Salt, and 1 tsp Black Pepper. Stir again to ensure the seasonings are distributed throughout the mixture. This is where the signature Wendy’s flavor starts to develop.
Step 3: Add Liquids and Simmer
Pour in the 2 cups Beef Stock and 1 cup Water. Stir well to incorporate all the ingredients. Bring the mixture to a boil, then reduce the heat to low so it simmers gently.
Let the chili simmer uncovered for 45-60 minutes, stirring occasionally. You’ll know it’s ready when the chili thickens slightly and the flavors meld together beautifully. If it gets too thick, add a little more water, but remember, it should be hearty, not soupy.
Step 4: Adjust and Rest Before Serving
Taste the chili and adjust the seasoning if needed. I often find it perfect as is, but if you prefer a bit more depth, a pinch of extra Salt or Ground Cumin can enhance the flavor.
Remove the Dutch oven from heat and let the chili rest for 10 minutes before serving. This resting period allows the flavors to settle and deepen. Serve hot with your favorite toppings, like shredded cheese, sour cream, or chopped green onions.
Pro Tips For Making Wendy’S Chili Recipe Top Secret
- Brown the Beef Well: Cook the ground beef until it’s deeply browned, not just gray—this builds the rich, meaty flavor that defines Wendy’s chili. I learned this the hard way after making bland batches with undercooked beef.
- Drain the Beans: Rinse and drain both kidney and pinto beans thoroughly to remove excess starch, or your chili will end up too thick and pasty. Sounds tedious, but it actually changes the outcome.
- Simmer Low and Slow: Once everything’s in the pot, keep it at a gentle simmer for at least 45 minutes—rushing it with high heat makes the flavors muddy instead of deep and balanced.
- Add Tomato Sauce Last: Stir in the tomato sauce during the last 15 minutes of cooking to prevent it from breaking down too much and thinning the chili. My grandmother swore by this, and she was right.
Make-Ahead Tips for This wendys chili recipe top secret
Overnight Flavor Boost
This chili tastes even better the next day. After cooking, let it cool completely, then refrigerate in an airtight container for 8-12 hours. The spices and meat will meld together, deepening the flavor significantly. 💡
Freezer-Friendly Batches
Portion cooled chili into freezer-safe containers—I use quart-sized mason jars—leaving 1 inch headspace. It freezes well for up to 3 months without losing quality. Label with the date for easy tracking.
Quick Thaw Method
To thaw, transfer a container from the freezer to the fridge the night before. For faster results, submerge the sealed container in cold water, changing the water every 30 minutes. Never thaw at room temperature.
Reheating Like a Pro
Reheat on the stovetop over medium-low heat for 10-15 minutes, stirring occasionally. Add a splash of beef stock or water if it thickens too much. Microwave works too—cover and heat in 1-minute intervals, stirring between each. 🔥
Meal Prep Shortcut
Double the recipe and freeze half for future meals. I like using silicone muffin molds for single servings—pop out a portion and reheat as needed. Perfect for busy weeks when you crave that Wendy’s taste.
Frequently Asked Questions
Can I use ground turkey instead of beef?
Yes, but the flavor will be milder. Use 85/15 ground turkey for best results, and consider adding an extra 1 tsp cumin to boost the depth. The texture will be slightly different but still delicious.
Why does the chili taste better the next day?
The flavors meld and deepen as it rests. The spices rehydrate, the meat absorbs the liquid, and the beans soften further. Always cool completely before refrigerating for 8-12 hours.
How can I make it spicier?
Add 1 chopped jalapeño with seeds when browning the beef, or stir in 1/2 tsp cayenne pepper with the seasonings. For extra heat, include a pinch of red pepper flakes at the end.
Can I make this in a slow cooker?
Brown the beef first, then transfer to a slow cooker with all ingredients. Cook on low for 6-8 hours or high for 3-4 hours. Stir occasionally if possible.
Nutrition Facts

- BBQ Sausage Recipe Oven: Smoky Depth Without the Grill - September 28, 2026
- BBQ Chicken Bowl Recipe Rice: Smoky Sweetness Over Fluffy Grains - September 28, 2026
- Beef Cutlet Recipe Ideas: Crispy Breaded Patties With Bold Seasonings - September 28, 2026