
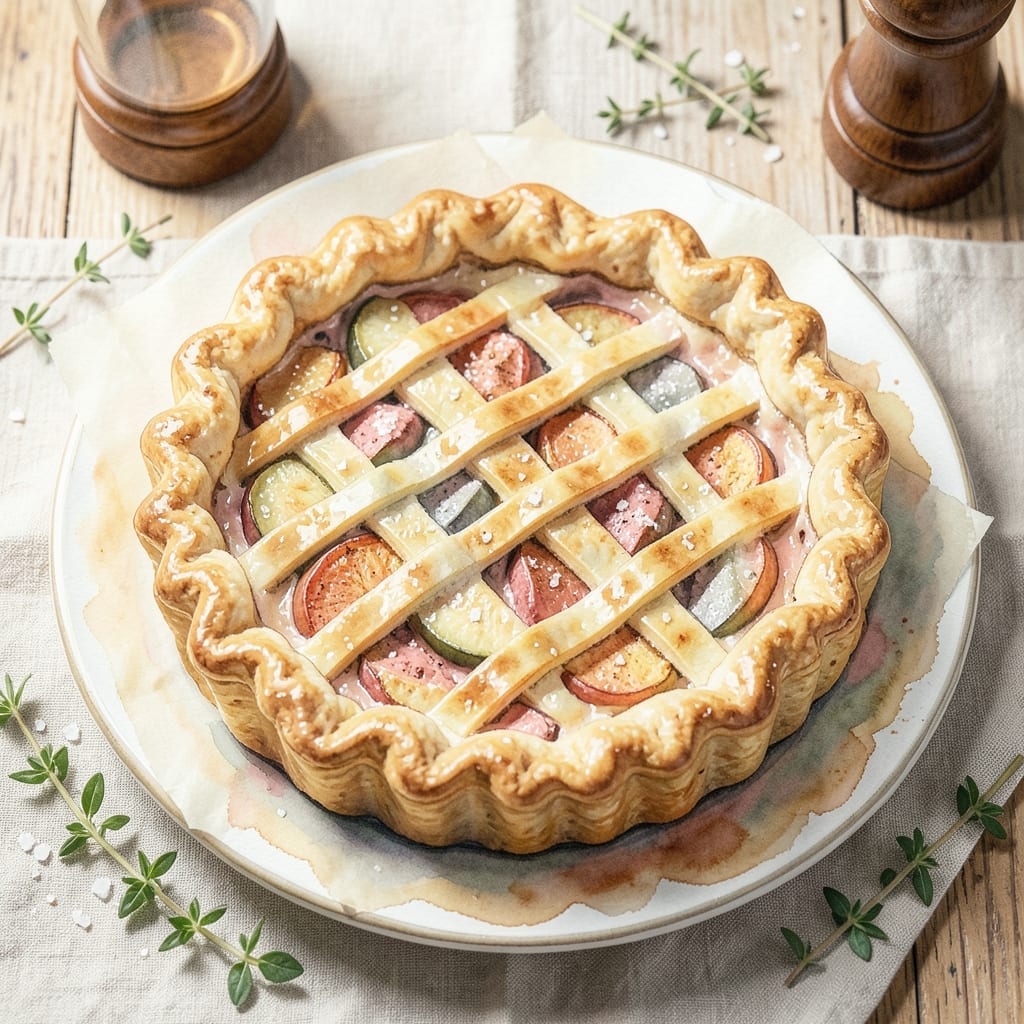
There’s nothing like the aroma of apple pie filling the kitchen, and this version delivers all that classic flavor without the sugar. I developed this recipe after years of experimenting with natural sweeteners, and stevia proved to be the perfect match for tart apples.
The key is balancing stevia’s concentrated sweetness with warm cinnamon and a touch of lemon juice to enhance the apples’ natural flavor. The crust stays flaky and golden, while the filling sets up beautifully without the need for cornstarch or other thickeners.
You’ll end up with a sugar-free pie that tastes just like the traditional version—sweet, aromatic, and comforting. The stevia allows the apples’ natural sweetness to shine through without overpowering it.
Perfect for those watching their sugar intake or anyone who loves the taste of homemade apple pie. Here’s how to make it.
Ingredients for Apple Pie Recipe Made with Stevia
A flaky crust and sweet-tart filling come together with natural sweetness from stevia.
| Ingredient | Amount | Notes |
|---|---|---|
| All-Purpose Flour 🌾 | 2 ½ cups | Plus extra for dusting surface |
| Unsalted Butter 🧈 | 1 cup | Chilled and cubed for crust |
| Ice Water 💧 | ⅓ cup | Plus extra as needed for crust |
| Granulated Stevia 🍃 | ¼ cup | Adjust to taste preference |
| Tart Apples 🍏 | 8 whole | Peeled, cored, thinly sliced (Granny Smith recommended) |
| Ground Cinnamon 🌿 | 2 tsp | Freshly ground preferred for intensity |
| Lemon Juice 🍋 | 1 tbsp | Freshly squeezed for brightness |
| Vanilla Extract 🌿 | 1 tsp | Pure extract for depth of flavor |
| Salt 🧂 | ½ tsp | Divided between crust and filling |
| Cold Water 💧 | 1 tbsp | For adjusting filling consistency |
The apples are everything here. Granny Smith gives that perfect tartness to balance the stevia—Honeycrisp or Braeburn work too but add a touch more lemon. I grab mine from Trader Joe’s or the local farmers market when they’re in season. The stevia needs to be pure granulated (not liquid drops) for even distribution. Wholesome! or Pyure brands are solid and widely available.
No stevia? Erythritol or monk fruit sweetener at a 1:1 ratio works, but adjust to taste—stevia’s more concentrated. Want more spice? Add a pinch of nutmeg or allspice. The butter in the crust can be swapped for vegetable shortening (1:1) if you prefer, though I find butter gives better flavor. For the flour, gluten-free 1:1 blend works if needed—just add 1/2 tsp xanthan gum to the dough.
The crust dough can rest in the fridge for up to 2 days, or freeze it for 1 month. Sliced apples will oxidize quickly, so toss them with a bit of lemon juice if prepping ahead. The baked pie keeps at room temperature (covered) for 2 days, or refrigerate for 5 days.
Why You’ll Love This Recipe
- One-Bowl Crust: I love that I can mix the flour, butter, and ice water right in one bowl—no fancy equipment, just my hands and 10 minutes.
- Sweet & Tart Harmony: The stevia lets the tart apples shine without overpowering sweetness, so every bite has that bright, crisp flavor I crave.
- Feeds a Crowd: This pie disappears fast at potlucks, but honestly, I’ve made it for a quiet Tuesday night too.
- Keeps Well: Leftovers stay flaky and delicious for days, which means I get to enjoy that buttery crust longer than expected.
Step-by-Step Instructions for Apple Pie Made With Stevia
Here’s the method. Straightforward, tested, works every time.
Step 1: Prepare the Pie Crust
In a large bowl, combine the 2.5 cups all-purpose flour and a pinch of the salt. Cut in the 1 cup chilled unsalted butter using a pastry cutter or your fingers until the mixture resembles coarse crumbs with pea-sized butter pieces visible.
Gradually add the 0.33 cup ice water, 1 tablespoon at a time, mixing gently with a fork just until the dough starts to come together. Don’t overwork it—you want a flaky crust, not a tough one. If the dough seems dry, add a bit more ice water, but be sparing.
Divide the dough into two equal portions, shape into discs, wrap in plastic, and refrigerate for at least 1 hour. This chilling step is crucial—it relaxes the gluten and prevents shrinking during baking.
Step 2: Prepare the Apple Filling
Peel, core, and thinly slice the 8 whole tart apples. As you work, toss the slices with the 1 tablespoon lemon juice to prevent browning. In a large bowl, combine the apple slices with the 0.25 cup granulated stevia, 2 teaspoons ground cinnamon, 1 teaspoon vanilla extract, and the remaining salt.
Mix gently to coat the apples evenly, then let the mixture sit for 15 minutes. This allows the stevia to begin drawing out the apples’ natural juices. If the filling seems too dry, add the 1 tablespoon cold water to create a light syrup that will thicken as it bakes.
Step 3: Assemble the Pie
On a lightly floured surface, roll out one disc of dough to a 12-inch circle. Transfer it to a 9-inch pie dish, pressing gently into the bottom and up the sides. Trim the excess dough, leaving a ½-inch overhang.
Pour the apple filling into the crust, mounding slightly in the center. Roll out the second disc of dough to another 12-inch circle and place it over the filling. Trim and crimp the edges to seal, then cut 4-5 slits in the top crust to allow steam to escape.
Step 4: Bake to Perfection
Preheat your oven to 375°F. Place the pie on a baking sheet to catch any drips and bake for 45-50 minutes. After 30 minutes, check the crust—if it’s browning too quickly, cover the edges with foil or a pie shield.
You’ll know it’s done when the crust is golden brown and the filling is bubbling through the vent slits. The apples should be tender but not mushy, and the juices should have thickened slightly.
Let the pie cool on a wire rack for at least 2 hours before slicing. This resting time allows the filling to set properly, making for clean, beautiful slices when you serve it.
Pro Tips For Making Apple Pie Recipe Made With Stevia
- Chill the Dough: Work the butter into the flour until pea-sized crumbs form, then add ice water—this keeps the crust flaky instead of tough. I learned this the hard way after my first few pies came out dense.
- Pre-Cook the Apples: Toss the tart apples with stevia and let them sit for 10 minutes, then drain excess liquid to avoid a soggy filling. Sounds weird, but it works.
- Watch the Stevia: Granulated stevia is Sweeter than sugar—start with 1/3 the amount you’d normally use and adjust to taste. After burning three batches, I finally figured out the ratio.
- Vent the Top: Cut 4-5 small slits in the top crust before baking to let steam escape—this prevents a cracked or sunken pie. My grandmother swore by this, and she was right.
Flavor Customization for This Recipe
Sweetness Adjustments
Since stevia is 200-300 times sweeter than sugar, start with ¼ cup granulated stevia and taste the filling before baking. If you prefer it sweeter, add 1-2 tbsp more to balance the tartness of Granny Smith apples. 💛
Spice Variations
For warmth, add ¼ tsp nutmeg or allspice to the filling. A pinch of cardamom pairs wonderfully with the cinnamon. If you love bold flavors, try ½ tsp apple pie spice for a complex, aromatic twist.
Crust Customization
Swap 1 tbsp sugar into the crust dough if you miss sweetness in the pastry itself. For texture, sprinkle 1 tbsp coarse almond flour on the bottom crust before adding filling to prevent sogginess.
Fruit Enhancements
Add ½ cup dried cranberries or chopped dates for chewy texture and depth. For freshness, fold in 1 diced pear with the apples—it complements the stevia beautifully. 🍏
Topping Ideas
Before baking, brush the crust with 1 egg wash and sprinkle with 1 tsp coarse sugar for extra crunch. Or, top with streusel made from ¼ cup oats, 2 tbsp flour, and 1 tbsp butter.
Serving Twists
Serve warm with a scoop of vanilla ice cream or a dollop of whipped cream. For contrast, drizzle with sugar-free caramel sauce or sprinkle with toasted pecans. ✨
Nutrition Facts
Frequently Asked Questions
Can I use liquid stevia instead of granulated?
Yes, but adjust carefully. Liquid stevia is more concentrated, so use 1-2 tsp instead of ¼ cup granulated. Start with less, taste, then add more if needed.
Why does my filling seem watery?
Stevia doesn’t thicken like sugar. Let the filling sit for 15 minutes before baking, or add 1 tsp cornstarch to help bind the juices. The filling will set as it cools.
Can I make this pie ahead of time?
Bake the pie, let it cool completely, then store at room temperature for 2 days or refrigerate for up to 5 days. Reheat slices briefly for best texture.
Which apples work best?
Granny Smith is ideal for tartness, but Honeycrisp or Braeburn add natural sweetness. Avoid overly soft varieties like Red Delicious.

- BBQ Sausage Recipe Oven: Smoky Depth Without the Grill - September 28, 2026
- BBQ Chicken Bowl Recipe Rice: Smoky Sweetness Over Fluffy Grains - September 28, 2026
- Beef Cutlet Recipe Ideas: Crispy Breaded Patties With Bold Seasonings - September 28, 2026