
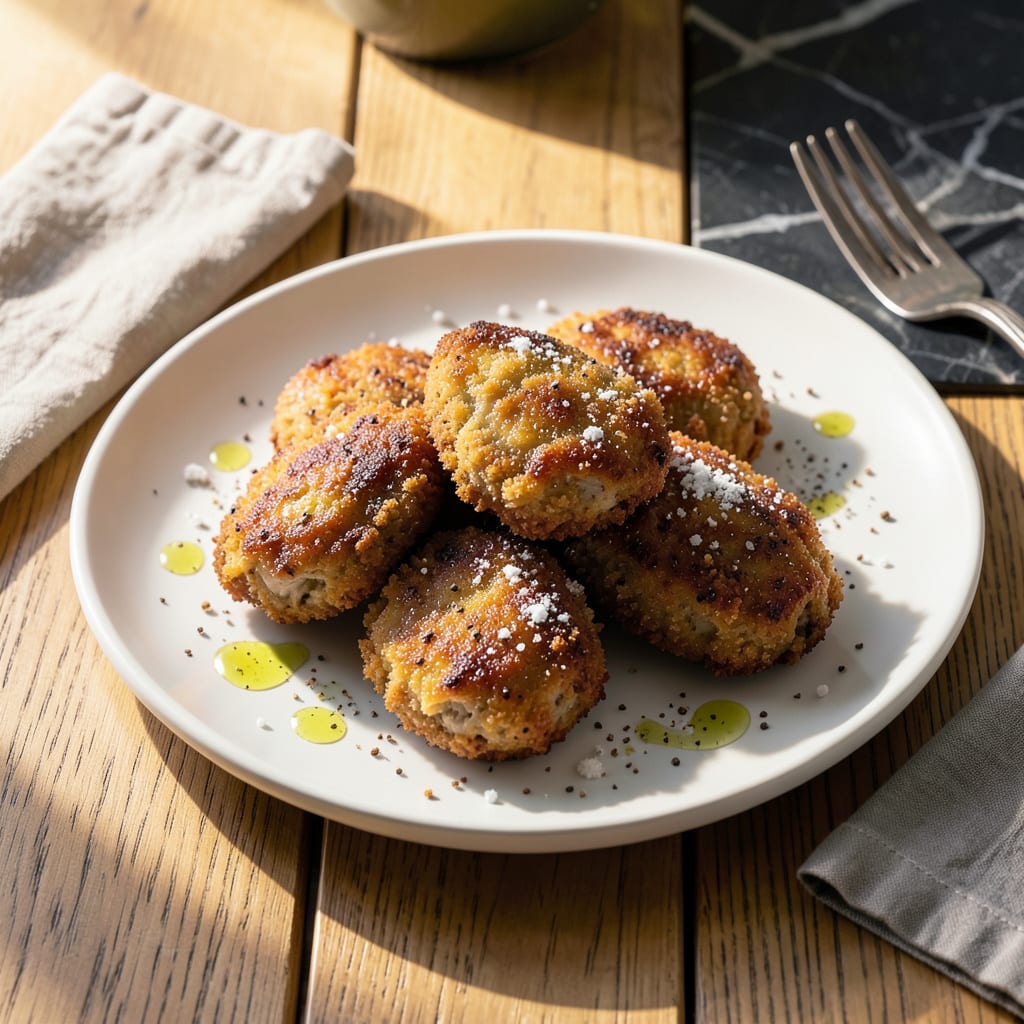
This baked chicken livers recipe transforms a nutrient-packed ingredient into crispy, flavorful bites with minimal effort. The oven method ensures even cooking while creating a golden exterior that locks in moisture.
With just 30 minutes and basic seasonings, you’ll achieve tender centers and perfectly crispy edges. Ideal for appetizers or a protein-rich main, this dish proves simple techniques deliver professional results.
Ingredients for Baked Chicken Livers
Basic pantry staples and fresh chicken livers create these crispy oven-baked bites with ease.
| Ingredient | Amount | Notes |
|---|---|---|
| Chicken Livers 🍗 | 1 ½ lb | Trimmed of connective tissue |
| All-Purpose Flour 🌾 | ½ cup | For dredging livers |
| Kosher Salt 🧂 | 1 ½ tsp | Diamond Crystal preferred |
| Freshly Ground Black Pepper 🌶️ | 1 tsp | Coarse grind for texture |
| Garlic Powder 🧄 | 1 tsp | Not garlic salt |
| Onion Powder 🧅 | 1 tsp | For depth of flavor |
| Smoked Paprika 🌶️ | 1 tsp | Adds subtle smokiness |
| Dried Thyme 🍃 | ½ tsp | Crushed between fingers |
| Large Eggs 🥚 | 2 whole | For binding coating |
| Whole Milk 🥛 | ½ cup | For egg wash mixture |
| Panko Breadcrumbs 🍞 | 1 ½ cups | For crispy coating |
| Olive Oil 🫒 | ¼ cup | For drizzling before baking |
| Unsalted Butter 🧈 | 2 tbsp | Melted for richness |
| Fresh Parsley 🌿 | ¼ cup | Chopped, for garnish |
The chicken livers are the star—look for fresh, moist livers with a deep red-brown color, avoiding any with a greenish tinge. Whole Foods or butcher shops often carry higher-quality options. Trim any connective tissue carefully (a sharp knife helps) for the best texture. Panko breadcrumbs are essential for that promised crispy exterior—Kikkoman or Progresso brands work well.
No milk on hand? Buttermilk or half-and-half adds richness too. Swap smoked paprika for regular if you prefer milder flavor. Fresh thyme can replace dried at three times the amount. The flour helps the coating adhere, but cornstarch works in a pinch for a lighter crust. For extra crunch, add crushed cornflakes to the breading mixture.
Store raw livers in the coldest part of your fridge for up to 2 days. Baked leftovers keep 3-4 days refrigerated. Reheat in a 400°F oven for 10 minutes to restore crispiness. Freezing isn’t recommended—it toughens the livers.
Why You’ll Love This Recipe
- One Pan Wonder: I toss the livers in flour and spices, then straight onto the sheet pan—no fuss, no extra dishes.
- Garlic-Pepper Crisp: That first bite with the crunchy coating and rich, garlicky flavor? I make extra just to sneak a few before dinner.
- Budget Stretcher: A pound of chicken livers costs less than a fancy steak but feels just as indulgent.
- Meal Prep Hero: I double the batch on Sunday and reheat portions all week—they taste even better the next day with a little less crisp.
Step-by-Step Instructions for Baked Chicken Livers
Master this method for perfectly crispy, iron-rich bites with a golden, flavorful crust.
Step 1: Prepare and Season the Chicken Livers
Begin by patting the 1.5 lb Chicken Livers completely dry with paper towels. This step is non-negotiable—moisture prevents the coating from adhering and leads to soggy results. Trim away any connective tissue or fat with a sharp knife for uniform texture.
In a shallow dish, combine the 0.5 cup All-Purpose Flour, 1.5 tsp Kosher Salt, 1 tsp Freshly Ground Black Pepper, 1 tsp Garlic Powder, 1 tsp Onion Powder, 1 tsp Smoked Paprika, and 0.5 tsp Dried Thyme. Crush the dried thyme between your fingers to release its aroma as you mix.
Step 2: Create the Breading Station
Set up a breading station with three shallow dishes. In the first, whisk the 2 whole Large Eggs with the 0.5 cup Whole Milk until fully combined. Place the 1.5 cups Panko Breadcrumbs in the second dish. Use the third for the flour mixture you prepared earlier.
Dredge each liver in the flour mixture, shaking off excess, then dip it into the egg wash, allowing any excess to drip off. Finally, press it firmly into the panko breadcrumbs, ensuring a thick, even coating on all sides. This three-step process guarantees maximum crispiness.
Step 3: Chill and Preheat for Optimal Results
Arrange the breaded livers on a wire rack set over a baking sheet. This elevation allows air to circulate around each piece, preventing steam from softening the crust. Drizzle the 0.25 cup Olive Oil evenly over the livers—this adds richness and promotes browning.
Refrigerate the livers for 15 minutes while you preheat the oven to 400°F. Chilling helps the coating set, reducing the risk of it separating from the liver during baking. Meanwhile, melt the 2 tbsp Unsalted Butter to have ready for finishing.
Step 4: Bake to Golden Perfection
Transfer the chilled livers to the preheated oven and bake for 12-15 minutes. Flip them halfway through the cooking time to ensure even browning. You’ll know they’re done when the coating is deep golden brown and the internal temperature reaches 165°F.
For the final touch, brush the hot livers with the melted unsalted butter immediately after removing them from the oven. This adds a glossy finish and extra richness. Let them rest for 2-3 minutes before serving to allow the juices to settle.
Step 5: Garnish and Serve Immediately
Transfer the baked chicken livers to a serving platter and sprinkle with the 0.25 cup Fresh Parsley, chopped finely. The parsley adds a pop of color and freshness that balances the rich flavor. Serve immediately while hot and crispy.
These livers are best enjoyed fresh from the oven. The contrast between the crispy panko crust and the tender, flavorful interior delivers a satisfying bite every time. Pair with a simple arugula salad or your favorite dipping sauce.
Pro Tips For Making Baked Chicken Livers
- Soak the Livers: Cover chicken livers in milk for 30 minutes before cooking—this removes any bitterness and keeps them tender. I learned this the hard way after serving a batch that tasted like regret.
- Dry Them Well: Pat the livers completely dry with paper towels after soaking. Any moisture left means the flour won’t stick, and you’ll end up with sad, pale livers instead of crispy ones.
- Hot Oven, Short Time: Bake at 425°F for 12-15 minutes, flipping halfway. High heat is non-negotiable—it locks in juices while getting that crust just right.
- Season the Flour: Mix kosher salt, black pepper, and garlic powder directly into the flour before dredging. Sounds simple, but it makes a real difference in getting even flavor on every bite.
Health Benefits of These Flavors
Iron Powerhouse
Chicken livers pack an incredible iron punch—just 3.5 ounces provides over 70% of your daily iron needs. This heme iron is especially valuable because your body absorbs it more efficiently than plant-based iron. I noticed my energy levels improved after adding livers to my diet weekly. 💪
Rich in B Vitamins
These little powerhouses are loaded with B vitamins, particularly B12 and riboflavin. A single serving delivers more than 100% of your daily B12, crucial for nerve function and red blood cell production. The folate content also supports cell growth and metabolism.
Protein Without the Fat
With about 20 grams of protein per 3.5 ounces, chicken livers offer a concentrated protein source with minimal fat. This makes them ideal for muscle maintenance and repair. The protein is complete, containing all essential amino acids your body needs.
Vitamin A Boost
Chicken livers are one of the best natural sources of vitamin A, with a 3.5-ounce serving providing over 160% of your daily requirement. This vitamin supports vision, immune function, and skin health. I love that this dish helps me meet my vitamin needs so easily. 🥗
Low Calorie, High Nutrition
Despite their rich flavor, chicken livers are surprisingly low in calories—about 130 calories per 3.5 ounces. This makes them a nutrient-dense choice that won’t derail your calorie goals. The combination of high nutrients and low calories is hard to beat.
Copper and Selenium
You’ll also get significant amounts of copper and selenium from chicken livers. Copper aids in iron metabolism, while selenium acts as a powerful antioxidant. These trace minerals support overall health and immune function.
Nutrition Facts
Frequently Asked Questions
What temperature should I bake them at?
Bake at 400°F for 12-15 minutes, flipping halfway. This high heat ensures a crispy exterior while cooking the livers through without drying them out.
Can I use regular breadcrumbs instead of panko?
Yes, but panko gives the best crunch. If substituting, add 1/4 cup crushed cornflakes to regular breadcrumbs for extra crispiness. The texture won’t be identical but will still be tasty.
How do I know when they’re done?
Check for a deep golden brown coating and an internal temperature of 165°F. The livers should feel firm but still slightly springy to the touch. Overcooking makes them tough.
Why did my coating fall off during baking?
This usually happens if the livers weren’t dry before breading or didn’t chill after coating. Always pat them completely dry and refrigerate for 15 minutes before baking to help the coating adhere.

- BBQ Sausage Recipe Oven: Smoky Depth Without the Grill - September 28, 2026
- BBQ Chicken Bowl Recipe Rice: Smoky Sweetness Over Fluffy Grains - September 28, 2026
- Beef Cutlet Recipe Ideas: Crispy Breaded Patties With Bold Seasonings - September 28, 2026