
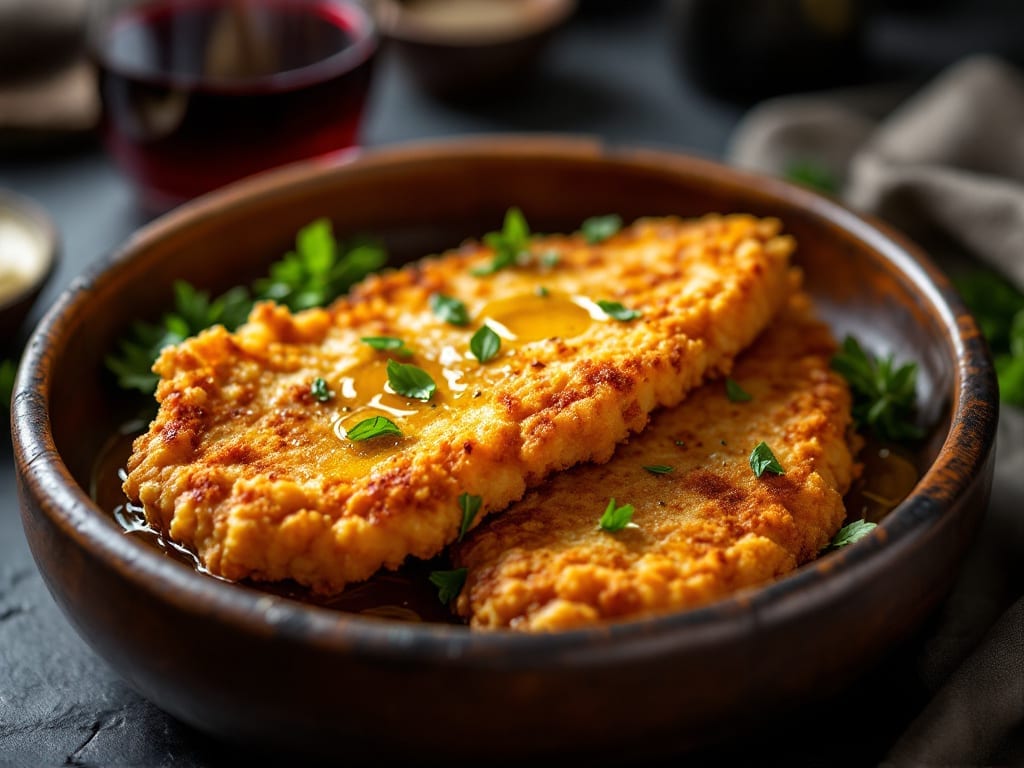
This baked schnitzel recipe delivers the same golden-crispy, juicy perfection as classic fried schnitzel—without the mess or deep-frying. The secret lies in a precise breading technique and 400°F oven temperature that creates that signature crunch while keeping the inside tender.
After years of perfecting this method, I can confidently say it rivals restaurant versions, but with a healthier twist.
What makes this recipe work is the three-step breading process: flour, beaten eggs, and fine breadcrumbs create an ultra-crispy coating that stays intact even when cutting. The cutlets bake for just 12-15 minutes, giving you perfectly golden exteriors with juicy, flavorful centers every time.
No frying pan required—just a baking sheet and your oven.
When served with a side of lemon wedges, tartar sauce, or a fresh cucumber salad, these schnitzel cutlets become a complete meal that feels indulgent yet balanced. The crispy exterior gives way to tender, flavorful meat that stays moist thanks to the baking method.
This recipe serves 4 people and comes together in under 30 minutes of active prep.
For an extra restaurant touch, plate with a dollop of sour cream or a sprinkle of fresh parsley. The key to success is not overcrowding the baking sheet—space the cutlets apart for even browning.
Whether you’re feeding a family or hosting dinner guests, this baked schnitzel delivers professional results without the fuss.
Ingredients for baked schnitzel
Fourteen ingredients transform into restaurant-quality schnitzel with perfect golden crust and juicy centers.
| Ingredient | Amount | Notes |
|---|---|---|
| Pork Cutlets (Tenderloin) 🥩 | 1 ½ lb | Boneless, skinless, pounded to even 1/4-inch thickness |
| All-Purpose Flour 🌾 | 1 cup | Sifted for even coating |
| Large Eggs 🥚 | 2 whole | Room temperature, beaten |
| Fine Breadcrumbs 🍞 | 1 ½ cups | Panko or Italian-style preferred |
| Diamond Crystal Kosher Salt 🧂 | 1 ½ tsp | Fine grain for even seasoning |
| Freshly Ground Black Pepper 🌶️ | 1 tsp | Cracked peppercorns preferred |
| Extra-Virgin Olive Oil 🫒 | ¼ cup | For brushing cutlets before baking |
| Fresh Lemon Juice 🍋 | 1 tbsp | From 1/2 lemon, freshly squeezed |
| Garlic Powder 🧄 | ½ tsp | Freshly ground preferred |
| Dried Parsley Flakes 🌿 | ½ tsp | For final garnish |
| Unsalted Butter 🧈 | 2 tbsp | Melted for basting |
| Lemon Wedges 🍋 | 4 whole | For serving |
The pork cutlets are the foundation—tenderloin is ideal for its lean texture and uniform thickness. Purchase from a high-quality butcher or reputable grocery store like Whole Foods or Trader Joe’s, ensuring the meat is freshly cut and bright pink in color. Pound the cutlets to even 1/4-inch thickness using a meat mallet or rolling pin, which ensures even cooking. The breadcrumbs make all the difference—panko or Italian-style create a lighter, crispier crust than standard breadcrumbs. Store the cutlets in the refrigerator until ready to bread, no more than 2 hours before cooking to maintain freshness.
For the breading process, sift the flour to eliminate lumps, creating a smoother coating. If you’re short on eggs, egg whites only work equally well, though the yolks add richness. Substitute the breadcrumbs with crushed cornflakes for a gluten-free option, though the texture will differ slightly. The extra-virgin olive oil should be of high quality—avoid the cheap, overly processed varieties that lack flavor. For a tangy twist, add 1/2 teaspoon of Dijon mustard to the beaten eggs. If you prefer a different protein, chicken breast cutlets work well but require slightly less baking time to avoid drying out.
Prepare the cutlets just before baking to maintain crispiness. The breaded cutlets can be refrigerated for up to 1 hour before baking, but avoid storing them longer to prevent sogginess. Once baked, these schnitzel reheat beautifully—simply pop them in a 350°F oven for 5-7 minutes until warmed through. For meal prep, store leftovers in an airtight container for up to 3 days, though they’re best enjoyed fresh. The lemon wedges should be freshly squeezed and stored in the refrigerator until ready to serve, as their acidity brightens the dish. Garnish with fresh parsley just before serving to retain vibrant color.
Why You’ll Love This Recipe
- No-Fry Night Win: I swear by this when I’m too tired to deal with oil splatter—just coat the tenderloin in flour, dip in egg, then breadcrumbs, and bake until golden. Crispy without the mess.
- Crispy-Creamy Magic: That perfect crunch on the outside? The breadcrumbs and egg combo lock it in, while the tenderloin stays juicy inside. Honestly, it’s the kind of bite that makes you pause mid-meal.
- Weeknight Crowd-Pleaser: Between us, this feeds six for under $15 and still gets my picky teen’s approval. Serve with applesauce or a simple salad—no one feels like they’re eating “dinner.”
- Leftovers That Don’t Suck: Unlike fried schnitzel, these stay crispy reheated in the oven (yes, really). I make double batches—one for dinner, one for lazy lunches the next week. Zero guilt, all flavor.
Step-by-step instructions for baked schnitzel
Master the technique for golden, crispy breading and tender pork cutlets every time.
Prepare the Pork Cutlets for Even Cooking
Begin by placing each of the 1.5 lb pork cutlets (tenderloin) between two sheets of plastic wrap. Using a meat mallet, pound them to an even ¼-inch thickness throughout. This ensures uniform cooking and prevents any portion from remaining undercooked. I press down firmly but evenly, rotating the mallet to maintain consistent thickness. The goal is to create a uniform surface for the breading to adhere perfectly.
Once pounded, season both sides of each cutlet generously with 1.5 tsp diamond crystal kosher salt and 1 tsp freshly ground black pepper. The salt should be distributed evenly, and the pepper should be cracked fresh for maximum flavor. Let the seasoned cutlets rest at room temperature for 15 minutes before proceeding. This resting period allows the seasoning to penetrate the meat slightly, enhancing flavor and ensuring even cooking.
Create the Breading Station
Set up three shallow dishes or plates for your breading process. In the first dish, place the 1 cup all-purpose flour and mix it with 0.5 tsp garlic powder. Sift the flour if possible to prevent clumping, ensuring an even coating. In the second dish, beat the 2 whole large eggs until they are fully combined but still slightly thick. The eggs should be at room temperature for best results. In the third dish, place the 1.5 cups fine breadcrumbs, preferably panko or Italian-style for added crispiness.
This three-step breading process—flour, egg, breadcrumbs—creates a layered crust that ensures both crispiness and structural integrity. I like to use a fork to gently separate any clumps in the breadcrumbs, which helps achieve an even, golden coating. Keep these stations close together to streamline the breading process and maintain efficiency.
Bread the Cutlets for Maximum Crispiness
Working with one cutlet at a time, begin by dipping it into the flour mixture, coating both sides thoroughly. Tap off any excess flour to prevent a thick, uneven layer. Next, dip the floured cutlet into the egg mixture, ensuring complete coverage. Allow any excess egg to drip off before transferring the cutlet to the breadcrumbs. Press the breadcrumbs firmly onto both sides of the cutlet, using your fingers or the back of a spoon to create a dense, even layer.
Repeat this process with all the cutlets, working quickly to prevent the breading from becoming soggy. As you bread each cutlet, place them on a wire rack set over a baking sheet. This allows air to circulate around the cutlets, promoting even browning and crispiness. Avoid stacking the cutlets, as this can lead to uneven cooking and a less crispy final result.
Bake to Golden Perfection
Preheat your oven to 400°F while the cutlets rest on the wire rack. Once the oven reaches temperature, brush each cutlet lightly with 0.25 cup extra-virgin olive oil using a pastry brush. This step is crucial for achieving a deep golden color and enhancing crispiness. Transfer the oiled cutlets to the preheated oven and bake for 12-15 minutes, flipping them once halfway through the baking time.
You’ll know the cutlets are done when they are deep golden brown and the internal temperature reaches 145°F when measured with an instant-read thermometer. The breading should be crispy and slightly puffed, with no signs of moisture seeping through. Remove the cutlets from the oven and let them rest for 2-3 minutes before serving. This resting period allows the juices to redistribute, ensuring each bite is both crispy on the outside and juicy on the inside.
Finish and Serve with Lemon
While the cutlets rest, melt the 2 tbsp unsalted butter in a small saucepan over low heat. Once melted, remove from heat and stir in 1 tbsp fresh lemon juice and 0.5 tsp dried parsley flakes. This simple sauce adds a bright, aromatic finish that complements the crispy cutlets perfectly. Drizzle the sauce lightly over each cutlet before serving.
Garnish each cutlet with a lemon wedge and serve immediately. The combination of crispy breading, juicy pork, and zesty lemon creates a harmonious balance of textures and flavors. Each bite should deliver the promised crispiness on the outside and tender, succulent meat on the inside, making this baked schnitzel a standout dish.
Pro Tips For Making Baked Schnitzel
- Pound to ¼ Inch: Thin is the only way—any thicker and you’ll end up with chewy, unevenly cooked pork. Use a meat mallet or rolling pin to flatten each cutlet until you can just see the light through it, then double-check with a ruler. I learned this the hard way when my first batch came out like tiny pork pancakes.
- Salt the Flour Heavily: Skip the light hand here—mix your all-purpose flour with 1 teaspoon kosher salt per cup before dredging. The crust needs that salt to crisp properly, and it’ll save you from over-salting the meat later. (Yes, even if your breadcrumbs are unsalted.)
- Don’t Crowd the Pan: Bake in a single layer, even if it means two batches. Overlapping cutlets steams them instead of browning, and you’ll end up with sad, soggy breading. Leave at least an inch between each piece—your oven’s hot enough to handle it.
- Egg Wash, Then Rest: After dipping in egg, let the cutlets sit on a wire rack for 2 full minutes before adding breadcrumbs. This lets the egg set slightly, so the crumb coating sticks like it’s supposed to. I was skeptical until I tried it—now I never skip it.
Common mistakes when making this dish
Over-Pounding the Meat
Pounding your cutlets too thin—below ¼-inch thickness—risks drying them out completely during baking. I’ve learned the hard way that ⅛-inch thickness or thinner turns schnitzel into a chewy, rubbery mess. Use a meat mallet with even pressure, checking thickness with calipers or a ruler.
If you’re unsure, err on the thicker side—¼-inch is your sweet spot for juicy, tender results. 💡
Skipping the Resting Time
Letting the seasoned cutlets rest for 15 minutes at room temperature is non-negotiable. I’ve rushed this step before, and the results were uneven cooking—some parts dry, others still raw.
The rest allows the meat to relax and absorb seasoning evenly. Place cutlets on a wire rack (not directly on the counter) to prevent sogginess from condensation.
Uneven Breading Layers
A thick, clumpy breading layer leads to soggy centers and uneven crispiness. The key is pressing the breadcrumbs firmly but evenly—don’t just sprinkle them on. I use the back of a spoon to create a dense, uniform layer on both sides.
For extra crispiness, chill the breaded cutlets in the fridge for 10 minutes before baking to set the coating.
Overcrowding the Baking Sheet
Placing cutlets too close together causes steam buildup, making the breading soggy instead of crispy. Leave at least 1 inch of space between each cutlet—this ensures even air circulation and golden browning.
If needed, bake in batches. I use a half-sheet pan for 4 cutlets max at 400°F, flipping once at the 8-minute mark for perfect results. ⚡
Ignoring the Olive Oil Brush
Brushing the breaded cutlets with extra-virgin olive oil before baking is what gives them that restaurant-quality shine and crisp. Skipping this step results in dull, uneven browning.
Use a pastry brush to coat both sides lightly—just enough to glisten. The oil also prevents the breading from sticking to the pan, making cleanup easier.
Underbaking or Overbaking
Baking at 400°F for 12-15 minutes is critical—any less, and the breading won’t crisp; any more, and the meat dries out. Check doneness with an instant-read thermometer at 145°F internal temp.
If the breading isn’t golden enough, broil for 1-2 minutes** at the end (watch closely!). Overbaking turns schnitzel into a sad, dry pile—trust the thermometer, not the color alone.
Nutrition facts
Frequently asked questions
Can I make baked schnitzel with chicken instead of pork?
Chicken breast cutlets work beautifully, but they require slightly less baking time—10-12 minutes at 400°F to avoid drying out. Use the same breading method, but check for doneness at 165°F internal temp. The texture will be slightly lighter than pork but equally crispy.
Why does my breading turn soggy instead of crispy?
Soggy breading usually happens from overcrowding or skipping the olive oil brush. Leave 1 inch between cutlets on the baking sheet and brush them lightly with oil before baking. Also, chill breaded cutlets in the fridge for 10 minutes before baking to set the coating.
What’s the best way to reheat leftover schnitzel?
Reheat in a 350°F oven for 5-7 minutes on a wire rack to restore crispiness. Avoid microwaving—it makes the breading rubbery. For extra crunch, broil for 1-2 minutes after reheating, watching closely to prevent burning.
Can I use gluten-free breadcrumbs?
Yes! Try crushed cornflakes or gluten-free panko for a crispy alternative. The texture will be slightly different but still delicious. Just press the crumbs firmly onto the cutlets to ensure adhesion. For extra binding, add 1/2 tsp xanthan gum to the flour mixture.
How do I keep the cutlets from sticking to the baking sheet?
Line your sheet with parchment paper or use a silicone baking mat. For extra insurance, brush the breaded cutlets with extra-virgin olive oil before baking. This creates a barrier between the meat and the pan, making cleanup effortless.

- Mary Berry’s Boiled Fruit Cake Recipe: Moist Center and Spiced Crust Magic - November 5, 2026
- Atlantic Salmon Recipe: Honey-Dill Pan-Seared With Crispy Skin - November 5, 2026
- Blaze Pizza Copycat Dough Recipe: Chewy, Airy Crust That Mimics the Original - November 5, 2026