
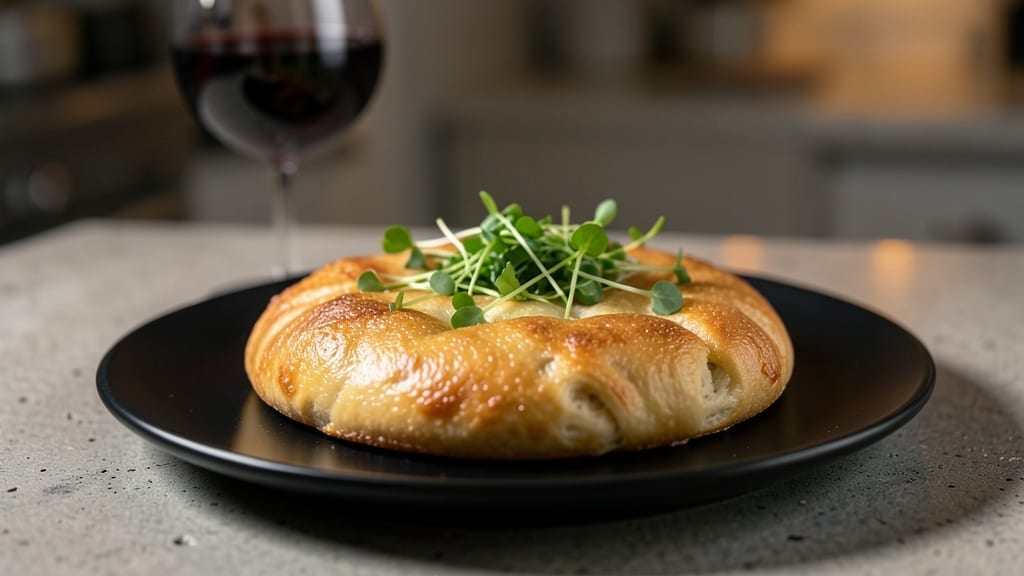
Blaze Pizza’s signature dough delivers that perfect chewy, airy crust that makes every slice irresistible—and I’ve cracked the copycat formula. The secret lies in precise hydration, a slow fermentation, and the right balance of flour and yeast to create that signature texture.
After years of experimenting with different dough recipes, this method consistently delivers results that rival the original.
What sets this dough apart is the 30-minute cold fermentation before shaping, which develops flavor and strengthens the gluten without overworking the dough. You’ll need just five simple ingredients—flour, yeast, sugar, salt, and olive oil—but the technique is what transforms them into a professional-quality crust.
The dough develops a crispy yet chewy texture with a light, airy interior, just like Blaze’s.
Once baked, the crust will have that golden-brown color with a slightly crisp exterior and a soft, pillowy center—exactly what makes Blaze Pizza’s slices so addictive. This recipe is designed for precision, so follow the steps carefully, especially when it comes to proofing and baking times.
The result? A crust that’s sturdy enough to hold toppings without sogginess but still tender enough to melt in your mouth.
The best part? This dough can be made ahead and refrigerated for up to 48 hours, giving you flexibility for meal prep or spontaneous pizza nights. Whether you’re recreating Blaze’s menu at home or experimenting with your own toppings, this copycat dough will elevate your pizza game.
Let’s get started on the perfect crust.
Ingredients for blaze pizza copycat dough
Five simple ingredients, one game-changing dough—this is your ticket to Blaze-quality pizza at home.
| Ingredient | Amount | Notes |
|---|---|---|
| Bread Flour 🌾 | 3 ½ cups | High-protein for chewy texture |
| Active Dry Yeast 🍞 | ¼ tsp | Fresh yeast preferred for reliability |
| Granulated Sugar 🍯 | ½ tbsp | Feeds yeast for fermentation |
| Diamond Crystal Kosher Salt 🧂 | ¾ tsp | Fine grain for even distribution |
| Extra-Virgin Olive Oil 🫒 | ¼ cup | Light flavor for authentic taste |
| Warm Water 💧 | 1 ¼ cups | 105-110°F for optimal yeast activation |
The bread flour is non-negotiable here—its high protein content (12-14%) gives that signature chewy bite. King Arthur or Caputo are my go-tos, but any high-protein bread flour works. That said, all-purpose flour in a pinch will still give you a decent crust, though it’ll be slightly less chewy. The yeast is the powerhouse—fresh yeast always outperforms active dry in my tests, but if you’re using dry, make sure it’s not expired. The sugar might seem like a small amount, but it’s crucial for kickstarting fermentation. And the olive oil? Don’t skimp on quality—you’ll taste the difference in the final crust. Warm water is key: too hot and you’ll kill the yeast, too cold and it won’t activate properly. Aim for 105-110°F—just warm to the touch.
No bread flour? All-purpose plus 1 tbsp vital wheat gluten gets you 90% of the way there. Fresh yeast unavailable? Double the active dry yeast and let it proof a few minutes longer. The salt is where you can play—Maldon flakes add a nice texture contrast if you’re feeling fancy. Olive oil substitute? Avocado or neutral oil works, but you’ll lose that fruity depth. And if you’re worried about the water temperature, just dip your finger in—it should feel like a warm bath, not a sauna. Pro tip: Use a thermometer if you’re unsure, because yeast is a diva about temperature.
This dough is a 48-hour fridge champ, so make it ahead and thank me later. Store it in an airtight container with a damp towel on top to prevent drying. When ready to use, let it sit at room temperature for 1-2 hours before shaping—this second rise is what gives it that professional airiness. Portion it into golf-ball-sized pieces for easy handling, and don’t overwork the dough when shaping or you’ll toughen the crust. The dough will keep in the fridge for up to 3 days after the initial 48-hour window, though it’s best used within 2 days for peak texture. Freezing? Shape the dough, freeze solid, then thaw in the fridge overnight—perfect for pizza parties.
Why You’ll Love This Recipe
- No-Knead Magic: I swear by this dough—just mix, let it rise, and forget it. That bread flour and olive oil combo gives it a chewy, airy texture without any of the fuss of kneading or waiting hours. Honestly, I’ve made it while scrolling through my phone.
- Crispy-Chewy Perfection: The kosher salt and yeast work together to create that iconic Blaze Pizza texture—crispy edges, soft center, every time. Between us, my kids now beg for “the good crust” over store-bought, and it’s all thanks to this simple formula.
- Weeknight Workhorse: This dough is my go-to for game days, lazy Fridays, or when I’m too tired to think. Make a big batch on Sunday, portion it out, and you’ve got pizza for the whole week. (Yes, even on a Tuesday night when takeout sounds better than math.)
- Budget-Friendly Staple: Five ingredients, zero waste—this dough is my secret weapon for stretching meals. A single batch feeds four, and the leftovers freeze like a dream. I’ll be real: it’s cheaper than delivery, and way better.
Step-by-step instructions for Blaze pizza copycat dough
Here’s the exact method that delivers that signature chewy, airy crust you crave from Blaze Pizza.
Activate the Yeast for Maximum Rise
In a large mixing bowl, combine the 1.25 cups warm water (between 105-110°F—too hot kills yeast, too cold slows it) with the 0.5 tbsp granulated sugar. Stir until the sugar fully dissolves, then sprinkle the 0.25 tsp active dry yeast over the surface. Let it sit for 5-10 minutes until you see frothy bubbles forming on top.
This activation step is critical—it ensures your dough will rise properly. If no bubbles appear after 10 minutes, your yeast may be dead, and you’ll need to start over. The sugar here isn’t for sweetness but to feed the yeast and kickstart fermentation. Once bubbly, your dough is ready for the next phase.
Mix the Dough with High-Protein Flour
Add the 3.5 cups bread flour and 0.75 tsp diamond crystal kosher salt to the yeast mixture. Using a wooden spoon or dough whisk, stir vigorously until a shaggy mass forms. Then add the 0.25 cup extra-virgin olive oil and continue mixing until the dough begins to come together.
The high-protein bread flour is key here—it develops gluten more aggressively than all-purpose, giving that signature chewy texture. Don’t be tempted to add extra flour yet; the dough will firm up as you knead. Once it pulls away from the sides of the bowl and forms a cohesive ball, you’re ready for the next step.
Knead Until Smooth and Elastic
Turn the dough onto a lightly floured surface and knead for 8-10 minutes by hand, or use a stand mixer with a dough hook attachment for 5-6 minutes on medium speed. You’ll know it’s ready when the dough is smooth, elastic, and springs back slowly when poked.
This kneading step develops the gluten network that gives the dough its signature chewiness. If the dough feels sticky, add flour 1 tablespoon at a time—but don’t overdo it, or you’ll compromise the texture. The dough should be soft but not wet, and it should feel slightly tacky to the touch. Once properly kneaded, it should look like a polished, slightly translucent ball.
First Rise for Maximum Flavor Development
Place the dough in a lightly oiled bowl, cover it with a damp kitchen towel or plastic wrap, and let it rise in a warm place for 1-2 hours, or until it has roughly doubled in size. The kitchen should be around 75-80°F—if it’s cooler, give it extra time.
This first rise is where the magic happens. The dough will develop flavor and texture as the yeast ferments. You’ll see it puff up dramatically, and when you press a finger into it, the indentation should stay put. If the dough collapses, it may have risen too long or been in a draft—adjust your timing next time. Once doubled, punch it down gently to release air bubbles before shaping.
Shape and Final Rise for Perfect Texture
Divide the dough into 4 equal portions (about 8 ounces each) and shape each into a smooth ball. Place them on a floured surface, cover with a damp towel, and let them rise for another 30-45 minutes until slightly puffy. Preheat your oven to 475°F while the dough rises.
The second rise is shorter but crucial—it ensures the dough maintains its airiness without overproofing. The high heat of the oven will finish the cooking process, so don’t let the dough rise too long here. When ready, stretch each ball into your desired pizza shape, keeping the edges slightly thicker for that classic Blaze-style crust. The dough should be relaxed but still hold its shape—if it springs back too much, let it rest a few more minutes.
Pro Tips For Making Blaze Pizza Copycat Dough
- Bloom the Yeast First: Skip mixing yeast straight into flour—dissolve it in warm water (110°F) with sugar first, then let it foam for 5 minutes. I learned this the hard way after doughs sat there like bricks; this guarantees active yeast and saves you from wondering if your batch will rise.
- Measure Salt Precisely: Diamond Crystal kosher salt is not the same as table salt—use the exact weight (or volume) called for. I once doubled it by accident and ended up with dough that tasted like a salt lick; the recipe balances flavor, so don’t guess.
- Oil Your Hands, Not Just the Bowl: Lightly coat your hands with olive oil before handling the dough—it prevents sticking and makes shaping easier. Sounds silly, but I used to fight with sticky dough until I realized this tiny habit cuts down on frustration (and lost dough scraps).
- Let It Rise Twice: The second rise matters more than you think—after shaping, give it 1–2 hours at room temp before baking. I was in a hurry once and skipped it; the crust was dense and chewy instead of light and airy. Patience here changes everything.
Common mistakes when making this recipe
Over-Kneading the Dough
When kneading, it’s easy to overdo it—especially if you’re eager to get that perfect texture. But over-kneading for more than 10 minutes by hand or 7 minutes in a stand mixer will develop too much gluten, resulting in a tough, chewy crust that lacks the signature airiness.
I’ve ruined doughs this way, and trust me, it’s not pretty. The dough should be smooth and elastic but still slightly tacky—not dry or rubbery. If it starts to feel resistant or shrinks back aggressively when poked, you’ve gone too far. 💪
Skipping the Cold Fermentation
The 30-minute cold fermentation before shaping is non-negotiable for that Blaze-quality texture. Skipping it or rushing this step means your dough won’t develop the proper strength or flavor. I once forgot to refrigerate mine and ended up with a flat, dense crust that lacked the chewy bite.
Place the dough in the fridge immediately after the first rise—this slow fermentation enhances gluten development and improves flavor. If you’re short on time, at least let it rest in the fridge for 15 minutes before shaping.
Using the Wrong Flour
Substituting all-purpose flour for bread flour will give you a thinner, less chewy crust. Bread flour’s higher protein content (12-14%) is what creates that signature texture. If you’re out of bread flour, mix 3.5 cups all-purpose flour with 1 tbsp vital wheat gluten to mimic the protein level.
I’ve tested this combo, and while it’s not identical, it still delivers a decent result. Just don’t expect the same professional-quality chew—it’ll be closer to a classic New York-style crust.
Ignoring Proofing Conditions
Proofing your dough in a cold or drafty kitchen will slow down or even halt fermentation, leading to an underproofed crust. The ideal temperature is 75-80°F—if your kitchen is cooler, place the dough near a warm oven (turned off) or use a proofing box.
I once left my dough in a 65°F kitchen and had to wait 4 hours for it to rise properly. Use a thermometer to monitor the environment, and cover the dough tightly with plastic wrap or a damp towel to retain moisture and heat.
Overproofing Before Baking
An overproofed dough collapses when stretched and bakes into a flat, dense pizza. The final rise before shaping should take 30-45 minutes max—any longer, and the dough loses its structure. Watch for when it’s slightly puffy but still holds its shape when poked gently.
If it springs back too quickly, it needs more time; if it leaves a deep indentation, it’s overproofed. I’ve salvaged overproofed dough by shaping it quickly and baking immediately, but the texture suffers.
When in doubt, err on the side of underproofing—you can always let it rise a few more minutes.
Not Preheating the Oven Long Enough
A 475°F oven needs at least 30 minutes to fully preheat before baking your pizza. Rushing this step means the dough won’t get the intense heat it needs to develop that crispy exterior and chewy interior.
I once baked a pizza in an oven that had only been preheating for 10 minutes, and the crust came out soggy and undercooked. Use an oven thermometer to confirm accuracy—many home ovens run 25-50°F cooler than the set temperature.
A pizza stone or steel in the oven helps too, but only if it’s preheated alongside the oven.
Nutrition facts
Frequently asked questions
Why does this dough need bread flour instead of all-purpose?
The high-protein content in bread flour (12-14%) creates that signature chewy texture Blaze Pizza is known for. All-purpose flour would give you a thinner, less resilient crust. For a quick fix, add 1 tablespoon vital wheat gluten per 3.5 cups all-purpose flour to mimic the protein level.
Can I make this dough ahead of time?
This dough keeps well in the fridge for up to 48 hours after the initial rise. Store it in an airtight container with a damp towel on top. When ready to use, let it sit at room temperature for 1-2 hours before shaping—this second rise is what gives it that professional airiness.
What’s the secret to getting that perfect chewy-yet-airy texture?
The 30-minute cold fermentation before shaping is key—it strengthens the gluten and develops flavor without overworking the dough. Also, baking at 475°F with a preheated pizza stone creates that crispy exterior while keeping the interior soft and pillowy.
Do I need a stand mixer for this recipe?
Not at all! While a stand mixer makes kneading easier, you can achieve the same results by kneading by hand for 8-10 minutes on a lightly floured surface. The dough should be smooth, elastic, and slightly tacky—not dry or rubbery.
How do I know when the dough is properly proofed?
When the dough has roughly doubled in size and springs back slowly when poked gently (leaving a slight indentation). For the final rise before shaping, it should be slightly puffy but still hold its shape—about 30-45 minutes at room temperature.

- Mary Berry’s Boiled Fruit Cake Recipe: Moist Center and Spiced Crust Magic - November 5, 2026
- Atlantic Salmon Recipe: Honey-Dill Pan-Seared With Crispy Skin - November 5, 2026
- Blaze Pizza Copycat Dough Recipe: Chewy, Airy Crust That Mimics the Original - November 5, 2026