
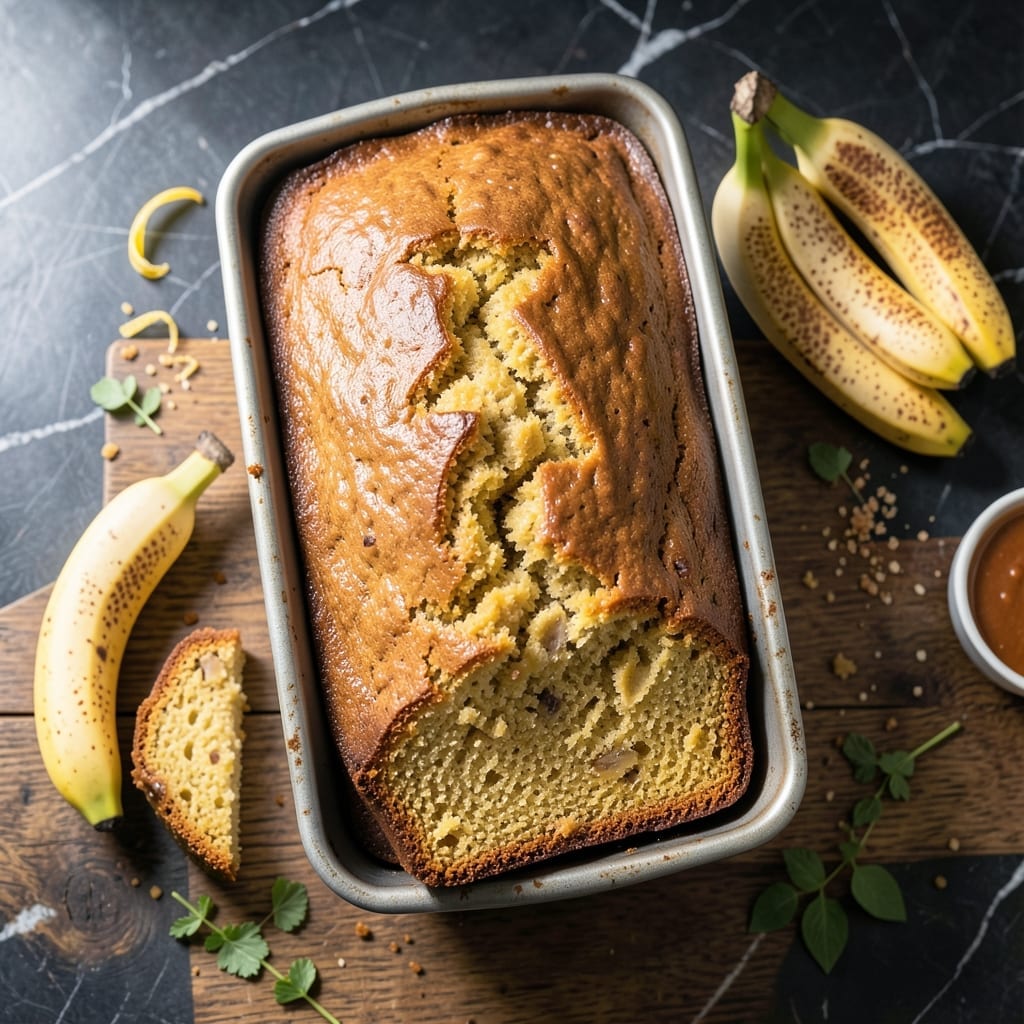
This recipe proves that moist, tender banana bread doesn’t require complicated techniques or special ingredients.
Using self-rising flour simplifies the process while delivering a perfect crumb every time, with minimal effort and maximum flavor.
Ingredients for Banana Bread Recipe with Self Rising Flour
Self-rising flour and ripe bananas create this effortlessly moist, tender loaf with minimal prep.
| Ingredient | Amount | Notes |
|---|---|---|
| Ripe Bananas 🍌 | 3 whole | Very ripe, heavily speckled |
| Self-Rising Flour 🌾 | 2 cups | Do not substitute all-purpose |
| Granulated Sugar 🍚 | ¾ cup | Fine white or raw cane |
| Light Brown Sugar 🟤 | ½ cup | Packed firmly into cup |
| Large Eggs 🥚 | 2 whole | Room temperature preferred |
| Vegetable Oil 🫒 | ½ cup | Neutral flavor, canola or sunflower |
| Pure Vanilla Extract 🌿 | 2 tsp | Real extract, not imitation |
| Ground Cinnamon 🌶️ | 1 tsp | Freshly opened for best aroma |
| Baking Soda 🧂 | ½ tsp | Ensures proper rise |
| Salt 🧂 | ½ tsp | Fine table or kosher salt |
| Chopped Walnuts 🌰 | ½ cup | Optional, lightly toasted |
| Unsalted Butter 🧈 | 2 tbsp | For greasing pan |
The bananas are critical—look for ones with black-speckled peels (the starches have fully converted to sugars). Self-rising flour is non-negotiable here; its built-in leavening and salt deliver the promised perfect crumb. King Arthur and White Lily are reliable brands for consistent results. For the oil, any neutral variety works, but avoid strongly flavored options like coconut unless you want that taste.
No self-rising flour? Make your own with 2 cups all-purpose flour plus 1 tbsp baking powder and 1 tsp salt. Brown sugar can be swapped for all granulated (add 1 tbsp molasses per 1/2 cup). Applesauce replaces oil 1:1 for lower fat. Skip the nuts if preferred, or swap for pecans or chocolate chips. Vanilla is worth using the real stuff—Nielsen-Massey is excellent.
Store cooled loaf wrapped in plastic at room temperature for 2-3 days, or refrigerate for 1 week. Freezes beautifully for 3 months. Slice before freezing for easy single servings (thaw at room temp 1-2 hours).
Why You’ll Love This Recipe
- One Bowl Magic: No sifting, no extra dishes—just dump, mix, and bake with that self-rising flour doing all the heavy lifting.
- Sweet Double Play: The combo of granulated and light brown sugar gives it that caramelized depth with every bite. Honestly, it’s the reason I keep overbuying bananas.
- Breakfast or Dessert: Slice it thick for morning toast or warm it up with ice cream after dinner. Between us, I’ve done both in the same day.
- Zero Waste Win: Those spotty bananas on the counter? This recipe turns them into something better than the original. I’ll be real: it’s my sneaky way to use up fruit before it’s compost.
Step-by-Step Instructions for Banana Bread With Self Rising Flour
This method ensures a tender, moist loaf with minimal effort and maximum flavor.
Step 1: Prepare the Pan and Preheat Oven
Grease a standard 9×5-inch loaf pan thoroughly with the 2 tbsp unsalted butter, ensuring all surfaces are coated. I use a paper towel to spread it evenly into every corner. This prevents sticking and creates a golden crust.
Preheat your oven to 350°F. The consistent heat of a fully preheated oven is crucial for even baking. While waiting, gather all your ingredients—this recipe comes together quickly once you start mixing.
Step 2: Mash Bananas and Combine Wet Ingredients
In a large bowl, mash the 3 whole ripe bananas with a fork until mostly smooth with a few small lumps remaining. The bananas should be heavily speckled for maximum sweetness and moisture.
Whisk in the 0.75 cup granulated sugar, 0.5 cup light brown sugar, 2 whole large eggs, 0.5 cup vegetable oil, and 2 tsp pure vanilla extract. Mix until fully combined and the sugars begin to dissolve. The oil creates a tender crumb, while the sugars ensure a moist texture.
Step 3: Incorporate Dry Ingredients and Walnuts
Sift the 2 cups self-rising flour directly into the wet mixture. Add the 1 tsp ground cinnamon, 0.5 tsp baking soda, and 0.5 tsp salt. Using a silicone spatula, fold everything together just until the flour disappears—overmixing develops gluten and makes the bread dense.
Gently fold in the 0.5 cup chopped walnuts (if using) until evenly distributed. The batter will be thick and slightly lumpy. This is normal; the self-rising flour eliminates the need for precise leavening measurements.
Step 4: Bake to Perfection
Pour the batter into your prepared loaf pan, smoothing the top with the spatula. Bake on the center rack for 50-60 minutes, or until a toothpick inserted into the center comes out clean with only a few moist crumbs attached.
Check for doneness at the 50-minute mark—ovens vary, and the bread continues cooking slightly after removal. If the top browns too quickly, tent loosely with aluminum foil. The finished loaf should have a deep golden crust with a slight domed center.
Step 5: Cool and Serve
Let the banana bread cool in the pan for 10 minutes, then transfer it to a wire rack to cool completely. This resting period allows the structure to set; slicing too soon results in a gummy texture.
Once cooled, slice with a serrated knife for clean cuts. The bread will keep at room temperature, wrapped in plastic, for up to 3 days, though it’s best enjoyed fresh. The self-rising flour ensures a consistent, moist crumb throughout the entire loaf.
Pro Tips For Making Banana Bread Recipe With Self Rising Flour
- Mash Bananas Thoroughly: I learned this the hard way—lumpy bananas mean uneven texture. Use a fork to mash them into a smooth, almost liquid consistency before mixing.
- Skip Extra Leavening: Self-rising flour already has baking powder, so adding more will make your bread rise too fast and then collapse. Just stick to the flour.
- Check at 50 Minutes: Oven temps vary, and overbaking dries it out. Start testing with a toothpick at 50 minutes—moist crumbs are fine, wet batter means more time.
- Use Room-Temp Eggs: Cold eggs can make the batter clump. Pull them out 30 minutes before mixing, or soak in warm water for 10—sounds fussy, but it actually changes the outcome.
Pro Cooking Tips for Great banana bread recipe with self rising flour
Banana Ripeness Matters
For the best flavor and moisture, use bananas with black-speckled peels. The starches have fully converted to sugars, giving your bread natural sweetness and a tender crumb. I always keep overripe bananas in my freezer for baking emergencies. 🍌
Mixing Technique
When combining wet and dry ingredients, use a silicone spatula and fold just until the flour disappears. Overmixing develops gluten, which can make your bread dense. The batter should be thick and slightly lumpy—that’s perfect.
Let the batter rest for 5-10 minutes before baking to allow the flour to hydrate fully. This small step ensures a more even texture throughout the loaf.
Oven Placement
Bake your loaf on the center rack of your preheated 350°F oven. This ensures even heat distribution. If your oven has hot spots, rotate the pan halfway through baking for consistent browning.
Doneness Test
Check for doneness at the 50-minute mark by inserting a toothpick into the center. It should come out clean with only a few moist crumbs. If the top browns too quickly, tent loosely with aluminum foil. 💡
Cooling Properly
Let the bread cool in the pan for 10 minutes, then transfer to a wire rack. This prevents the bottom from becoming soggy. Slicing too soon results in a gummy texture, so resist the urge to dive in immediately.
Frequently Asked Questions
Can I use regular flour instead of self-rising?
Yes, but you’ll need to add 1 tbsp baking powder and 1 tsp salt per 2 cups of all-purpose flour to replicate self-rising.
Why does my bread come out dense?
Overmixing develops gluten, which makes the crumb tough. Fold ingredients just until combined, and ensure bananas are very ripe for moisture.
How do I know when it’s done baking?
Insert a toothpick into the center—it should come out clean or with a few moist crumbs. Bake for 50-60 minutes at 350°F.
Can I add chocolate chips or other mix-ins?
Fold in 1 cup of chocolate chips, nuts, or dried fruit after combining wet and dry ingredients.
Nutrition Facts

- BBQ Sausage Recipe Oven: Smoky Depth Without the Grill - September 28, 2026
- BBQ Chicken Bowl Recipe Rice: Smoky Sweetness Over Fluffy Grains - September 28, 2026
- Beef Cutlet Recipe Ideas: Crispy Breaded Patties With Bold Seasonings - September 28, 2026