
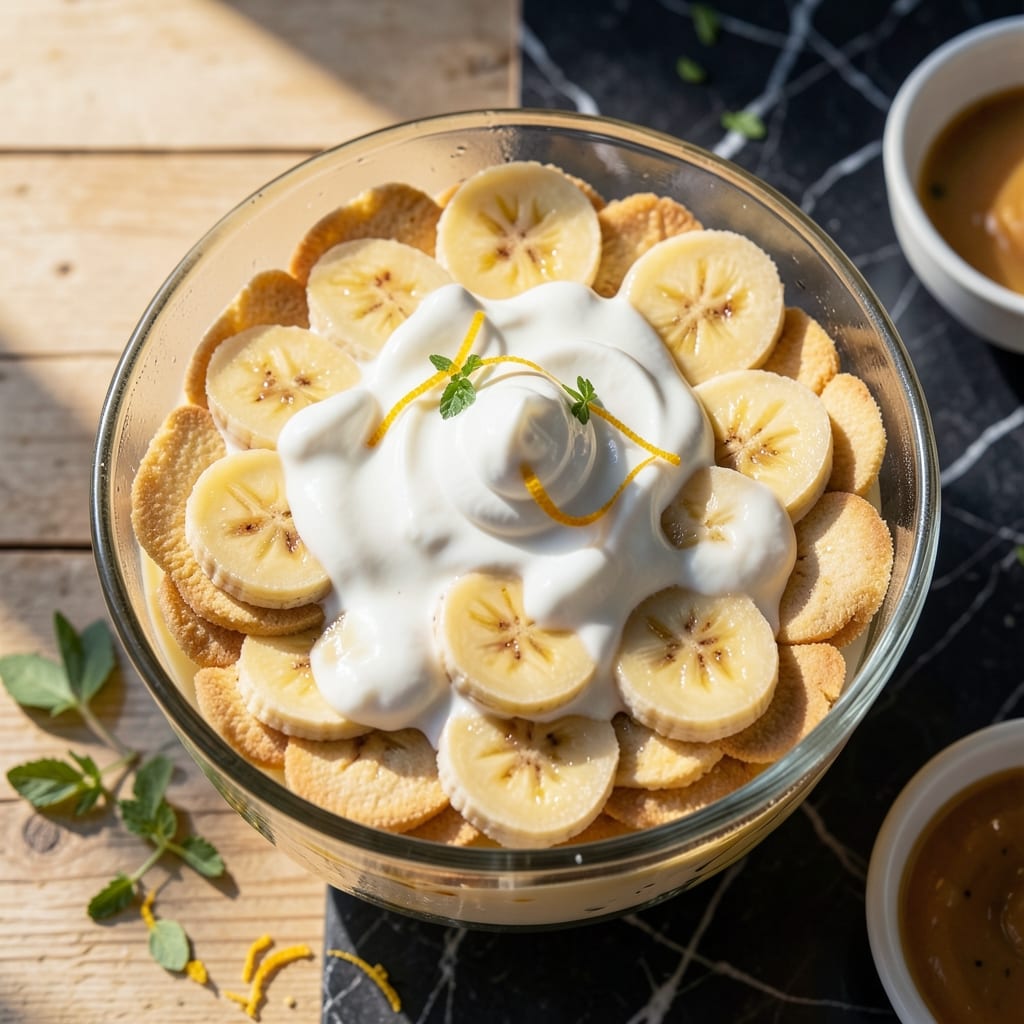
This banana pudding recipe transforms a classic into something extraordinary with the addition of sour cream. The result is a dessert with velvety layers of custard that’s both rich and tangy.
I developed this version after realizing that sour cream adds depth and balances the sweetness of the bananas and vanilla wafers. Each bite delivers a perfect harmony of textures and flavors.
The process is straightforward: layer vanilla wafers, fresh bananas, and custard, then let it chill. The sour cream ensures the custard stays creamy and doesn’t separate.
Serve it at gatherings or enjoy it as a special treat. This pudding is always a crowd-pleaser.
Ingredients for Banana Pudding Recipe with Sour Cream
Classic ingredients plus sour cream for that signature tangy creaminess everyone loves.
| Ingredient | Amount | Notes |
|---|---|---|
| Vanilla Wafers 🍪 | 12 oz | About 48 wafers total |
| Ripe Bananas 🍌 | 4 whole | Sliced into rounds |
| Granulated Sugar 🍚 | 1 ½ cups | Divided for custard and layers |
| All-Purpose Flour 🌾 | ½ cup | For thickening custard |
| Salt 🧂 | ¼ tsp | Balances sweetness |
| Whole Milk 🥛 | 3 cups | Full-fat for creaminess |
| Large Eggs 🥚 | 4 whole | For custard base |
| Pure Vanilla Extract 🌿 | 2 tsp | For custard flavor |
| Sour Cream 🥣 | 1 cup | Full-fat for tanginess |
| Unsalted Butter 🧈 | 2 tbsp | For custard richness |
The vanilla wafers are key here. Nilla Wafers are the gold standard (found in any grocery store baking aisle), but generic brands work in a pinch. For bananas, pick ones that are ripe but firm—too soft and they’ll turn to mush. The milk needs to be whole for that velvety texture; skim won’t cut it. I grab mine from Whole Foods or whatever’s on sale at the regular supermarket.
No sour cream? Full-fat Greek yogurt gets you close but loses some tang. For a lower-cal twist, half-and-half plus a splash of lemon juice works (though the texture won’t be quite as thick). If you’re out of vanilla wafers, shortbread cookies or graham crackers add a fun twist. The custard can handle it—just keep the layers even.
This tastes best after 24 hours in the fridge (the wafers soften perfectly). Leftovers keep for 3-4 days, but honestly, it never lasts that long. For a crowd, double the batch—uses 2 quarts of milk and fits in a 9×13 dish.
Why You’ll Love This Recipe
- No-Bake Simplicity: I love that I can layer the Vanilla Wafers and bananas while the pudding sets itself—no oven required.
- Creamy Tangy Magic: The sour cream adds this subtle tang that balances the sweetness of the ripe bananas perfectly.
- Crowd-Pleaser Ready: Honestly, I’ve served this at potlucks and family dinners, and the pan always comes back empty.
- Budget-Friendly Feast: Between us, a bunch of ripe bananas and a box of Vanilla Wafers stretch further than you’d think.
Step-by-Step Instructions for Banana Pudding With Sour Cream
Here’s the method I use for layers of creamy custard and fresh banana flavor.
Step 1: Prepare the Custard Base
In a medium saucepan, whisk together 1.5 cups Granulated Sugar, 0.5 cup All-Purpose Flour, and 0.25 tsp Salt until no lumps remain. This dry mix prevents clumping when you add the wet ingredients.
Gradually whisk in 3 cups Whole Milk until smooth. The mixture should look like thin pancake batter. Place the saucepan over medium heat and cook, stirring constantly, until it begins to thicken—this takes about 5-7 minutes.
You’ll know it’s ready when the mixture coats the back of a spoon and leaves a clear path when you run your finger through it. Don’t let it boil, or the custard will curdle.
Step 2: Temper and Cook the Eggs
In a separate bowl, whisk the 4 whole Large Eggs until smooth. Slowly pour about 1 cup of the hot milk mixture into the eggs while whisking constantly—this tempers them so they don’t scramble when added to the hot custard.
Pour the tempered eggs back into the saucepan with the remaining milk mixture. Add 2 tbsp Unsalted Butter and 2 tsp Pure Vanilla Extract. Return to medium heat and cook for another 3-5 minutes, stirring constantly, until the custard thickens enough to mound slightly when dropped from a spoon.
Remove from heat and let it cool for 5 minutes, stirring occasionally to release steam. Then stir in 1 cup Sour Cream until fully incorporated. The sour cream adds a subtle tang that balances the sweetness perfectly.
Step 3: Layer the Pudding
Start with a layer of 12 oz Vanilla Wafers at the bottom of a 9×13-inch baking dish. I arrange them in a single layer, slightly overlapping, to create a sturdy base.
Slice the 4 whole Ripe Bananas into ¼-inch rounds and layer them over the wafers. The bananas should cover most of the surface, but don’t worry about gaps—it adds texture.
Pour half of the custard over the bananas, spreading it evenly with a spatula. Repeat with another layer of vanilla wafers, banana slices, and the remaining custard. The top layer should be smooth and even.
Step 4: Chill and Serve
Cover the dish with plastic wrap, pressing it directly onto the surface of the pudding to prevent a skin from forming. Refrigerate for at least 4 hours, but overnight is even better—the flavors meld and the wafers soften into the perfect texture.
When ready to serve, give it a good stir to redistribute the layers. The vanilla wafers will have absorbed some of the custard, creating a creamy, almost cake-like consistency. Serve chilled in bowls or directly from the dish.
Each bite should deliver the creamy custard, soft bananas, and a hint of vanilla wafer crunch. If you prefer a firmer texture, you can add a final layer of crushed vanilla wafers on top just before serving.
Pro Tips For Making Banana Pudding Recipe With Sour Cream
- Chill Before Serving: I learned this the hard way—letting the pudding sit in the fridge for at least 3 hours (4 is better) lets the Vanilla Wafers soften just right without turning to mush.
- Use Spotty Bananas: The riper the better—those brown-spotted bananas add way more sweetness and creaminess to the layers than firm, greenish ones.
- Skip Thin Layers: After a few soggy batches, I finally figured out that stacking 2-3 Vanilla Wafers per layer keeps them from disappearing into the pudding entirely.
- Fold Sour Cream Last: Mix the sour cream in at the very end, after the pudding base cools slightly—this keeps it from curdling or separating in the heat.
Serving Suggestions for This Recipe
Elegant Glassware
I love serving this pudding in clear glass dessert bowls so you can see the beautiful layers. Individual 8-ounce mason jars work perfectly for picnics or potlucks. The transparent presentation highlights the vanilla wafers and banana slices beautifully. ✨
Garnish Ideas
Top each serving with a dollop of whipped cream and a sprinkle of crushed vanilla wafers for extra crunch. Fresh banana slices or a few mint leaves add a pop of color and freshness.
Temperature Note
This pudding is best served well-chilled—straight from the fridge. If you’re serving a crowd, keep the dish on ice or in a cooler until ready to serve. The custard holds its shape better when cold.
Portion Control
For a dinner party, use small 4-ounce ramekins for perfect single servings. This size allows guests to enjoy the dessert without feeling overwhelmed. I always get compliments on the presentation.
Make It Festive
Drizzle with caramel sauce or chocolate syrup for special occasions. A dusting of cinnamon adds warmth and complements the banana flavor perfectly. 💛
Family-Style Service
For casual gatherings, serve directly from the 9×13-inch dish with a large serving spoon. The layers stay intact if you scoop gently from the center outward.
Nutrition Facts
Frequently Asked Questions
Can I use Greek yogurt instead of sour cream?
Yes, full-fat Greek yogurt works as a substitute, though the tang might be slightly stronger. Use the same 1 cup measurement for best results.
How long does this pudding need to chill?
For optimal texture, refrigerate for at least 4 hours, but overnight is ideal. This allows the vanilla wafers to soften perfectly.
Why did my custard turn out lumpy?
Lumps usually mean the eggs weren’t tempered properly. Always whisk hot milk into eggs slowly over medium heat.
Can I make this ahead for a party?
It tastes best after 24 hours in the fridge. Leftovers keep well for 3-4 days.

- Pina Colada Dip Recipe Red Lobster: Tropical Creaminess With Toasted Coconut - October 12, 2026
- Pickled Sweet Cherry Peppers Recipe Canning: Tangy Heat for Pantry Staples - October 12, 2026
- Peppercorn Sauce Recipe Vegan: Rich Umami Depth Without Cream - October 12, 2026