
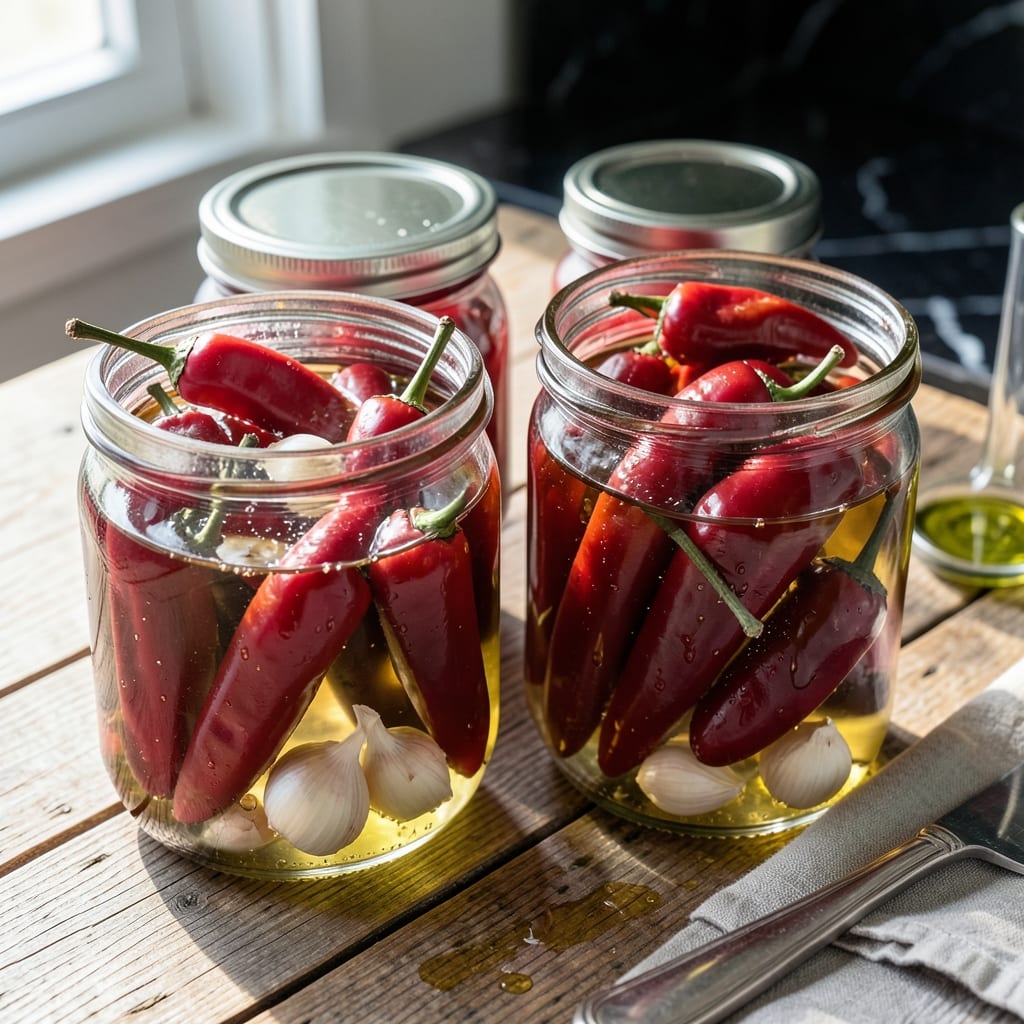
There’s a special satisfaction in preserving the vibrant flavor of sweet cherry peppers through pickling. This method transforms their natural sweetness with a tangy, slightly spicy brine that enhances any dish.
The process is straightforward yet rewarding, combining vinegar, water, and spices to create a flavor-packed condiment. Proper canning ensures these peppers stay fresh and ready to use for months.
You’ll end up with jars of bright, zesty peppers that add a punch to sandwiches, salads, or charcuterie boards. Their balanced heat and sweetness make them a versatile pantry staple.
Perfect for gifting or keeping on hand to elevate everyday meals. Here’s how to make them.
Ingredients for Pickled Sweet Cherry Peppers Recipe Canning
Bright, zesty, and packed with tangy heat, these pantry staples start with fresh cherry peppers and a few key brine ingredients.
| Ingredient | Amount | Notes |
|---|---|---|
| Sweet Cherry Peppers 🌶️ | 2 lb | Fresh, whole with stems |
| White Vinegar 💧 | 3 cups | 5% acidity minimum |
| Water 💧 | 3 cups | Filtered or distilled preferred |
| Pickling Salt 🧂 | 2 tbsp | Non-iodized, fine grain |
| Granulated Sugar 🍚 | 3 tbsp | Adjust to taste preference |
| Garlic Cloves 🧄 | 8 cloves | Peeled, smashed slightly |
| Black Peppercorns 🌶️ | 1 tbsp | Whole, not ground |
| Mustard Seeds 🌿 | 1 tsp | Yellow or brown variety |
| Red Pepper Flakes 🔥 | 1 tsp | Adjust for heat level |
| Fresh Dill 🌿 | 4 sprigs | Optional for aromatic depth |
The peppers are everything here. Farmers markets often have the sweetest, most vibrant ones in late summer, but well-stocked Whole Foods or Trader Joe’s carry them too. Look for firm, glossy skins without blemishes. The vinegar must be at least 5% acidity—this isn’t negotiable for safe canning. I prefer Heinz white vinegar for its clean, sharp flavor, but any reputable brand works as long as it meets the acidity requirement.
No pickling salt? Kosher salt without additives works in a pinch, but avoid iodized table salt—it can make the brine cloudy. Short on garlic? Garlic powder at one-third the amount added to the brine is an acceptable substitute. For heat adjustments, start conservative with the red pepper flakes—you can always add more next batch. The dill is optional but highly recommended (fresh from the garden is ideal, but store-bought works fine).
Properly canned, these keep at room temperature for up to 12-18 months. Once opened, refrigerate and use within 1 month. Always check jars for proper seals before storage—if the lid pops when pressed, it didn’t seal correctly and should be refrigerated immediately.
Why You’ll Love This Recipe
- Minimal Effort: I just stuff peppers in jars, pour the vinegar brine, and let time do the rest.
- Sweet Heat: The sugar balances the vinegar’s tang, making every bite pop with bright, pickled flavor.
- Pantry Staple: Honestly, I toss these on sandwiches, charcuterie boards, or straight from the jar for a quick snack.
- Budget Friendly: A pound of cherry peppers costs pennies and turns into multiple jars that last for months.
Step-by-Step Instructions for Pickled Sweet Cherry Peppers
Follow this precise canning method to preserve vibrant flavor and perfect crunch in every pepper.
Step 1: Prepare the Peppers and Jars
Begin by washing the 2 lb Sweet Cherry Peppers thoroughly and leaving the stems intact. I use a small knife to make a tiny slit in each pepper—this allows the brine to penetrate fully while keeping them whole. Sterilize four pint-sized canning jars by boiling them for 10 minutes, then keep them hot until ready to use.
This preparation step is crucial for both food safety and flavor absorption. The slit ensures the brine reaches the interior, while hot jars prevent thermal shock when filled with boiling liquid. Keep the jars warm in the pot of hot water until you’re ready to fill them.
Step 2: Create the Pickling Brine
In a large pot, combine the 3 cups White Vinegar, 3 cups Water, 2 tbsp Pickling Salt, and 3 tbsp Granulated Sugar. Bring to a full rolling boil over high heat, stirring until the salt and sugar dissolve completely. The mixture should be clear with no visible grains.
While the brine heats, divide the 8 cloves Garlic Cloves, 1 tbsp Black Peppercorns, 1 tsp Mustard Seeds, 1 tsp Red Pepper Flakes, and 4 sprigs Fresh Dill evenly among the prepared jars. These aromatics will infuse the peppers with complex, balanced flavor during the pickling process.
Step 3: Pack Jars and Add Brine
Pack the prepared peppers tightly into the hot jars, leaving ½-inch headspace at the top. The peppers should be snug but not crushed. Carefully ladle the boiling brine over the peppers, ensuring they’re completely submerged and no air bubbles remain. Use a bubble remover or clean knife to release any trapped air.
This step requires precision—the brine must cover the peppers entirely to prevent spoilage. The headspace allows for expansion during processing. If you run short on brine, make more using the same ratio of vinegar, water, salt, and sugar.
Step 4: Process for Shelf-Stable Preservation
Wipe the jar rims clean with a damp cloth, then apply the lids and rings, tightening to fingertip resistance. Process the jars in a boiling water bath for 10 minutes, making sure the water covers the jars by at least 1 inch. Start the timer only after the water returns to a full boil.
After processing, carefully remove the jars and place them on a towel-lined countertop. Let them cool undisturbed for 12-24 hours. You’ll hear the satisfying “ping” of sealing lids as they cool—a sign of proper vacuum sealing. Check the seals after cooling; any unsealed jars should be refrigerated and used within a month.
Step 5: Store and Age for Optimal Flavor
Once cooled and sealed, label the jars with the date and store them in a cool, dark place. For the best flavor development, wait at least 2 weeks before opening. The peppers will gradually absorb the brine’s tangy, spiced character, with the garlic and dill notes becoming more pronounced over time.
The pickles will maintain peak quality for up to 1 year in storage. After opening a jar, refrigerate it and use the contents within 1 month. The texture remains crisp for the full year, though the color may mellow slightly—a natural part of the pickling process.
Pro Tips For Making Pickled Sweet Cherry Peppers Recipe Canning
- Sterilize Jars First: Always boil your jars and lids for 10 minutes before filling—I learned this the hard way after losing a whole batch to mold.
- Slit the Peppers: Make a small vertical cut in each pepper so the brine penetrates fully; sounds tedious but it actually changes the outcome.
- Use Pickling Salt: Skip table salt; the additives in it can cloud your brine and ruin the look of your pickles.
- Boil the Brine: Bring vinegar, water, salt, and sugar to a full boil before pouring over peppers—this guarantees the flavors meld properly.
Creative Variations of pickled sweet cherry peppers recipe canning
Spicy Garlic Variation
Double the red pepper flakes to 2 tsp and add 4 sliced jalapeños to each jar for serious heat lovers. I also toss in 2 extra garlic cloves per jar. The extra kick pairs perfectly with the natural sweetness of the peppers. 🌶️
Sweet and Tangy Twist
Increase the sugar to ½ cup and swap 1 cup of white vinegar for apple cider vinegar for a fruitier profile. Add 1 tsp celery seeds to the brine for depth. This version is amazing with sharp cheddar on burgers.
Herb-Infused Brine
Replace the dill with 4 sprigs fresh thyme and 2 bay leaves per jar. I also add 1 tsp coriander seeds for an earthy note. This sophisticated blend elevates charcuterie boards beautifully.
Quick Fridge Pickles
Skip the canning process entirely for faster results. Pack peppers and aromatics in clean jars, pour cooled brine over them, and refrigerate. They’re ready in 48 hours and keep for 1 month in the fridge.
Mediterranean Style
Add 1 tsp fennel seeds and ½ tsp dried oregano to each jar. I sometimes include thin lemon slices for bright citrus notes. These pair wonderfully with Greek dishes and olives. 💫
Smoky Chipotle Version
Stir 1 tbsp smoked paprika into the hot brine before pouring. The subtle smokiness complements grilled meats and sandwiches. I find this variation particularly addictive with smoked gouda cheese.
Nutrition Facts
Frequently Asked Questions
Can I use apple cider vinegar instead of white?
Yes, but ensure it’s at least 5% acidity. Apple cider vinegar adds a fruitier note that pairs well with the peppers’ sweetness. The flavor will be slightly different but equally delicious.
How long do they need to sit before eating?
For best flavor, wait at least 2 weeks. This allows the peppers to fully absorb the brine and spices. However, you can sample them after 48 hours if you’re impatient!
What if my jars don’t seal properly?
Refrigerate any unsealed jars immediately and use within 1 month. Proper canning requires a vacuum seal for safe, long-term storage. Always check the lid’s pop before storing.
Can I reuse the pickling brine?
Yes, you can reuse the brine once for a new batch, but only if it’s been refrigerated and used within 1 week. Bring it to a boil first to ensure safety.

- Pina Colada Dip Recipe Red Lobster: Tropical Creaminess With Toasted Coconut - October 12, 2026
- Pickled Sweet Cherry Peppers Recipe Canning: Tangy Heat for Pantry Staples - October 12, 2026
- Peppercorn Sauce Recipe Vegan: Rich Umami Depth Without Cream - October 12, 2026