
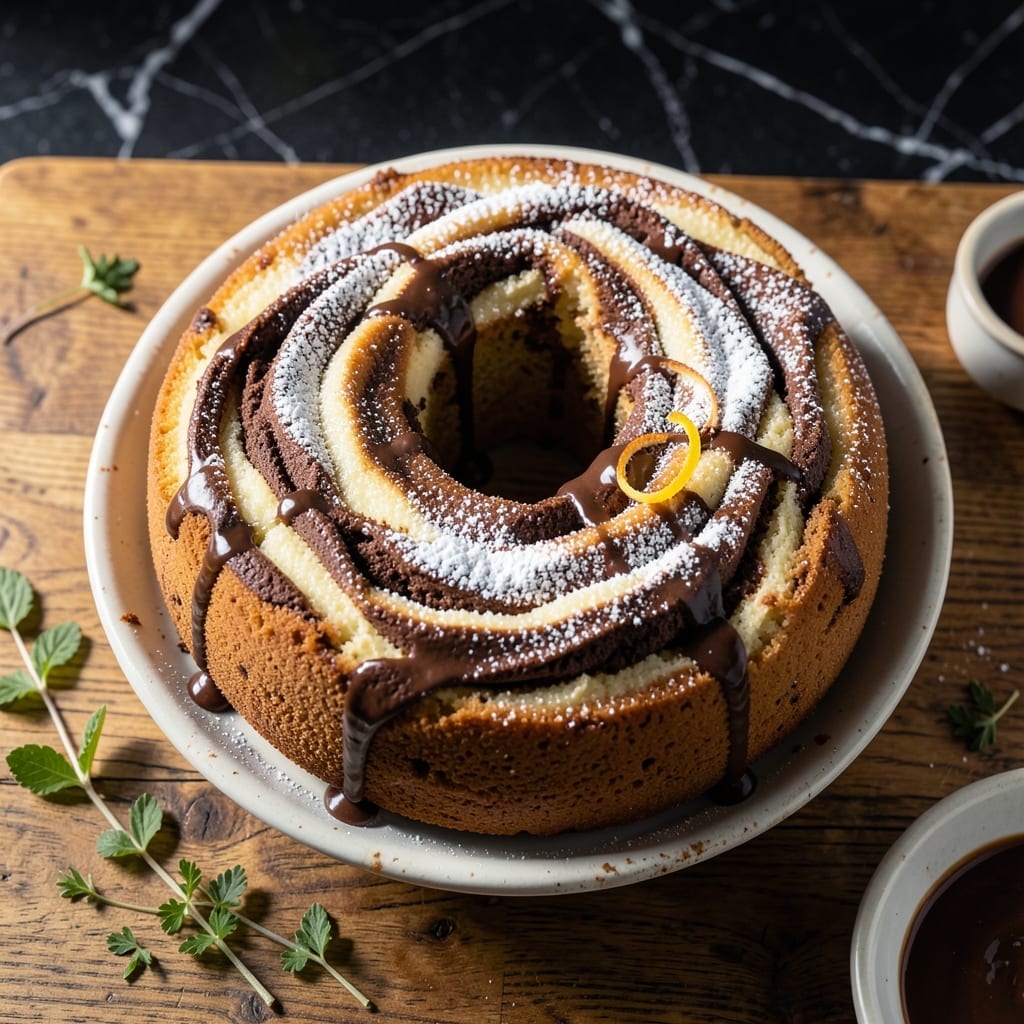
This marble cake delivers the perfect balance of rich chocolate and sweet vanilla in every bite. The swirled batter creates a beautiful pattern that looks as impressive as it tastes.
I’ve refined this recipe to ensure a moist crumb and even swirls throughout. The vanilla base is light and fluffy, while the chocolate portion adds depth without overpowering.
The cake bakes up tall and tender, with a golden crust that gives way to a soft, velvety interior. It’s a classic that never fails to impress.
Serve it plain or dusted with powdered sugar for a simple yet elegant finish.
Ingredients for Barefoot Contessa Marble Cake
A baker’s dozen of ingredients for this showstopping marble cake with perfect swirls.
| Ingredient | Amount | Notes |
|---|---|---|
| All-Purpose Flour 🌾 | 3 cups | Sifted for lightness |
| Granulated Sugar 🍚 | 2 cups | Fine white sugar |
| Unsalted Butter 🧈 | 1 cup | Room temperature, softened |
| Large Eggs 🥚 | 4 whole | Room temperature preferred |
| Baking Powder 🧂 | 2 tsp | Fresh for best rise |
| Baking Soda 🧂 | ½ tsp | Balances acidity |
| Salt 🧂 | 1 tsp | Fine sea salt |
| Pure Vanilla Extract 🌿 | 2 tsp | High-quality for flavor |
| Whole Milk 🥛 | 1 cup | Room temperature |
| Unsweetened Cocoa Powder 🍫 | ¼ cup | Dutch-process recommended |
| Boiling Water 💧 | ¼ cup | For cocoa mixture |
| Powdered Sugar 🍚 | ¼ cup | For dusting optional |
The butter and eggs must be room temperature—Plugra or European-style butters give superior texture. For the cocoa, Hershey’s Special Dark or Valrhona Dutch-process deliver the richest chocolate depth. Most supermarkets carry these, but Williams Sonoma has premium options. Fresh baking powder and soda are non-negotiable; test them by dropping a pinch in hot water—active ones will bubble vigorously.
No Dutch-process cocoa? Natural cocoa works but may yield a slightly lighter color and less smooth flavor. Short on whole milk? Mix half-and-half with water in equal parts. The vanilla extract can be swapped for vanilla bean paste for visible flecks, though it’s pricier. For a richer vanilla base, replace 2 tbsp milk with heavy cream—this adds tenderness without altering the structure.
Store the cake at room temperature under a cake dome for 2-3 days, or refrigerate for up to 5 days. It freezes beautifully for 3 months—wrap slices individually in plastic, then foil. Dust with powdered sugar just before serving (it dissolves over time).
Why You’ll Love This Recipe
- I’ll be real: it tastes even better the next day, and it freezes beautifully for those last-minute dessert emergencies.
- No-Fuss Mixing: I love that I can use one bowl and a whisk—no fancy equipment, just butter, sugar, and eggs coming together effortlessly.
- Rich Swirl Magic: The vanilla and chocolate layers create that perfect sweet balance, and the butter makes it tender every single time.
- Crowd-Pleaser Cake: Honestly, it’s my go-to for birthdays, brunch, or just because—everyone from kids to grandparents wants a slice.
Step-by-Step Instructions for Marble Cake
Here’s the method I use to create a perfectly swirled vanilla and chocolate marble cake.
Step 1: Prepare the Vanilla Batter Base
Preheat your oven to 350°F and grease a 10-inch bundt pan thoroughly. In a large bowl, cream together the 1 cup Unsalted Butter with the 2 cups Granulated Sugar until light and fluffy—this should take 3-4 minutes with an electric mixer.
Add the 4 whole Large Eggs one at a time, beating well after each addition. Stir in the 2 tsp Pure Vanilla Extract. In a separate bowl, whisk together the 3 cups All-Purpose Flour, 2 tsp Baking Powder, 0.5 tsp Baking Soda, and 1 tsp Salt. Gradually add this dry mixture to the butter mixture alternately with the 1 cup Whole Milk, beginning and ending with flour.
Step 2: Create the Chocolate Swirl Mixture
Measure out 1 cup of the vanilla batter and set it aside. In a small bowl, whisk together the 0.25 cup Unsweetened Cocoa Powder and 0.25 cup Boiling Water until smooth.
Gradually fold the cocoa mixture into the reserved 1 cup of vanilla batter until completely combined. This chocolate batter should be slightly thicker than the vanilla batter. Let both batters sit for 5 minutes while you prepare the pan.
Step 3: Layer and Swirl the Batters
Spoon alternating dollops of vanilla and chocolate batters into the prepared bundt pan. I like to start with vanilla, then add chocolate, repeating until all batter is used. The layers don’t need to be perfect—this creates the natural swirl effect.
Using a butter knife or offset spatula, gently swirl the batters together with a figure-eight motion. Don’t overmix or you’ll lose the distinct marbled pattern. Tap the pan firmly against the counter 2-3 times to remove any air bubbles.
Step 4: Bake and Test for Doneness
Bake for 50-55 minutes or until a toothpick inserted near the center comes out clean. The cake should pull away slightly from the edges of the pan and the top should be golden brown with a slight spring when touched lightly.
If the top begins to brown too quickly, tent the pan loosely with aluminum foil. Check for doneness at 45 minutes—ovens vary, and you don’t want to overbake. The internal temperature should read 200-205°F when fully baked.
Step 5: Cool and Finish the Cake
Allow the cake to cool in the pan for 15 minutes, then invert it onto a wire rack to cool completely. This waiting period is crucial—it lets the cake set and prevents it from breaking apart when removed from the pan.
Once completely cool, dust lightly with 0.25 cup Powdered Sugar if desired. I find that a fine-mesh sieve works best for an even, professional-looking dusting. The cake tastes best when served at room temperature the same day it’s baked.
Pro Tips For Making Barefoot Contessa Marble Cake
- Cream Butter Longer: Beat the unsalted butter and sugar for a full 3-4 minutes until pale and fluffy—I learned this the hard way after my first few cakes came out dense.
- Room Temperature Eggs: Take the eggs out 30 minutes before baking, or place them in warm water for 10 minutes. Cold eggs won’t emulsify properly with the butter.
- Alternate Dry Ingredients: Add the flour and baking powder mixture in three parts, alternating with any liquid ingredients. This prevents overmixing, which can make the cake tough.
- Test with a Toothpick: Start checking for doneness at 50 minutes—insert a toothpick in the center and pull it out clean. Overbaking dries out the marble swirls.
Serving Suggestions for barefoot contessa marble cake
Classic Presentation
For a timeless look, dust the cooled cake with 0.25 cup Powdered Sugar using a fine-mesh sieve. The contrast of white against the golden-brown crust highlights the marble pattern beautifully. I like to serve it on a white cake stand to make the colors pop. ✨
Dessert Pairings
A scoop of vanilla bean ice cream alongside a warm slice transforms this into a decadent dessert. The cold cream melts into the cake’s warm crumb, creating a luxurious texture. Alternatively, whipped cream with fresh berries adds a light, fruity contrast.
Beverage Matches
A cup of hot coffee or earl grey tea complements the chocolate and vanilla flavors perfectly. For a special occasion, serve with a glass of Moscato d’Asti—its slight sweetness and effervescence cut through the richness. 🍷
Plating Ideas
Slice the cake into 1-inch thick wedges and arrange on individual plates with a drizzle of chocolate ganache or caramel sauce. A few raspberries or mint leaves add a pop of color and freshness.
Breakfast Treat
This cake works beautifully as a breakfast dessert. Serve a smaller slice with a dollop of Greek yogurt and a sprinkle of toasted almonds for added protein and crunch. It’s a great way to start the day with something sweet yet balanced.
Gift Idea
Wrap individual slices in clear cellophane tied with ribbon for a thoughtful homemade gift. The cake stays fresh for 2-3 days at room temperature, making it perfect for sharing with friends or neighbors.
Nutrition Facts
Frequently Asked Questions
What size pan works best?
A 10-inch bundt pan is ideal for even baking and perfect swirls. A 9×13-inch baking dish works too, but adjust baking time to 40-45 minutes.
Can I use cake flour instead?
Yes, but reduce the amount by 2 tablespoons per cup. Cake flour creates a lighter crumb but may make the swirls less defined.
Why did my swirls disappear?
Overmixing the batters is the usual culprit. Use a knife for just 2-3 gentle swirls to maintain distinct patterns.
How do I know when it’s done?
A toothpick should come out clean, and the internal temperature should read 200-205°F. The center should spring back when lightly touched.

- BBQ Sausage Recipe Oven: Smoky Depth Without the Grill - September 28, 2026
- BBQ Chicken Bowl Recipe Rice: Smoky Sweetness Over Fluffy Grains - September 28, 2026
- Beef Cutlet Recipe Ideas: Crispy Breaded Patties With Bold Seasonings - September 28, 2026