
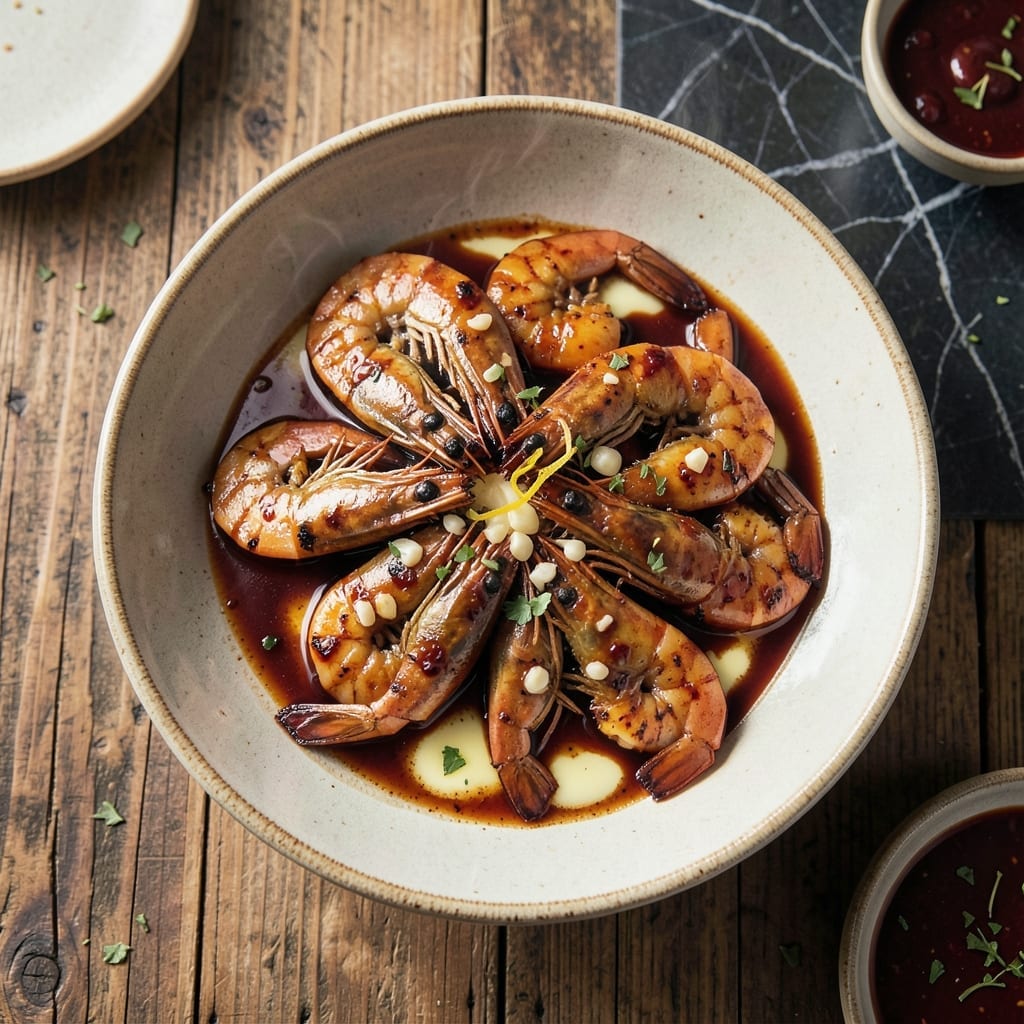
This oven-baked shrimp delivers bold BBQ flavor without the grill. The secret is a garlicky butter sauce with a touch of heat that transforms plump shrimp into a restaurant-quality dish.
I developed this method after testing countless variations to perfect the balance of smoky, sweet, and spicy. The oven ensures even cooking while allowing the shrimp to soak up every bit of that rich, buttery sauce.
What you get is juicy, tender shrimp with a glossy, finger-licking glaze. The high heat caramelizes the sauce, creating layers of flavor that cling to each bite.
Ready in under 30 minutes, this is the kind of meal that impresses with minimal effort. David always requests seconds.
Ingredients for Bbq Shrimp Recipe Oven
Plump shrimp, buttery sauce, and a spicy kick come together for bold flavor.
| Ingredient | Amount | Notes |
|---|---|---|
| Large Shrimp 🍤 | 1 ½ lb | Peeled, deveined, tails on |
| Unsalted Butter 🧈 | ½ cup | Melted for sauce |
| Garlic Cloves 🧄 | 6 cloves | Minced for maximum flavor |
| BBQ Sauce 🍯 | ¾ cup | Smoky, sweet variety |
| Hot Sauce 🌶️ | 1 tbsp | Adjust to taste preference |
| Worcestershire Sauce 🫒 | 1 tbsp | Adds depth to sauce |
| Lemon Juice 🍋 | 1 tbsp | Freshly squeezed preferred |
| Brown Sugar 🏝️ | 1 tbsp | Light or dark works |
| Smoked Paprika 🌶️ | 1 tsp | For smoky depth |
| Salt 🧂 | ½ tsp | Kosher or sea salt |
| Black Pepper 🌶️ | ½ tsp | Freshly ground preferred |
| Fresh Parsley 🌿 | ¼ cup | Chopped, for garnish |
| Green Onions 🧅 | 3 whole | Thinly sliced for garnish |
The shrimp is everything here. Wild-caught or large frozen (thawed completely) works best—avoid the tiny salad shrimp. I grab mine from Whole Foods or Trader Joe’s when they’re running a special. The butter? Kerrygold or Plugrá if you’re feeling fancy, but any unsalted works fine. Just don’t use margarine (trust me on this one).
No BBQ sauce on hand? Mix ketchup with a little vinegar, brown sugar, and smoked paprika—one-third the amount of each. Out of Worcestershire? Soy sauce with a dash of lemon gets you close. The hot sauce can be any variety, but I like Tabasco or Cholula. Want more heat? Add a pinch of cayenne to the mix.
This keeps 2-3 days in the fridge—reheat gently to avoid overcooking the shrimp. The sauce thickens as it cools, so thin with a splash of water if needed. Freezes beautifully for 1 month if you leave the shrimp uncooked (just freeze the sauce).
Why You’ll Love This Recipe
- One Pan Magic: I just toss the shrimp with melted butter, garlic, and sauces on a sheet pan—no fancy prep, no mess.
- Garlic Butter Kick: The combo of rich butter, punchy garlic, and smoky BBQ sauce with a hint of hot sauce is ridiculous.
- Weeknight Hero: Honestly, it’s my go-to when I need dinner fast but still crave restaurant-quality flavor.
- Leftovers? Yes Please: The shrimp taste even better the next day in tacos or over rice—if they last that long.
Step-by-Step Instructions for BBQ Shrimp Oven Bake
This foolproof oven method delivers juicy shrimp with a sticky, spicy-sweet glaze every time.
Step 1: Prep the Shrimp and Make the Sauce Base
Preheat your oven to 400°F and arrange a rack in the upper third. Pat the 1.5 lb Large Shrimp dry with paper towels—this prevents steaming and ensures they roast instead. I always leave the tails on for presentation, but remove them if you prefer.
In a small bowl, melt the 0.5 cup Unsalted Butter in the microwave for 45 seconds, then stir in the 6 cloves minced Garlic Cloves, 0.75 cup BBQ Sauce, 1 tbsp Hot Sauce, 1 tbsp Worcestershire Sauce, 1 tbsp Lemon Juice, and 1 tbsp Brown Sugar until smooth. The butter should be warm but not boiling to keep the garlic from turning bitter.
Step 2: Season and Coat the Shrimp
Place the shrimp in a large bowl and sprinkle evenly with the 1 tsp Smoked Paprika, 0.5 tsp Salt, and 0.5 tsp Black Pepper. Toss gently to coat. I find that using my hands works best here—just make sure they’re clean and dry.
Pour about half of the sauce mixture over the shrimp and toss again until every piece is well coated. You want the shrimp to glisten with sauce, not swim in it. Save the remaining sauce for later—it’ll be your glaze.
Step 3: Roast Until Pink and Glazed
Arrange the shrimp in a single layer on a rimmed baking sheet lined with parchment paper. Pour the remaining sauce evenly over the top, making sure each shrimp gets a little extra. This ensures they caramelize rather than dry out.
Roast for 8-10 minutes until the shrimp turn pink and opaque, and the sauce begins to bubble and thicken at the edges. Don’t overcook—shrimp are done when they curl into a loose “C” shape and the flesh is just firm to the touch. If your oven runs hot, start checking at 7 minutes.
Step 4: Garnish and Serve Hot
Remove the baking sheet from the oven and immediately sprinkle the 0.25 cup chopped Fresh Parsley and 3 thinly sliced Green Onions over the top. The residual heat will soften the green onions slightly and brighten up the parsley.
Let the shrimp rest for 2 minutes to soak up any remaining sauce. Serve directly from the baking sheet or transfer to a platter with a spoon to capture every drop of the buttery, garlicky glaze. These are best enjoyed fresh, but leftovers reheat surprisingly well in a skillet over low heat.
Pro Tips For Making Bbq Shrimp Recipe Oven
- Preheat the Pan: Crank the oven to 425°F and let your baking dish heat up inside for 5 minutes before adding the shrimp—I learned this the hard way after too many batches came out watery.
- Pat Shrimp Dry: Use paper towels to remove every bit of moisture from the shrimp, especially if they’re frozen-thawed. More salt than you think helps here, since wet shrimp steam instead of sear.
- Skip the Overcrowding: Spread the shrimp in a single layer with space between each one. After burning three batches, I finally figured out they need room to caramelize, not steam.
- Butter Last: Toss the shrimp with half the butter and garlic first, then add the rest with the BBQ and hot sauce at the end. Sounds weird, but it keeps the sauce from breaking or burning.
Essential Equipment for Perfect Results
Baking Sheet Essentials
Invest in a heavy-duty half-sheet pan with a rim—my go-to is Nordic Ware from Central Market. The rim prevents sauce from dripping into your oven, and the heavy gauge ensures even heat distribution. David swears by this for all our roasted dishes. 💪
Parchment Paper
Always line your baking sheet with parchment paper for easy cleanup. I prefer unbleached for a more natural option. The non-stick surface lets the shrimp caramelize without sticking, and you can lift the whole batch off for serving.
Mixing Bowls
Use a large, wide mixing bowl for tossing shrimp with sauce. I love Pyrex glass bowls because they’re sturdy and easy to clean. A 2-quart size gives enough room to coat every shrimp evenly without spilling.
Sauce Whisk
A small silicone whisk is perfect for blending your butter and sauce ingredients smoothly. It scrapes every bit of flavor from the bowl and handles heat well. I keep one dedicated just for sauces to avoid any lingering garlic or spice flavors.
Oven Thermometer
Don’t trust your oven’s built-in thermometer. I use a Taylor oven thermometer hanging in the center rack to verify my 400°F setting. Many ovens run 25-50°F hot or cold, which can make or break your shrimp timing. ✨
Tongs for Serving
Have a pair of 12-inch locking tongs ready for serving. They let you arrange shrimp on plates without losing any of that precious sauce. I prefer OXO brand for their comfortable grip and durability.
Nutrition Facts
Frequently Asked Questions
What temperature should I bake the shrimp at?
Bake at 400°F for optimal results. This high heat ensures the shrimp cook quickly while allowing the sauce to caramelize beautifully.
Can I use frozen shrimp?
Yes, but thaw completely first and pat very dry. Frozen shrimp release moisture that can dilute the sauce, so draining them well is key.
How do I know when the shrimp are done?
Look for pink, opaque flesh and a loose “C” shape. They’re done in 8-10 minutes—overcooking makes them rubbery.
Can I make this ahead of time?
Prepare the sauce up to 2 days ahead, but cook shrimp fresh. Reheat gently in a skillet with extra sauce to prevent drying.

- BBQ Sausage Recipe Oven: Smoky Depth Without the Grill - September 28, 2026
- BBQ Chicken Bowl Recipe Rice: Smoky Sweetness Over Fluffy Grains - September 28, 2026
- Beef Cutlet Recipe Ideas: Crispy Breaded Patties With Bold Seasonings - September 28, 2026