
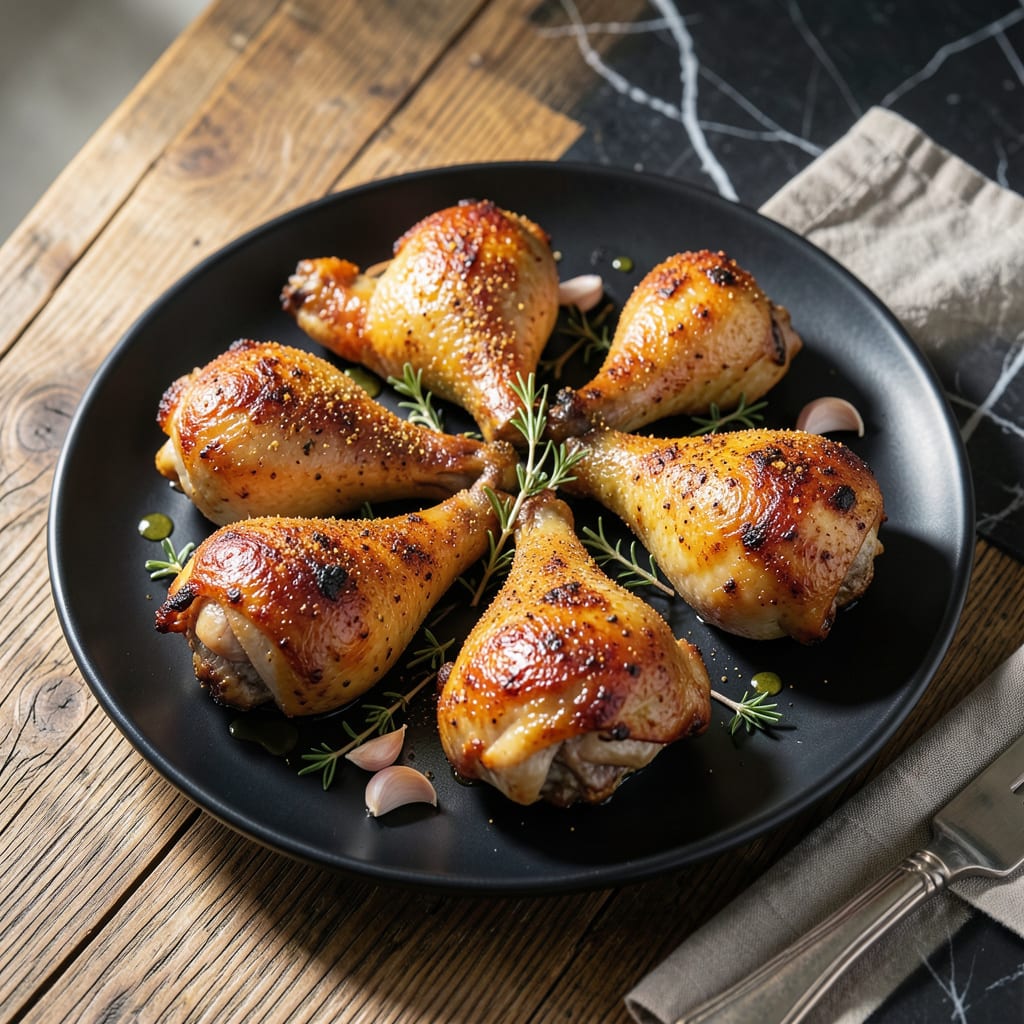
This baked chicken leg method delivers on its promise of crispy skin and tender meat every time. The secret lies in a simple dry brine that ensures seasoning penetrates deep while the skin crisps to perfection.
With just 45 minutes in the oven at high heat, you’ll achieve restaurant-quality results. The high temperature renders the fat, creating that coveted golden, shatteringly crispy exterior while keeping the meat juicy and flavorful.
Ingredients for Best Baked Chicken Leg
Bone-in chicken legs plus a few pantry spices create this unbeatable dish with crispy perfection.
| Ingredient | Amount | Notes |
|---|---|---|
| Chicken Legs 🍗 | 8 pieces | Bone-in, skin-on, drumsticks and thighs |
| Diamond Crystal Kosher Salt 🧂 | 1 ½ tbsp | For dry brine, plus more to taste |
| Freshly Ground Black Pepper 🌶️ | 1 tsp | Coarse grind preferred |
| Garlic Powder 🧄 | 1 tsp | Not garlic salt |
| Onion Powder 🧅 | 1 tsp | For depth of flavor |
| Smoked Paprika 🌶️ | 1 tsp | Adds subtle smokiness |
| Dried Thyme 🍃 | 1 tsp | Or use 1 tbsp fresh |
| Dried Rosemary 🌿 | ½ tsp | Crushed to release aroma |
| Baking Powder 🧂 | 1 tsp | For extra crispy skin |
| Extra-Virgin Olive Oil 🫒 | 1 tbsp | For tossing before baking |
| Lemon 🍋 | 1 whole | Zested and juiced |
The chicken legs are the foundation—bone-in, skin-on is non-negotiable for that coveted crispy texture. Costco or Whole Foods typically carry high-quality options with good fat marbling. For the dry brine, Diamond Crystal kosher salt is preferred by professional kitchens for its clean flavor and even distribution. Avoid iodized table salt, which can impart a metallic taste.
No smoked paprika? Regular paprika plus a pinch of cayenne can substitute, though the depth won’t be identical. Fresh rosemary at double the amount works if you’ve got it growing—just finely chop it. For a shortcut, poultry seasoning at half the quantity covers thyme and rosemary in one. The baking powder might seem odd, but it’s the secret to that shatteringly crisp skin (trust the science).
The dry-brined chicken can rest uncovered in the fridge for up to 24 hours—longer means deeper seasoning. Baked leftovers keep 4 days refrigerated and reheat best in a hot oven or air fryer to revive crispiness. Freeze cooked legs for up to 3 months in airtight containers.
Why You’ll Love This Recipe
- One Pan Magic: I toss the chicken legs with salt, pepper, garlic and onion powder, then bake—no marinating, no fuss.
- Crispy & Juicy: The skin gets that perfect crunch while the meat stays tender, thanks to the high-heat roast.
- Weeknight Hero: Between us, this is my Tuesday lifesaver—ready before the kids finish their homework.
- Budget Stretcher: A pack of chicken legs feeds my family for less than takeout, with leftovers for lunch.
Step-by-Step Instructions for Baked Chicken Legs
This method guarantees perfectly crispy skin and juicy meat with professional-level results.
Step 1: Dry Brine the Chicken Legs
Pat the 8 pieces chicken legs completely dry with paper towels. This removes excess moisture that would otherwise steam the skin instead of crisping it. I press firmly to absorb every drop.
In a large bowl, combine the 1.5 tbsp Diamond Crystal Kosher Salt, 1 tsp Freshly Ground Black Pepper, 1 tsp Garlic Powder, 1 tsp Onion Powder, 1 tsp Smoked Paprika, 1 tsp Dried Thyme, 0.5 tsp Dried Rosemary, and 1 tsp Baking Powder. The baking powder raises the skin’s pH, breaking down proteins for maximum crispness.
Add the chicken legs and toss to coat evenly with the seasoning mixture. Arrange them in a single layer on a wire rack set over a baking sheet, skin-side up. Refrigerate uncovered for 12-24 hours to allow the dry brine to penetrate deeply.
Step 2: Prepare for Roasting
Remove the chicken legs from the refrigerator 1 hour before cooking to bring them to room temperature. This ensures even cooking throughout. Preheat your oven to 425°F during this time.
Zest the 1 whole Lemon, then cut it in half and juice it. Drizzle the 1 tbsp Extra-Virgin Olive Oil over the chicken legs, then sprinkle with half the lemon zest. Toss gently to coat. The citrus brightens the rich flavors while the oil helps the skin crisp.
Step 3: Roast to Perfection
Transfer the baking sheet to the preheated oven. Roast for 30 minutes, then carefully flip each piece skin-side up. Return to the oven for another 20-25 minutes until the skin is deep golden brown and crispy.
You’ll know it’s done when the internal temperature reaches 185°F at the meatiest part near the bone. The skin should be crackling crisp, not just browned. If it’s not crispy enough, broil for 2-3 minutes at the end, watching closely to prevent burning.
Step 4: Rest and Serve
Transfer the chicken legs to a serving platter and let them rest for 5-10 minutes. This allows the juices to redistribute, ensuring moist, flavorful meat in every bite. Sprinkle with the remaining lemon zest and a squeeze of fresh lemon juice.
Serve immediately while the skin is still at its crispiest. The combination of smoky, herby, citrus notes with the ultra-crispy skin and tender meat delivers on the promise of the best baked chicken legs you’ve ever tasted.
Pro Tips For Making Best Baked Chicken Leg
- Dry the Skin: Pat the chicken legs very dry with paper towels before seasoning—I learned this the hard way after my first few batches came out steamed instead of crispy.
- Start Hot: Crank the oven to 425°F for the first 20 minutes, then drop to 375°F to finish. This gives you that golden crust without drying out the meat.
- Season Twice: Hit the legs with salt, pepper, garlic powder, and onion powder the night before, then give them another light dusting right before baking for layers of flavor.
- Skip the Crowding: Leave at least an inch between each leg on the baking sheet—any closer and they’ll steam instead of roast, and nobody wants soggy chicken skin.
Troubleshooting Great best baked chicken leg
Skin Not Crispy
If your skin isn’t crisping, your oven likely isn’t hot enough. Bump the temperature to 450°F and extend cooking by 5-10 minutes. I also recommend patting the skin extra dry before the final roast. 🔥
Dry Meat Issues
Overcooking is the usual culprit. Pull the legs when they hit 185°F internal temperature—any higher and they’ll dry out. Remember, dark meat can handle higher temps than white meat without drying.
Uneven Cooking
This happens when pieces vary in size. Arrange similar-sized legs together and rotate the pan halfway through cooking. I always check the thickest piece first with my ThermoWorks instant-read thermometer.
Seasoning Too Light
If the flavor seems weak, extend your dry brine time. 24 hours in the fridge gives the salt and spices maximum penetration. Don’t skip the baking powder—it’s crucial for both crispiness and flavor development.
Sticking Problems
Use a wire rack on your baking sheet for proper air circulation. If you must use a pan without a rack, turn the legs every 15 minutes and use parchment paper to prevent sticking. A little oil on the parchment helps too.
Soggy Leftovers
Reheat in a 400°F oven for 10-12 minutes to revive crispiness. The microwave will make them soggy. I’ve found that spreading leftovers on a wire rack in the oven works best to maintain that crunch. ✨
Nutrition Facts
Frequently Asked Questions
Why use baking powder in the recipe?
Baking powder raises the skin’s pH, breaking down proteins for maximum crispiness. It’s the secret to achieving that shatteringly crisp texture without frying. Don’t skip it!
Can I use boneless chicken thighs instead?
Yes, but they’ll cook faster and won’t get as crispy. Reduce the cooking time to 20-25 minutes at 425°F and monitor closely. Bone-in is still best for flavor and texture.
How do I know when they’re done?
Use an instant-read thermometer to check the internal temperature. It should reach 185°F at the meatiest part near the bone. The skin will also be deep golden brown and crispy.
How long can I store leftovers?
Cooked legs keep fresh in the fridge for up to 4 days. For longer storage, freeze in airtight containers for up to 3 months.

- BBQ Sausage Recipe Oven: Smoky Depth Without the Grill - September 28, 2026
- BBQ Chicken Bowl Recipe Rice: Smoky Sweetness Over Fluffy Grains - September 28, 2026
- Beef Cutlet Recipe Ideas: Crispy Breaded Patties With Bold Seasonings - September 28, 2026