
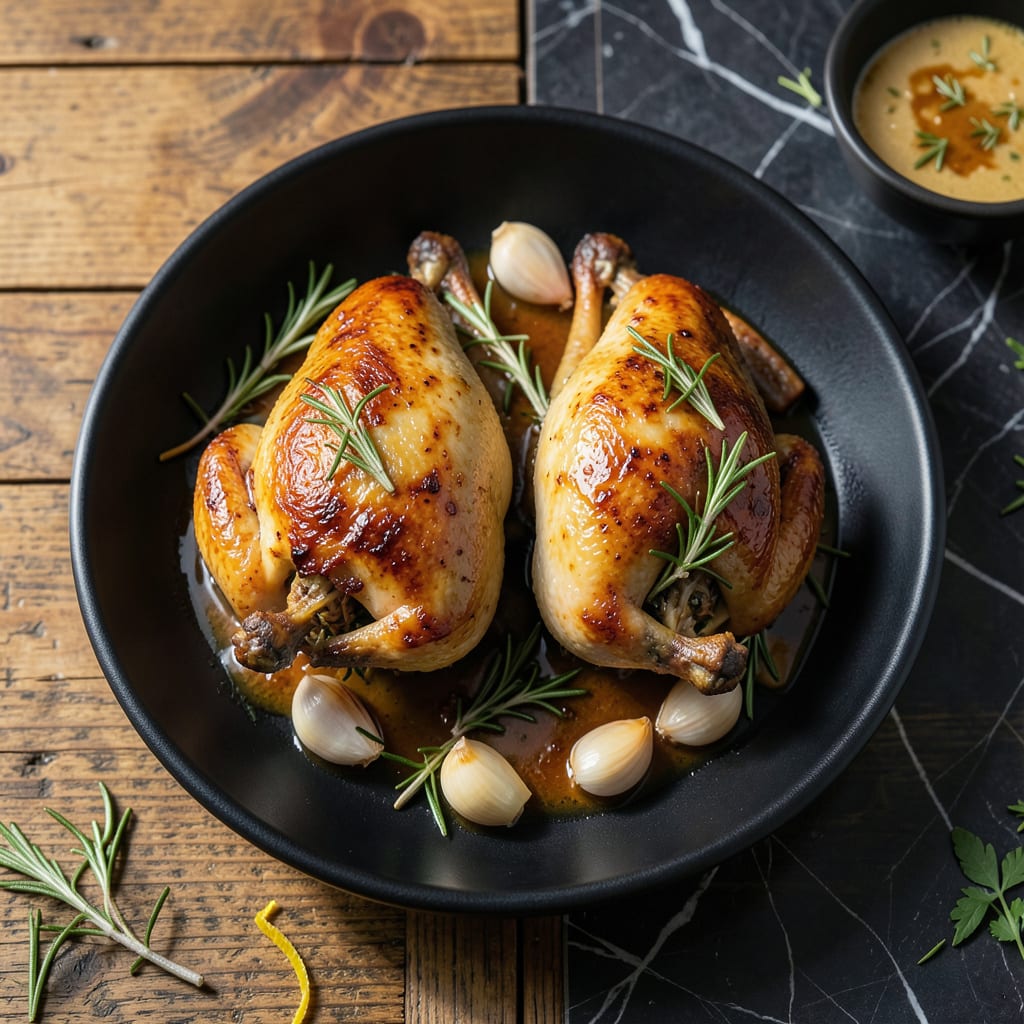
This roasted Cornish hen recipe delivers restaurant-quality results with a simple, proven method. The butter basting technique ensures juicy meat while creating caramelized pan drippings for an unforgettable sauce.
What sets this apart is the high-heat start followed by gentle roasting, which produces golden, crispy skin and tender flesh. The pan drippings form the base for a quick, flavorful sauce that ties the dish together perfectly.
Ingredients for Best Roasted Cornish Hen
Restaurant-quality results start with these carefully selected ingredients for perfectly roasted hens with caramelized skin.
| Ingredient | Amount | Notes |
|---|---|---|
| Cornish Hens 🍗 | 2 whole | Thawed if frozen, patted dry |
| Unsalted Butter 🧈 | ½ cup | Softened for basting |
| Fresh Rosemary 🌿 | 2 tbsp | Finely chopped, stems discarded |
| Fresh Thyme 🍃 | 2 tbsp | Finely chopped, stems discarded |
| Garlic Cloves 🧄 | 6 cloves | Minced for basting compound |
| Kosher Salt 🧂 | 1 ½ tsp | Diamond Crystal preferred for even seasoning |
| Freshly Ground Black Pepper 🌶️ | 1 tsp | Coarse grind for texture |
| Lemon 🍋 | 1 whole | Zested and juiced for brightness |
| Medium Carrots 🥕 | 2 whole | Peeled, cut into chunks for roasting |
| Celery Stalks 🌿 | 2 whole | Cut into chunks for aromatics |
| Yellow Onion 🧅 | 1 whole | Quartered for flavor base |
| Dry White Wine 🍷 | ½ cup | For deglazing pan drippings |
| Chicken Stock 🥣 | ½ cup | Low-sodium preferred for sauce control |
| All-Purpose Flour 🌾 | 1 tbsp | For thickening sauce |
[recipeingredientscaler]
The Cornish hens are the foundation—opt for fresh, not previously frozen when possible. Whole Foods or ButcherBox offer excellent quality. The butter must be European-style for its higher fat content, which creates superior basting results. Look for bright, fragrant rosemary and thyme at your grocer’s herb section; avoid wilted bunches. The garlic should be firm with unbroken skins.
No white wine? Dry vermouth works perfectly, or substitute additional chicken stock with a splash of lemon juice. Fresh herbs are ideal, but dried at one-third the quantity can be used in a pinch. For a richer sauce, brown the flour lightly before adding liquids. The carrots, celery, and onion can be swapped for other root vegetables like parsnips or fennel.
Store fresh herbs wrapped in damp paper towels in the fridge for up to 5 days. The compound butter can be made ahead and refrigerated for 3 days. Leftover hens keep well in the fridge for 3-4 days and reheat beautifully in a low oven.
Why You’ll Love This Recipe
- One Pan Wonder: I just toss the hens with melted butter, garlic, rosemary, and thyme, then roast—no extra dishes to wash.
- Herb Infused Perfection: The garlic and fresh herbs soak into every bite, making the meat rich and aromatic.
- Dinner Party Star: I serve this at gatherings, and it always feels special without requiring all-day prep.
- Next-Day Magic: Leftovers make the best sandwiches or salads—I look forward to them as much as the first meal.
Step-by-Step Instructions for Roasted Cornish Hens
This professional method ensures perfectly golden skin and succulent meat with every bite.
Step 1: Prepare and Season the Cornish Hens
Pat the 2 whole Cornish Hens completely dry inside and out with paper towels. This critical step removes moisture that would otherwise steam the skin instead of crisping it. I always check the cavity and under the wings where water tends to collect.
Season the hens generously inside and out with the 1.5 tsp Kosher Salt and 1 tsp Freshly Ground Black Pepper. Don’t be shy—the seasoning needs to penetrate both the skin and meat. The Diamond Crystal salt I prefer distributes evenly, ensuring consistent flavor throughout.
Step 2: Create the Aromatic Compound Butter
In a small bowl, combine the 0.5 cup Unsalted Butter with the 2 tbsp Fresh Rosemary, 2 tbsp Fresh Thyme, and the 6 cloves Garlic Cloves (minced). The softened butter should easily incorporate the herbs and garlic into a fragrant paste.
Gently separate the skin from the breast meat on each hen, creating a pocket. Spread about half of this compound butter under the skin, directly onto the meat. This technique infuses the meat with flavor while the remaining butter will be used for basting during roasting.
Step 3: Roast with Vegetable Bed for Even Cooking
Preheat your oven to 425°F. Arrange the 2 whole Medium Carrots, 2 whole Celery Stalks, and 1 whole Yellow Onion (quarterd) in a roasting pan. These vegetables create a natural rack that promotes even air circulation and adds depth to your pan sauce.
Place the hens breast-side up on this vegetable bed. Roast for 25 minutes, then reduce heat to 375°F and continue roasting for another 35-40 minutes. Baste with the remaining compound butter every 15 minutes until the skin turns a deep golden brown.
Step 4: Create the Pan Sauce
Transfer the hens to a cutting board and tent with foil. Place the roasting pan on the stovetop over medium heat. Add the 0.5 cup Dry White Wine and scrape up all the browned bits with a wooden spoon. This deglazing process captures all the concentrated flavors from the roasting.
Simmer for 2-3 minutes until reduced by half. Sprinkle in the 1 tbsp All-Purpose Flour and whisk to combine. Gradually add the 0.5 cup Chicken Stock while whisking constantly. Simmer for another 3-4 minutes until the sauce thickens enough to coat the back of a spoon.
Finish by whisking in the lemon zest and juice. Strain the sauce if you prefer a smoother consistency, then serve it spooned over the carved hens. The bright citrus cuts through the richness of the butter and meat beautifully.
Pro Tips For Making Best Roasted Cornish Hen
- Preheat the Pan: Start with a screaming hot oven—425°F minimum—to get that golden, crispy skin before the hen finishes cooking through.
- Butter Under Skin: Gently loosen the skin and rub softened unsalted butter mixed with minced garlic, rosemary, and thyme directly onto the meat; it bastes from the inside out.
- Skip Overcrowding: Roast one hen per person with space between them so the heat circulates; I learned this the hard way after my first batch steamed instead of browned.
- Rest Before Carving: Let the hens rest 10 minutes under foil after roasting—this keeps the juices in the meat, not on your cutting board.
Make-Ahead Tips for This best roasted cornish hen
Prep Ahead Compound Butter
Make the herb butter up to 3 days in advance and refrigerate in an airtight container. Let it soften slightly before using so it spreads easily under the skin. This saves 10 minutes on cooking day. 💡
Season Hens Early
Pat the hens dry and season with salt and pepper the night before. Leave them uncovered in the fridge on a wire rack. This dry-brine method enhances flavor and ensures crispier skin.
Prep Vegetable Base
Chop the carrots, celery, and onion the day before and store in a sealed container. This aromatic base keeps well for 24 hours without losing freshness.
Room Temperature Hens
Take the hens out of the fridge 1 hour before roasting. This ensures even cooking throughout. I’ve found this step prevents dryness near the bones.
Sauce Prep Work
Measure the wine, chicken stock, and flour ahead of time. Keep them near the stove for quick deglazing after roasting. This streamlines the final steps. ⚡
Storage Before Cooking
If using fresh hens, store them in the coldest part of your fridge for up to 2 days. For previously frozen hens, thaw completely in the fridge 24 hours before cooking.
Nutrition Facts
Frequently Asked Questions
What temperature should I roast the hens at?
Start at 425°F for the first 25 minutes, then reduce to 375°F for the remaining 35-40 minutes. This two-step method ensures crispy skin and juicy meat.
How do I know when they’re done?
Use a meat thermometer inserted into the thickest part of the thigh. It should read 165°F. The juices should run clear, not pink, when pierced.
Can I use dried herbs instead of fresh?
Yes, but use 1/3 the amount since dried herbs are more concentrated. Soak them in warm water for 10 minutes first to rehydrate.
What if my sauce is too thin?
Simmer it longer to reduce, or mix 1 tsp cornstarch with 1 tbsp cold water and whisk in. Let it cook for 1-2 minutes to thicken.

- BBQ Sausage Recipe Oven: Smoky Depth Without the Grill - September 28, 2026
- BBQ Chicken Bowl Recipe Rice: Smoky Sweetness Over Fluffy Grains - September 28, 2026
- Beef Cutlet Recipe Ideas: Crispy Breaded Patties With Bold Seasonings - September 28, 2026