
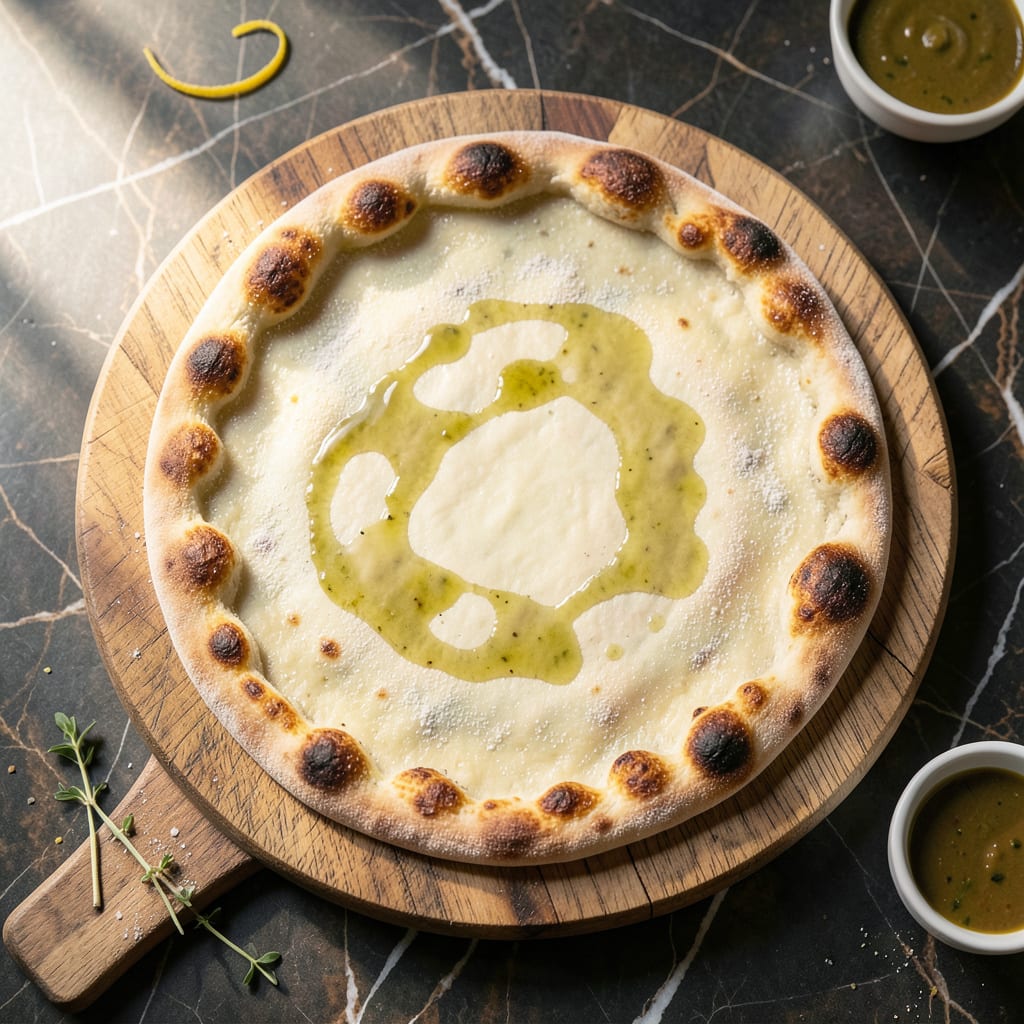
This recipe delivers the crispy foundation you need for authentic pizza night at home. The dough comes together with simple pantry staples and a precise resting period to develop flavor.
With a thin, sturdy base that bakes to golden perfection, this vegetarian-friendly dough holds toppings beautifully. The result is a professional-quality crust that rivals any pizzeria.
Ingredients for Best Thin Crust Pizza Dough
Simple pantry staples create this professional-quality crust with crisp golden edges every time.
| Ingredient | Amount | Notes |
|---|---|---|
| Bread Flour 🌾 | 3 ½ cups | High-protein for crisp texture |
| Active Dry Yeast 🍞 | 1 tsp | Instant yeast works too |
| Granulated Sugar 🍚 | 1 tsp | Feeds yeast for activation |
| Kosher Salt 🧂 | 1 ½ tsp | Diamond Crystal preferred |
| Extra-Virgin Olive Oil 🫒 | 2 tbsp | Divided for dough and bowl |
| Warm Water 💧 | 1 ¼ cups | 105-110°F for yeast activation |
| Semolina Flour 🌾 | ¼ cup | For dusting work surface |
| All-Purpose Flour 🌾 | ½ cup | For adjusting consistency |
| Cornmeal 🌽 | ¼ cup | For crispy crust bottom |
| Honey 🍯 | ½ tsp | Optional for sweetness |
The flour choice is critical here. Bread flour delivers the high protein needed for that crisp yet chewy texture—King Arthur is my go-to brand. Yeast freshness matters too; check the expiration date on the packet. Warm water should feel like bathwater on your wrist (not hot). Diamond Crystal kosher salt dissolves evenly, but any fine salt will work in a pinch.
No bread flour? All-purpose works at a 1:1 ratio, though the crust won’t be quite as crisp. Out of yeast? You’ll need to start over—there’s no substitution for this. For olive oil, California Olive Ranch offers great quality for the price. The semolina and cornmeal can be swapped for extra flour, but they add that authentic pizzeria texture to the crust.
Dough can rest in the fridge for up to 48 hours—the flavor improves with time. Store extra cooked crusts in an airtight container at room temperature for 2 days, or freeze for 1 month. Always bring dough to room temperature before shaping for best results.
Why You’ll Love This Recipe
- One Bowl Wonder: I just dump the flour, yeast, sugar, salt, and olive oil in one bowl—no fancy tools, no mess.
- Crispy Perfection: That bread flour gives it the ideal snap, while the olive oil adds a rich depth you’ll crave.
- Weeknight Hero: Honestly, I’ve used this dough for quick dinners, party appetizers, and even impromptu lunch with the kids.
- Budget Friendly: Five simple pantry staples, and I get restaurant-quality pizza for a fraction of the cost.
Step-by-Step Instructions for Thin Crust Pizza Dough
Master the technique for a perfectly crisp, authentic base with professional results.
Step 1: Activate the Yeast and Proof
In a small bowl, combine the 1 tsp Active Dry Yeast, 1 tsp Granulated Sugar, and 0.5 tsp Honey with the 1.25 cups Warm Water (maintained at 105-110°F). Stir gently and let sit for 5-7 minutes until the mixture becomes frothy and opaque.
This visual confirmation—bubbles forming and the yeast rising to the surface—signals the yeast is active and ready. If no bubbles appear, discard and start again; inactive yeast won’t leaven your dough. The sugar and honey provide the initial food source to jumpstart fermentation.
Step 2: Mix and Knead the Dough
In a large mixing bowl, combine the 3.5 cups Bread Flour and 1.5 tsp Kosher Salt. Create a well in the center and pour in the proofed yeast mixture and 1 tbsp Extra-Virgin Olive Oil. Use a wooden spoon to stir until a shaggy dough forms.
Turn the dough onto a surface dusted with 0.25 cup Semolina Flour and knead for 8-10 minutes by hand, or 6-7 minutes in a stand mixer with a dough hook. The dough should become smooth, elastic, and slightly tacky but not sticky. If it feels too wet, incorporate 0.5 cup All-Purpose Flour 1 tbsp at a time until the texture is right.
Step 3: First Rise for Flavor Development
Lightly oil a clean bowl with the remaining 1 tbsp Extra-Virgin Olive Oil. Place the dough in the bowl, turning to coat all sides. Cover with a damp kitchen towel or plastic wrap and let rise in a warm, draft-free spot for 1 to 1.5 hours, or until doubled in volume.
This initial rise allows the yeast to ferment the sugars, developing the complex flavors characteristic of authentic pizza dough. The dough should spring back slowly when pressed gently with a finger—this indicates it’s properly proofed and ready for shaping.
Step 4: Divide, Shape, and Second Rise
Punch down the dough to release excess air and divide it into 4 equal portions for individual pizzas. Shape each portion into a tight ball by tucking the edges under and rolling gently on the work surface. Place the balls on a tray dusted with 0.25 cup Cornmeal to prevent sticking.
Cover loosely and let rest for 30 minutes. This second rise relaxes the gluten, making the dough easier to stretch thin without tearing. The cornmeal not only prevents sticking but also adds a subtle crunch to the finished crust.
Step 5: Roll and Prepare for Toppings
Preheat your oven to its highest setting, ideally 500°F or above, with a pizza stone or inverted baking sheet inside. On a surface dusted with Semolina Flour, roll or stretch each dough ball into a thin round, about ⅛-inch thick.
Transfer the stretched dough onto a piece of parchment paper dusted with Cornmeal to ensure it slides easily onto the hot stone. Dock the surface lightly with a fork to prevent large air bubbles. The dough is now ready for toppings and baking to crispy, golden perfection.
Pro Tips For Making Best Thin Crust Pizza Dough
- Proof the Yeast: Bloom your active dry yeast in warm (110°F) water with the sugar for 5-10 minutes until foamy—skip this and your dough won’t rise properly.
- Use Bread Flour: Bread flour’s higher protein content gives thin crust that perfect chewy yet crisp texture; all-purpose just doesn’t cut it.
- Avoid Over-Kneading: I learned this the hard way—knead just until smooth, about 5-7 minutes, or your crust will turn tough instead of tender.
- Chill the Dough: After mixing, let it rest in the fridge for at least 24 hours; this develops flavor and makes rolling out paper-thin crusts way easier.
Troubleshooting Perfect Results
Dough Won’t Rise
If your dough isn’t rising, first check your yeast. It might be expired—always verify the date on the packet. The water temperature is also crucial; it needs to be 105-110°F. Too hot kills yeast, too cold slows activation. I keep a thermometer handy for accuracy. 🌡️
Sticky Dough Issues
If the dough sticks to your hands, resist adding too much flour. Instead, wet your hands with cold water and continue kneading. The dough should be tacky but not sticky. If absolutely necessary, add 1 tbsp All-Purpose Flour at a time until manageable.
Tearing While Stretching
Tearing often happens when gluten is too tight. Let your dough rest for the full 30 minutes after dividing. If it still resists, roll it out with a rolling pin instead of stretching. Work from the center outward, maintaining even thickness.
Crust Too Thick
For that perfect thin crust, aim for ⅛-inch thickness when rolling. Use a ruler if needed. If your crust still comes out thick, you may have used too much dough—stick to 4 equal portions from the recipe. The weight should be about 6-7 oz per ball.
Soggy Bottom
Prevent soggy bottoms by preheating your pizza stone for at least 30 minutes at 500°F. The Cornmeal on your parchment helps too—it creates a barrier and adds crunch. Bake on the lowest oven rack for maximum heat exposure. 🔥
Overproofed Dough
If your dough smells very yeasty and collapses when touched, it’s overproofed. Next time, reduce the first rise to 1 hour in a warmer spot or 1.5 hours in a cooler one. The finger test helps: properly proofed dough springs back slowly, not instantly.
Nutrition Facts
Frequently Asked Questions
Can I use all-purpose flour instead of bread flour?
Yes, but the texture will be slightly less crisp. Bread flour’s higher protein creates that perfect chew. If substituting, use the same amount and expect a softer crust.
Why does my crust turn out tough?
Over-kneading develops too much gluten. Stick to 8-10 minutes by hand or 6-7 minutes in a mixer. Let the dough rest properly to relax the gluten.
How thin should I roll the dough?
Aim for ⅛-inch thickness for authentic thin crust. Use a ruler for accuracy. If it tears, patch it with extra dough before baking.
Can I make this dough ahead?
The dough can rest in the fridge for up to 48 hours. This actually improves flavor. Bring to room temperature before stretching for best results.

- BBQ Sausage Recipe Oven: Smoky Depth Without the Grill - September 28, 2026
- BBQ Chicken Bowl Recipe Rice: Smoky Sweetness Over Fluffy Grains - September 28, 2026
- Beef Cutlet Recipe Ideas: Crispy Breaded Patties With Bold Seasonings - September 28, 2026