
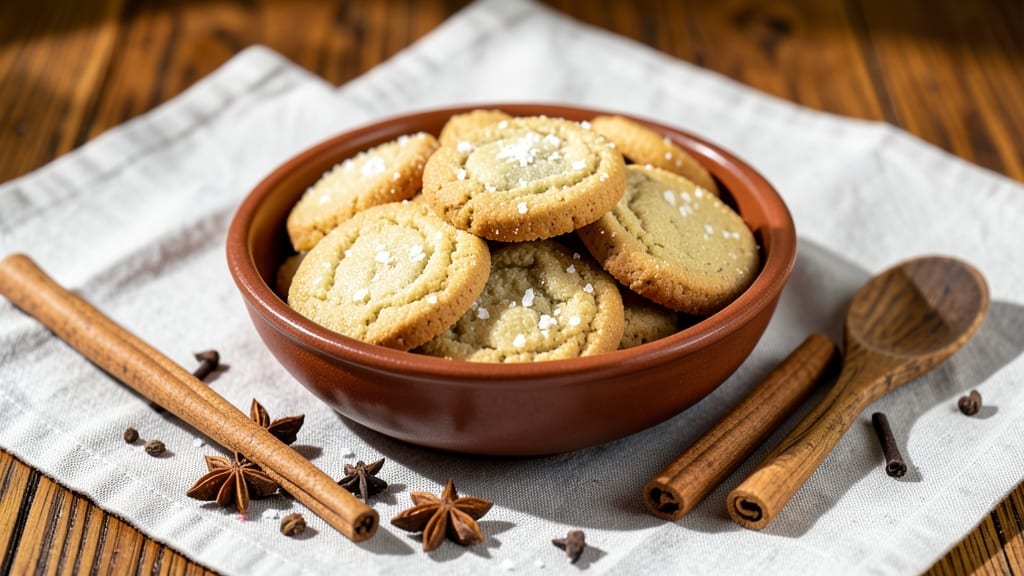
Betty Crocker’s Ethel’s sugar cookies deliver that perfect balance of crisp edges and soft, melt-in-your-mouth centers—just like the ones from your favorite bakery. The secret lies in the precise ratio of butter to sugar and a touch of vanilla that elevates every bite into something nostalgic and comforting.
I’ve baked these countless times, and they never fail to impress, whether dressed up with icing or enjoyed plain.
This recipe is all about simplicity with a professional touch—no fancy techniques, just a few key steps that ensure foolproof results every time. The dough comes together in minutes, and with just 10 minutes of baking at 350°F, you’ll have golden, tender cookies ready to decorate or enjoy as-is.
The texture is what sets these apart: crisp around the edges while staying soft inside, with just the right amount of chew.
What makes these cookies truly special is that classic Betty Crocker flavor—rich vanilla, a hint of warmth from the butter, and a touch of sweetness that’s never overpowering. The dough is forgiving enough for beginners but refined enough to satisfy even the most discerning bakers.
Whether you’re making them for a holiday gathering or a simple treat, they’re guaranteed to disappear fast.
Once you try these, you’ll want to make them regularly—trust me, I do. The best part? They freeze beautifully, so you can bake a batch ahead and pull them out whenever the craving hits. Let’s get started on creating cookies that taste like home.
Ingredients for betty crocker ethel’s sugar cookie
Classic ingredients for cookies that taste like nostalgia—soft centers, crisp edges, and pure vanilla goodness.
| Ingredient | Amount | Notes |
|---|---|---|
| Unsalted Butter 🧈 | ½ cup | Cold, cubed for texture |
| Granulated Sugar 🍚 | 1 cup | White sugar preferred |
| Packed Brown Sugar 🍚 | ½ cup | Light or dark works |
| Pure Vanilla Extract 🍯 | 2 tsp | High-quality, not imitation |
| Large Eggs 🥚 | 1 whole | Room temperature preferred |
| All-Purpose Flour 🌾 | 2 ½ cups | Sifted for light texture |
| Baking Soda 🧂 | ½ tsp | Freshly opened |
| Salt 🧂 | ½ tsp | Fine sea salt preferred |
| Ground Cinnamon 🌿 | ¼ tsp | Optional, for warmth |
| Powdered Sugar 🍚 | ¼ cup | For dusting, optional |
The butter matters here—cold cubes create those tender pockets of dough that give Ethel’s cookies their signature texture. Land O’Lakes unsalted or Plugrá work best, but any good-quality brand will do. If you’re in a pinch, European-style butter has more fat content for that perfect melt. The sugars? Domino or C&H are reliable, but if you’ve got organic cane sugar, use it—it adds subtle depth. Measure the brown sugar packed down, not scooped. And that vanilla? Reese or Nielsen-Massey are my go-tos, but any pure extract will work.
No vanilla extract? Vanilla bean paste at half the amount gives you those little specks of happiness. Short on brown sugar? White sugar plus 1 tsp molasses mimics the moisture. The cinnamon is optional, but if you skip it, add a pinch more vanilla for warmth. For the flour, King Arthur or Bob’s Red Mill are my favorites—they bake evenly. If you’re at high altitude, reduce the sugar by 2 tbsp and add 1 tbsp more flour. And trust me on the cold butter—don’t soften it, or you’ll end up with tough cookies.
These cookies keep for 5 days in an airtight container, but they’re best fresh. For freezing, shape the dough into balls, place on a tray, freeze solid, then transfer to a bag. 3 months in the freezer—just bake straight from frozen, adding 1-2 minutes. The dough itself? 2 days in the fridge, wrapped tightly. I always make extra dough and freeze half—nothing beats pulling out pre-shaped cookies for a last-minute treat.
Why You’ll Love This Recipe
- No Fuss Mixing: I swear by this dough—just cream butter, sugars, and vanilla until it’s light, then fold in eggs. No standing over a hot stove, no complicated steps. The butter and brown sugar combo gives it that melt-in-your-mouth texture without the fuss.
- Buttery Vanilla Bliss: That perfect balance of creamy butter and brown sugar? It’s like a hug in cookie form. The vanilla extract isn’t subtle—it’s rich, warm, and lingers with every bite. Honestly, I’ve tried store-bought sugar cookies, but these taste like they’re homemade by someone who actually cares.
- Holiday or Snack Attack: These cookies freeze like a dream, so I make a batch in December and pull them out all year. Too sweet for breakfast? Cut them into squares and serve with coffee—trust me, it works. They’re the kind of treat that fits any moment, from holiday gifts to a last-minute dessert.
- Leftovers That Last: A dozen cookies disappear fast, but the dough keeps for days in the fridge. Need to save money? Double the batch, freeze half, and thank me later. No waste, no stress—just pure, buttery satisfaction whenever you want it.
Step-by-step instructions for Ethel’s sugar cookies
Here’s how to make these legendary cookies with a perfect balance of soft centers and crisp edges.
Cream the Cold Butter and Sugars
In a large mixing bowl, combine the 0.5 cup unsalted butter (cold, cubed) with the 1 cup granulated sugar and 0.5 cup packed brown sugar. Using a hand mixer or stand mixer on medium speed, beat for 3-4 minutes until the mixture is light and fluffy. You’ll notice the butter pieces start to break down but still hold their shape—this is perfect for maintaining that classic sugar cookie texture.
Here’s the thing—using cold butter creates pockets of fat that melt during baking, creating those signature soft centers. If the butter starts to look too smooth or melts completely, your cookies will spread too much and lose their shape. Keep an eye on the temperature; if the mixture feels too warm, chill it for 10 minutes before proceeding.
Add Egg and Vanilla for Moisture
Reduce the mixer speed to low and add the 1 whole large egg and 2 tsp pure vanilla extract. Mix for 1 minute until fully combined. The mixture should look smooth and slightly thick, like a thick batter. This step ensures your cookies stay moist without being cakey—overmixing here will develop gluten and make them tough.
I always use room-temperature eggs for this recipe. They blend more easily and create a smoother dough. If your eggs are straight from the fridge, let them sit in warm water for 5 minutes before adding. The vanilla extract should be high-quality; imitation won’t give you that authentic Ethel’s flavor profile.
Combine Dry Ingredients for Structure
In a separate bowl, whisk together the 2.5 cups all-purpose flour, 0.5 tsp baking soda, 0.5 tsp salt, and 0.25 tsp ground cinnamon. Sift the flour first if possible—this prevents lumps and ensures an even texture. Gradually add the dry ingredients to the wet mixture, mixing on low speed just until combined. You’ll see small streaks of flour remaining, and that’s exactly what you want—overmixing develops gluten and makes cookies tough.
This is where the magic happens. The baking soda helps create lift, while the cinnamon adds warmth without overpowering the vanilla. If you’re sensitive to cinnamon, you can reduce it to 0.125 tsp, but the traditional amount gives that classic Ethel’s flavor. The dough should hold together when pressed but still be soft enough to shape easily.
Chill the Dough for Perfect Texture
Divide the dough into 4 equal portions (about 1 cup each) and flatten each into a 1-inch thick disk. Wrap each disk tightly in plastic wrap and refrigerate for at least 2 hours or up to 24 hours. Chilling is non-negotiable—it firms up the butter, prevents excessive spreading, and allows the flour to fully hydrate for that perfect texture.
I know it’s tempting to skip this step, but don’t. Cold dough means cookies that hold their shape beautifully in the oven. If you’re in a hurry, you can freeze the dough disks for 30 minutes before rolling—just let them sit at room temperature for 10 minutes before shaping to prevent cracking.
Roll and Cut for Classic Shapes
Preheat your oven to 375°F and line two baking sheets with parchment paper. On a lightly floured surface, roll out one dough disk to 1/8-inch thickness. Use cookie cutters to create your desired shapes—Ethel’s original recipe works beautifully with classic rounds, stars, or trees. Transfer the cutouts to the prepared baking sheets, spacing them 2 inches apart for even baking.
For that signature Ethel’s look, I like to brush the tops with a little egg wash (1 egg yolk beaten with 1 tablespoon milk) before baking. This creates a beautiful golden finish. Bake for 8-10 minutes until the edges are light golden brown but the centers still look slightly soft. They’ll firm up as they cool.
Cool and Dust for Finishing Touches
Remove the cookies from the oven and let them cool on the baking sheets for 5 minutes before transferring to a wire rack. While still warm, dust the tops generously with the 0.25 cup powdered sugar for that classic Ethel’s finish. The powdered sugar should melt slightly from the residual heat, creating a beautiful, snowy appearance.
Let the cookies cool completely before storing. They’ll keep in an airtight container at room temperature for up to 5 days, though I promise they won’t last that long. The perfect balance of soft centers and crisp edges makes these cookies irresistible—ideal for holiday gatherings or anytime you want a taste of nostalgia.
Pro Tips For Making Betty Crocker Ethel’S Sugar Cookie
- Cream Butter Slowly: Dump cold butter straight into the mix? Don’t. Cut it into small cubes first, then let it sit at room temp for 10-15 minutes before creaming. I learned this the hard way—overworking cold butter makes cookies dense, and skipping this step turns your dough into a greasy mess that spreads like crazy.
- Measure Brown Sugar Right: Pack that brown sugar like you’re stuffing a Thanksgiving turkey—no air gaps. Use a spoon to press it firmly into the measuring cup, then level it off. I used to eyeball it, and my cookies always ended up either too dry or too sticky. This recipe relies on that moisture, so don’t skimp.
- Chill Dough Twice: The recipe says to chill once, but trust me—do it twice. After mixing, pop the dough in the fridge for 2 hours minimum, then shape the cookies and refrigerate them again for 30 minutes. Skipping this? Your cookies will crack when baking, and the edges won’t hold their shape.
- Rotate Cookie Trays: Your oven’s hot spots are real, and this recipe’s cookies need even baking. Swap the top and bottom racks halfway through the bake time. I used to ignore this, and half my batch would come out pale while the other half turned into hockey pucks. Rotate, and you’ll get consistent, perfect cookies every time.
Troubleshooting this dish
Dough Too Sticky
If your dough feels too sticky to handle, it’s likely because the flour needs more time to hydrate or the butter warmed up too quickly. I’ve found that adding 1-2 tablespoons more flour, 1 tablespoon at a time, usually fixes this.
Work it in gently—don’t overmix—or the cookies will turn out tough. If the dough still feels too soft, chill it for an extra 30 minutes to firm up the butter. 🧈
Cookies Spread Too Much
Over-spreading is usually a sign the butter melted too soon or the dough wasn’t chilled enough. Always use cold butter and stick to the 2-hour chilling time (or longer if your kitchen is warm).
For extra insurance, shape the dough into balls and freeze them for 15 minutes before rolling. This prevents the butter from softening too quickly in the oven.
Cookies Too Hard or Dry
Dry cookies often mean the butter was too warm or the dough was overmixed. Next time, measure your butter straight from the fridge and use Land O’Lakes unsalted or Plugrá for better fat content.
If the dough seems too stiff, add 1 teaspoon milk or water to bring it together. For baking, pull them out when the edges are just starting to golden—they’ll firm up as they cool.
Edges Burn Before Centers Cook
This happens when the oven runs hot or the cookies are too close together. Always preheat your oven for 15-20 minutes and use an oven thermometer to confirm it’s at 375°F.
Space cookies 2 inches apart on the baking sheet and rotate the pans halfway through baking. If your oven runs hot, reduce the temperature to 350°F and bake for 11-12 minutes instead.
Dough Cracks When Rolling
Cracking usually means the dough was too warm or overworked. Let the dough rest for 10-15 minutes at room temperature before rolling, and avoid over-flouring the surface. If the dough feels too stiff, soften it slightly with ½ teaspoon milk or melted butter.
Work quickly but gently—don’t press too hard with the rolling pin, or you’ll force air bubbles to burst.
Cookies Taste Bland
If your cookies lack flavor, it’s likely the vanilla or cinnamon wasn’t strong enough. Always use pure vanilla extract (like Reese or Nielsen-Massey) and measure it accurately. For extra depth, add ½ teaspoon almond extract along with the vanilla.
A pinch of ground cardamom (just ¼ teaspoon) also enhances the warmth without overpowering the vanilla. 💫
Nutrition facts
Frequently asked questions
Why do these sugar cookies have soft centers but crisp edges?
The secret lies in the cold butter and proper chilling. Using cold cubed butter creates pockets that melt during baking, while the 2-hour chilling prevents excessive spreading. Baking at 375°F for 8-10 minutes gives just enough time for the edges to crisp while keeping the centers tender.
Can I substitute brown sugar with white sugar?
You can, but it will change the texture slightly. Brown sugar adds moisture and chew, while white sugar creates crispness. For the closest match, replace the 0.5 cup brown sugar with white sugar plus 1 teaspoon molasses to mimic the moisture. If you skip it entirely, your cookies may be slightly drier.
How do I prevent my cookies from spreading too much?
Always use cold butter and chill the dough for the full 2 hours. Shape dough balls and freeze them for 15 minutes before rolling if your kitchen is warm. Avoid overmixing the dough, and bake at 375°F for 8-10 minutes—don’t overbake!
Can I make these cookies ahead of time?
The dough keeps for 2 days in the fridge, wrapped tightly. For best results, freeze shaped dough balls for up to 3 months—bake straight from frozen, adding 1-2 minutes. Store baked cookies in an airtight container for 5 days, though they’re best fresh.
What’s the best way to decorate these cookies?
Start with the classic: dust warm cookies with powdered sugar for a snowy finish. For more flair, use royal icing (3 parts powdered sugar + 1 part meringue powder + 1 tsp water) or melted chocolate. Let decorations set for 1 hour before serving.

- Mary Berry’s Boiled Fruit Cake Recipe: Moist Center and Spiced Crust Magic - November 5, 2026
- Atlantic Salmon Recipe: Honey-Dill Pan-Seared With Crispy Skin - November 5, 2026
- Blaze Pizza Copycat Dough Recipe: Chewy, Airy Crust That Mimics the Original - November 5, 2026