
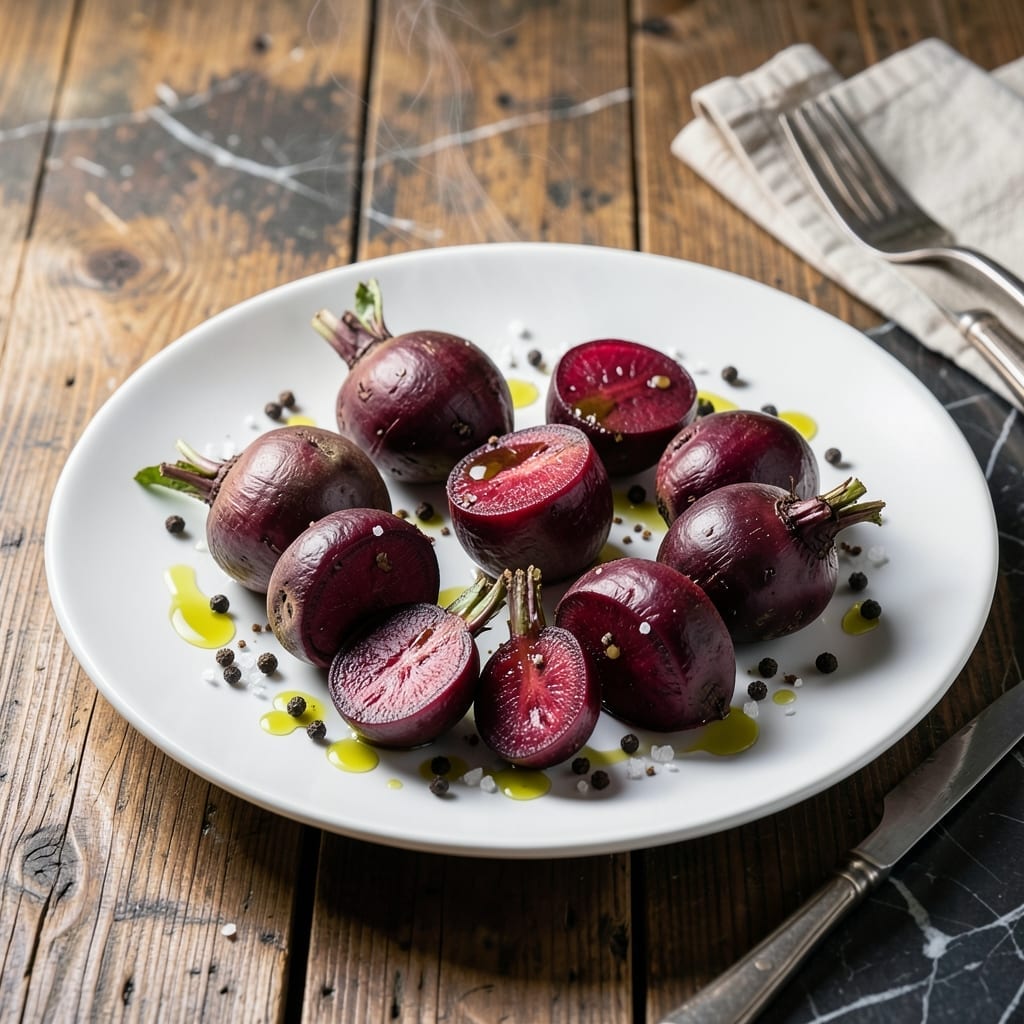
This simple method delivers perfectly tender beets with minimal effort. The key is starting them in cold water and simmering until fork-tender.
Boiling preserves their natural sweetness and vibrant color better than roasting. I prefer medium beets for even cooking, but any size works with adjusted time.
Once cooked, the beets can be peeled and used in salads, sides, or as a base for other dishes. Their earthy flavor pairs well with both sweet and savory ingredients.
With just 30 minutes of active time, you’ll have a versatile ingredient ready for countless preparations. This technique works for both red and golden beets.
Ingredients for Boiled Beets
Simple ingredients transform humble beets into vibrant, tender perfection with ease.
| Ingredient | Amount | Notes |
|---|---|---|
| Medium Beets 🍠 | 2 lb | Red or golden variety, unpeeled |
| Cold Water 💧 | 8 cups | Enough to cover beets completely |
| White Vinegar 🍶 | ¼ cup | Preserves vibrant color |
| Kosher Salt 🧂 | 1 tbsp | Diamond Crystal preferred |
| Black Peppercorns 🌶️ | 1 tsp | Optional for serving |
| Extra-Virgin Olive Oil 🫒 | 2 tbsp | For finishing, high quality |
| Fresh Lemon Juice 🍋 | 1 tbsp | Brightens earthy flavor |
| Fresh Dill 🌿 | ¼ cup | Chopped, for garnish |
| Garlic Cloves 🧄 | 2 cloves | Minced, optional for serving |
| Apple Cider Vinegar 🍎 | 1 tsp | Alternative to white vinegar |
The beets are the star—medium-sized red or golden work best for even cooking. Whole Foods or your local farmers market will have the freshest selection. Look for firm beets with smooth skin and deep, consistent color. Avoid any with soft spots or excessive greens attached (they pull moisture from the roots). Rinse before cooking but don’t peel until after—the skin protects the flesh.
No white vinegar? Apple cider vinegar works just as well (use the same amount). The vinegar isn’t just for flavor—it locks in the color so your beets stay vibrant, not dull. For serving, fresh herbs like parsley or mint can replace dill if that’s what you have. The olive oil is optional but recommended—California Olive Ranch makes a great affordable option.
Boiled beets keep 5-7 days in the fridge, peeled or unpeeled. Store in an airtight container with a splash of their cooking liquid to maintain moisture. They freeze beautifully for up to 10 months—peel and slice before freezing for easiest use later.
Why You’ll Love This Recipe
- Hands-Off Cooking: I just toss the beets in water with vinegar and spices, then let them do their thing—no stirring, no fuss.
- Bright and Earthy: The vinegar cuts through the beets’ sweetness, while the peppercorns add a subtle warmth that’s honestly addictive.
- Meal Prep Hero: I boil a big batch on Sunday and use them in salads, sides, or even blended into dips all week long.
- Pennies per Serving: A pound of beets costs less than a coffee, and this method stretches them into multiple meals without extra effort.
Step-by-Step Instructions for Boiled Beets
This straightforward method ensures perfectly tender beets with vibrant color and earthy depth.
Step 1: Prepare the Beets and Boiling Liquid
Place the 2 lb medium beets in a large pot, leaving them unpeeled to preserve their color and nutrients. Add the 8 cups cold water, ensuring the liquid covers the beets completely by at least 1 inch. This prevents uneven cooking and guarantees consistent tenderness.
Stir in the 0.25 cup white vinegar and 1 tbsp kosher salt. The vinegar helps maintain the beets’ vivid hue, while the salt enhances their natural sweetness. Bring the mixture to a boil over high heat, then immediately reduce to a gentle simmer to prevent the beets from bursting.
Step 2: Simmer Until Tender
Cover the pot partially with a lid to allow steam to escape while maintaining a steady simmer. Cook the beets for 25-30 minutes, depending on their size. You’ll know they’re done when a knife or fork slides into the largest beet with minimal resistance.
Avoid overcooking, as this can make the beets mushy and dull their color. The beets should retain a slight firmness when pierced, ensuring they hold their shape when sliced or served whole.
Step 3: Shock in Cold Water and Peel
Once tender, drain the beets and immediately transfer them to a bowl of ice water to halt the cooking process. This step, called shocking, locks in their vibrant color and makes peeling effortless. Let them cool for 5-10 minutes until comfortable to handle.
Using your fingers or a paring knife, gently rub the skins off under running water. The skins should slip off easily, revealing the beets’ rich, jewel-toned flesh beneath. Pat them dry with a clean towel before proceeding.
Step 4: Finish and Serve
Slice or quarter the peeled beets and transfer them to a serving dish. Drizzle with the 2 tbsp extra-virgin olive oil and 1 tbsp fresh lemon juice, which brighten the earthy flavor and add a touch of acidity. Sprinkle with the 0.25 cup fresh dill for a fresh, herbaceous note.
For added depth, season with freshly cracked 1 tsp black peppercorns or minced 2 cloves garlic cloves. If you prefer a slightly tangier profile, substitute the white vinegar with 1 tsp apple cider vinegar in the boiling water. Serve warm or at room temperature for the best texture and flavor.
Pro Tips For Making Boiled Beets
- Start in Cold Water: I learned this the hard way—always begin with beets fully submerged in cold water, not hot, to ensure even cooking and prevent tough skins.
- Keep Skins On: Sounds weird, but it works: boiling beets whole with skins intact locks in color and flavor, and they peel easier after cooking.
- Add Vinegar Late: Skip adding white vinegar at the start—wait until the last 10 minutes to preserve the beets’ natural sweetness while still getting that tangy brightness.
- Test with a Knife: After 30-40 minutes, pierce the largest beet with a knife—if it slides in smooth as butter, they’re done, no matter the size.
Common Mistakes When Making This Recipe
Overcooking the Beets
One of the most common mistakes is boiling beets beyond their perfect tenderness. Once they reach the 25-30 minute mark, test doneness with a fork. If it slides in easily, they’re ready. Overcooking leads to mushy texture and dull color loss.
Starting with Hot Water
Always begin with cold water covering the beets. Starting hot can cause uneven cooking, with the outer layers turning soft while the center remains firm. Cold water ensures gradual, even heat penetration.
Skipping the Vinegar
Omitting the 0.25 cup white vinegar is a mistake I see often. This small addition preserves the vibrant color and balances the earthy sweetness. Without it, beets can turn a lackluster brown. 💡
Peeling Before Cooking
Peeling raw beets is messy and unnecessary. The skin protects the flesh during cooking and makes peeling after boiling effortless. Just rinse them well before adding to the pot.
Using Small Beets
While small beets cook faster, they can become waterlogged and lose their structure. I recommend sticking to medium beets (about 2-3 inches in diameter) for even cooking and better texture.
Ignoring the Shock
After boiling, transfer beets to ice water for 5-10 minutes. This stops the cooking process, locks in color, and makes peeling a breeze. Skipping this step often results in overcooked, dull beets.
Nutrition Facts
Frequently Asked Questions
Why start with cold water?
Cold water ensures even cooking throughout each beet. Starting hot can leave the center undercooked while the outer layers turn mushy. This method guarantees consistent tenderness every time.
Can I use baby beets?
You can, but they may become waterlogged. For best results, stick with medium beets about 2-3 inches wide. These hold their shape and texture better during boiling.
How do I know when they’re done?
Test with a fork after 25-30 minutes. It should slide in with minimal resistance. Overcooking makes them mushy and dulls their vibrant color.
What if I don’t have white vinegar?
Apple cider vinegar works perfectly as a substitute. Use the same amount to preserve color and balance the earthy flavor.

- BBQ Sausage Recipe Oven: Smoky Depth Without the Grill - September 28, 2026
- BBQ Chicken Bowl Recipe Rice: Smoky Sweetness Over Fluffy Grains - September 28, 2026
- Beef Cutlet Recipe Ideas: Crispy Breaded Patties With Bold Seasonings - September 28, 2026