
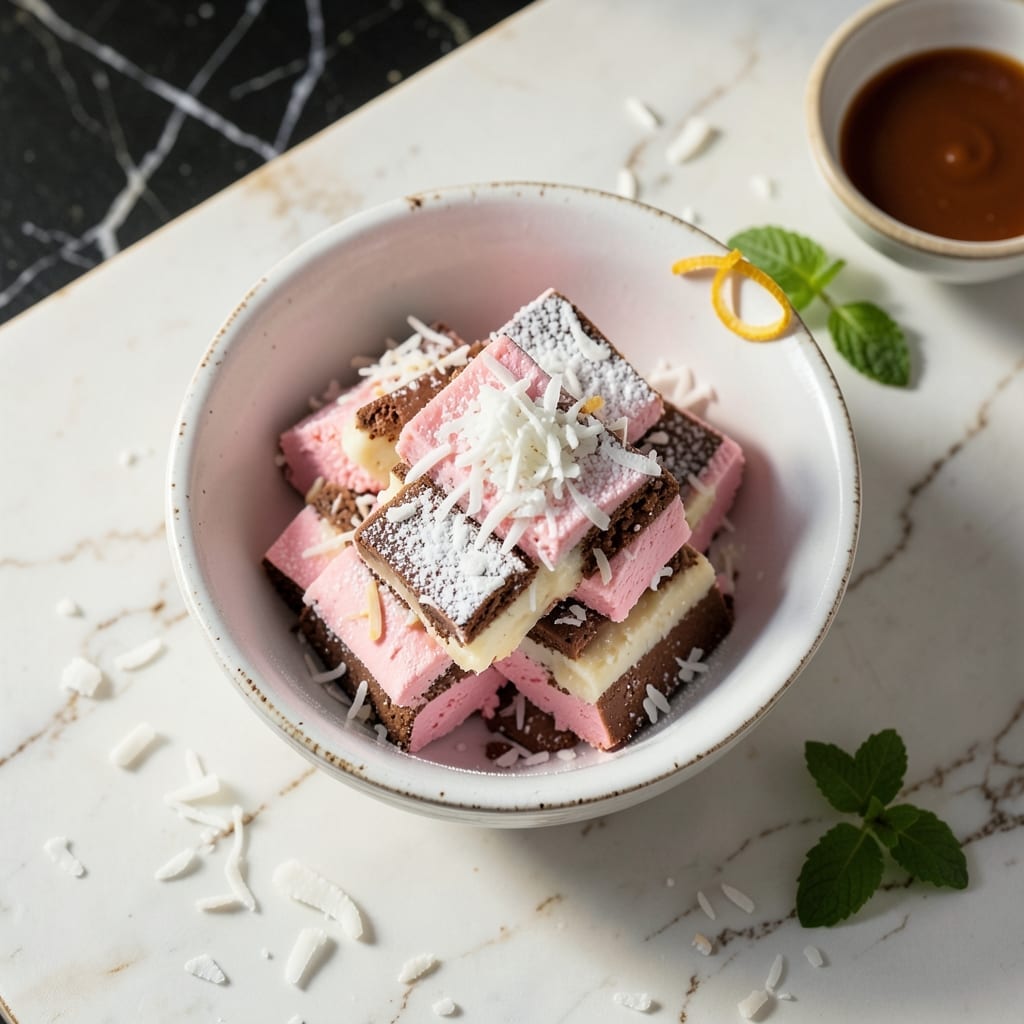
There’s something timeless about recreating classic candies at home, and this layered confection brings together three beloved flavors in one bite. The combination of coconut, chocolate, and vanilla creates a nostalgic treat that’s surprisingly simple to make.
Each layer builds upon the next, starting with a sweet coconut base that’s both chewy and tender. The middle vanilla layer adds a creamy contrast, while the chocolate topping provides the perfect rich finish that ties everything together.
What makes this recipe special is its ability to deliver that vintage candy shop experience with just a few basic ingredients and straightforward techniques. The layers set up firmly yet melt beautifully in your mouth.
The result is a batch of bite-sized candies that taste just like the originals, with that signature three-flavor harmony in every piece. These are perfect for sharing or savoring slowly.
Ingredients for Brach’s Neapolitan Coconut Candy
Ten ingredients transform into nostalgic three-layered candies with coconut, vanilla, and chocolate harmony.
| Ingredient | Amount | Notes |
|---|---|---|
| Shredded Coconut 🥥 | 3 cups | Sweetened, fine or medium shred |
| Sweetened Condensed Milk 🥛 | 1 can | 14 oz can, full-fat |
| Vanilla Extract 🌿 | 2 tsp | Pure, not imitation |
| Powdered Sugar 🧂 | 2 cups | Sifted for smoothness |
| Unsalted Butter 🧈 | ½ cup | Softened to room temperature |
| Heavy Cream 🥛 | ¼ cup | Whole milk works in pinch |
| Semi-Sweet Chocolate Chips 🍫 | 2 cups | High-quality for melting |
| Vanilla Wafer Crumbs 🍪 | 1 ½ cups | Finely crushed, about 30 wafers |
| Granulated Sugar 🧂 | ½ cup | Fine white sugar |
| Salt 🧂 | ¼ tsp | Fine table salt |
| Vanilla Bean Paste 🌿 | 1 tsp | Optional, for enhanced flavor |
The coconut base demands high-quality sweetened shredded coconut—Baker’s Angel Flake or Let’s Do Organic brands deliver the right texture. Avoid unsweetened varieties as they won’t provide the necessary sweetness. For the condensed milk, Eagle Brand is the gold standard (the can with the blue label). The vanilla wafer crumbs are non-negotiable for that authentic Brach’s texture—Nilla Wafers are the obvious choice.
No condensed milk? Simmer 2 cups milk with 1.5 cups sugar until reduced by half for a homemade version. For the chocolate layer, Ghirardelli or Guittard chips melt beautifully. The butter must be unsalted to control the sodium content—Land O’Lakes or Plugra are reliable. Vanilla bean paste can be skipped, but if you have it, use Heilala or Nielsen-Massey for superior flavor depth.
These candies set up best when stored in an airtight container at room temperature for 24 hours before serving. They’ll keep for 1 week in a cool, dry place or 1 month refrigerated. For longer storage, freeze layers separately between parchment paper for up to 3 months.
Why You’ll Love This Recipe
- Five Ingredients: I just dump shredded coconut, sweetened condensed milk, vanilla, powdered sugar, and butter in a bowl—no fancy steps.
- Chewy Sweet Heaven: That first bite of buttery coconut with the creamy condensed milk? Ridiculously good.
- Holiday Lifesaver: I make a double batch for cookie swaps—everyone thinks I slaved for hours.
- Stays Fresh for Days: Honestly, these keep in an airtight container for over a week, and they taste just as good on day five.
Step-by-Step Instructions for Brach’s Neapolitan Coconut Candy
Master the layering process with precision and patience for authentic results.
Step 1: Prepare the Coconut Filling Base
In a large mixing bowl, combine the 3 cups Shredded Coconut, 1 can Sweetened Condensed Milk, 2 tsp Vanilla Extract, 1 tsp Vanilla Bean Paste, and 0.25 tsp Salt. Stir thoroughly until the mixture becomes uniformly moist and clumps together when pressed.
The condensed milk will bind the coconut flakes, creating a dough-like consistency that holds its shape. Ensure no dry pockets remain—this guarantees even flavor distribution throughout the filling. Let the mixture rest for 5 minutes to allow the coconut to fully absorb the liquid.
Step 2: Shape and Chill the Coconut Layer
Line an 8×8-inch baking pan with parchment paper, leaving an overhang for easy removal. Press the coconut mixture evenly into the pan, using the back of a spoon or offset spatula to create a smooth, compact layer. Apply firm pressure to eliminate air gaps, which could cause uneven texture after chilling.
Refrigerate the coconut layer for 1 hour or until completely firm to the touch. This chilling step is critical—it allows the filling to set properly so it can be cleanly cut into squares later. Resist the urge to rush this process; under-chilled coconut will crumble when sliced.
Step 3: Create the Vanilla Wafer Middle Layer
In a medium bowl, blend the 1.5 cups Vanilla Wafer Crumbs, 0.5 cup Granulated Sugar, and 0.5 cup Unsalted Butter (softened) until the mixture resembles wet sand. The butter should fully coat the crumbs, creating a pressable dough that holds together when squeezed.
Once the coconut layer is firm, spread the wafer mixture evenly over it, pressing gently to adhere without disturbing the coconut base. Return the pan to the refrigerator and chill for another 30 minutes to set this middle layer before adding the chocolate topping.
Step 4: Melt and Spread the Chocolate Topping
In a microwave-safe bowl, combine the 2 cups Semi-Sweet Chocolate Chips and 0.25 cup Heavy Cream. Heat in 30-second intervals, stirring between each, until the chocolate is fully melted and smooth. This gentle method prevents scorching and ensures a glossy finish.
Pour the melted chocolate over the chilled wafer layer and spread evenly with an offset spatula. The heat from the chocolate will slightly soften the layers beneath, so work quickly. Return the pan to the refrigerator and chill for 2 hours or until the chocolate is completely set and firm.
Step 5: Slice and Serve
Remove the pan from the refrigerator and lift the entire set candy out using the parchment paper overhang. Place on a cutting board and use a sharp knife to cut into 1-inch squares. For clean cuts, dip the knife in hot water and wipe it dry between each slice.
Store the finished candies in an airtight container in the refrigerator for up to 1 week. For best texture, allow them to sit at room temperature for 10 minutes before serving to soften slightly. The layers should be distinct yet cohesive, with the coconut providing a chewy base, the wafer layer offering crumbly texture, and the chocolate delivering a smooth finish.
Pro Tips For Making Brach’S Neapolitan Coconut Candy
- Toast the Coconut First: Spread the shredded coconut on a baking sheet and toast at 350°F for 5-7 minutes until golden—I learned this the hard way after my first batch tasted raw and bland.
- Warm the Condensed Milk: Microwave the sweetened condensed milk for 20-30 seconds before mixing; it blends smoother with the butter and prevents grainy texture in the final candy.
- Chill Before Shaping: Let the mixture set in the fridge for at least 30 minutes before rolling into balls—skipping this step turns your candy into a sticky mess that won’t hold its shape.
- Use Room Temp Butter: Take the unsalted butter out 1 hour before starting; it creams better with the powdered sugar and avoids the greasy separation I used to get with cold butter.
Essential Equipment for brachs neapolitan coconut candy
Baking Pan
An 8×8-inch baking pan with straight sides is essential for achieving uniform layers. I recommend USA Pan or Wilton brands for their even heat distribution and non-stick coating. Avoid glass pans as they can cause uneven chilling.
Parchment Paper
Use pre-cut parchment sheets or roll your own to fit the pan exactly. Reynolds Kitchens brand has the perfect non-stick surface. Leave a 2-inch overhang on all sides for easy removal of the set candy layers.
Mixing Bowls
A set of nested stainless steel bowls in various sizes helps with each layer preparation. I prefer Cuisinox for their durability and weight. You’ll need at least 1 large and 1 medium bowl for this recipe. 🥥
Offset Spatula
An offset spatula is indispensable for spreading each layer evenly. The 9-inch Ateco model gives perfect control. The offset design helps you reach into pan corners without disturbing previous layers.
Microwave-Safe Bowls
For melting chocolate, use a heatproof glass bowl like Pyrex. A 2-cup capacity works perfectly. The glass allows you to monitor the melting process and prevents hot spots that can burn the chocolate.
Sharp Knife
A long, thin-bladed knife is crucial for clean cuts. I use a Wüsthof 8-inch chef’s knife. Dip it in hot water and wipe dry between cuts to prevent sticking and ensure those perfect candy squares. ✨
Nutrition Facts
Frequently Asked Questions
Can I use unsweetened coconut?
No, the recipe requires sweetened shredded coconut to achieve the proper flavor and texture. Unsweetened will make the layer too dry. Stick with brands like Baker’s Angel Flake for best results.
Why do my layers separate when cutting?
This usually happens if layers aren’t chilled long enough between additions. Ensure each layer sets for the full time: 1 hour for coconut, 30 minutes for wafer, and 2 hours for chocolate.
How do I get clean cuts?
Use a hot, dry knife between each slice. Dip a sharp knife in hot water, wipe dry, then cut. Repeat for each slice to prevent sticking and ensure those perfect candy squares.
Can I make these ahead of time?
Yes! They’ll keep in an airtight container at room temperature for 1 week or refrigerated for 1 month. For longer storage, freeze layers separately between parchment for up to 3 months.

- BBQ Sausage Recipe Oven: Smoky Depth Without the Grill - September 28, 2026
- BBQ Chicken Bowl Recipe Rice: Smoky Sweetness Over Fluffy Grains - September 28, 2026
- Beef Cutlet Recipe Ideas: Crispy Breaded Patties With Bold Seasonings - September 28, 2026